LazyMat
You'll need to have your nutexb files created beforehand, you might want to look at jam's img2nutexb to batch convert images.
You also need to have MatLab somewhere on your machine. Grab it here.
You'll also want StudioSB to be able to assign materials to your meshes after you're done.
Click on the Import Textures button on the right-hand side. It'll prompt you to select a folder for where your nutexb textures are. VERY IMPORTANT: the program assumes that anything with the suffix _col is to be treated as its own material when importing. You'll need to manually add normal and prm textures to their appropriate column, which isn't too hard. To easily import your textures, make sure at least one of your desired materials has a texture ending with _col.nutexb
Once you select the folder, it will populate your spreadsheet with textures, and material names based on the texture name
If you have a preferred list of shaders to use, it's easy to add them to the program. It's similar to CrossMod, but you'll need to use syntax compatible with MatLab.
Inside Shaders\Default.xml, you'll find
<material name="SFX_PBS_00000000000c8100_#render#" label="#material#">
...
<param name="Texture5">
      <string>
        <Text>#texture#</Text>
      </string>
    </param>
notice #render#,#material#,#texture#. These correspond to columns in the excel sheet. These 3 correspond to the RenderPass (ie opaque, sort, etc), the name for your material (ie coolMaterial), and the texture you'll use (ie coolMaterial_col). You can also include #normal# and #prm#, or anything else that corresponds to a header past the "E" column (if you need an Emi variable, you'll need a column called "emi" and to add #emi# to your XML file)
After you've created the XML files for your shader prefabs, go into Excel and select ImportShaders. It should populate the A column with your shader prefabs!
Now you can assign shaders to your materials. If left blank, the program will give the Default shader to that material. It will also assign "opaque" to the render pass if that column is blank. There are also default values for Normal, PRM, Specular, GAO, and Baked if the shader requires one of those textures, but the cell is not filled out.
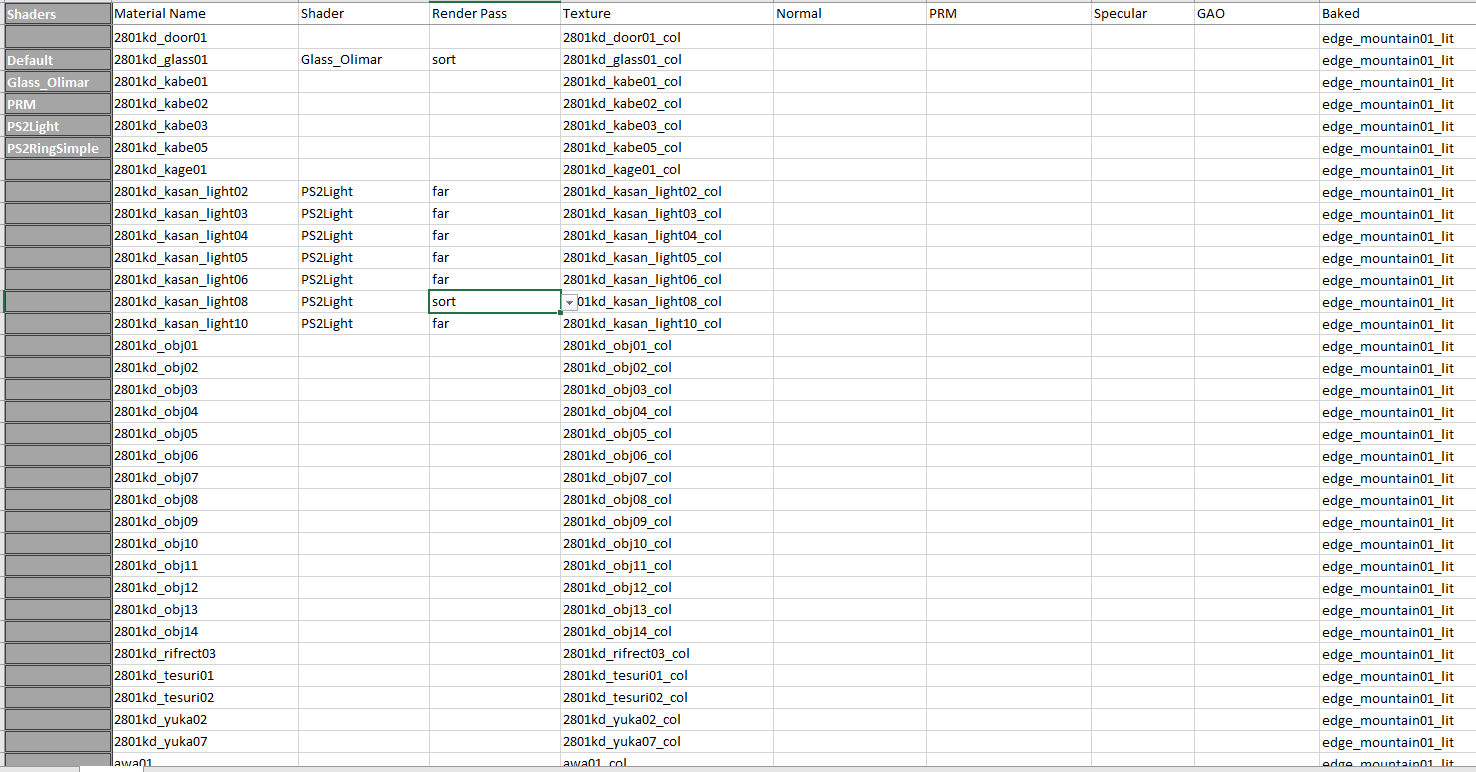
Here's what one of my worksheets looks like. For the lights, I wanted to use a different texture that properly supports transparency, so I gave them a unique shader and render pass. Let's go ahead and create a numatb!
Click on Publish, and within seconds (hopefully) it will create an XML sheet in the worksheet's folder. It will then say that it will create the numatb file using MatLab. If this is your first time running the program, it will ask you to select the MatLab.exe file on your machine. Select that file, and it will create a model.numatb in your worksheet's location. This does use a powershell command, so try not to have any spaces in your directory for this to work. If a numatb isn't created, don't worry you can use the XML file with matlab as well. Now place that numatb file and you now have a list of materials to assign to your meshes! Hopefully, this makes the most mundane part of creating and assigning materials 50% less mundane.