Installation and development
¿Que es la ST-LIB? es una libreria de utilidades para el microcontrolador STM32H7ZGT6 que simplifica y facilita su uso. Esta compuesta por varias partes, algunas de bajo nivel y otras de alto nivel. Estas partes son la HALAL (Hardware Abstaction Layer Abstraction Layer), la ST-LIB LOW y la ST-LIB en si misma.
La HALAL es una capa por encima de la HAL oficial de ST para facilitar el uso de la misma. Además se encarga de de inciar todos los perifericos del micro y otras configuraciones.
La ST-LIB LOW es una capa por encima de HALAL que utiliza los servicios que esta implementa para crear por ejemplo sensores, actuadores, etc. De esta forma abstraemos las complejidades intrinsicas de estos perifericos para que puedan se usados de forma simple.
La ST-LIB en si misma es una capa por encima de la ST-LIB LOW. La ST-LIB utiliza las clases implementadas por la capa anterior para crear las placas en su conjunto, integrando todos los periferico.
Como puedes observar se trata de un proyecto complejo con varias capas, algunas dependientes del hardware en si mismo y otras totalmente independientes de esto. Por tanto necesitaras configurar varias herramientas y aprender algunas cosas antes de poder emepzar a desarrolar. A continuación se van a listar y explicar brevemente la mayoria de estas.
El sistema operativo es la base de todo ordenador, nuestra herramienta principal. Aunque no es obligatorio tener ningun sistema operativo concreto se recomienda usar un sistema basado en linux, en concreto una distribución de Ubuntu estable.
Este sistema operativo a parte de ser más rápido y óptimo para el desarrollo de codigo en general viene con varias herramientas preinstaladas y se adapta mejor a nuestras necesidades.
Si ya eres usuario de un sistema linux o prefieres seguir usando windows por ahora puedes saltarte este paso.
Si eres usuario de windows lo más recomendable es intalar Ubuntu en dual boot con windows. Esto es un proceso realmente simple para el que no necesitas saber nada previamente.
Para instalar Ubuntu puedes descargar la ISO desde el siguiente enlace enlace. Se recomienda encarecidamente descargar una version estable con soporte a largo plazo etiquetadas en la pagina con el acronimo LTS.
Una vez descargada la imagen del sistema operativo necesitaras flashear un usb con el espacio suficente con algun programa como Balena Etchet que puedes descargar desde el siguiente enlace disponible tanto para windows como para linux. Ten en cuenta que el usb se formateara al subir la imagen del sistema operativo.
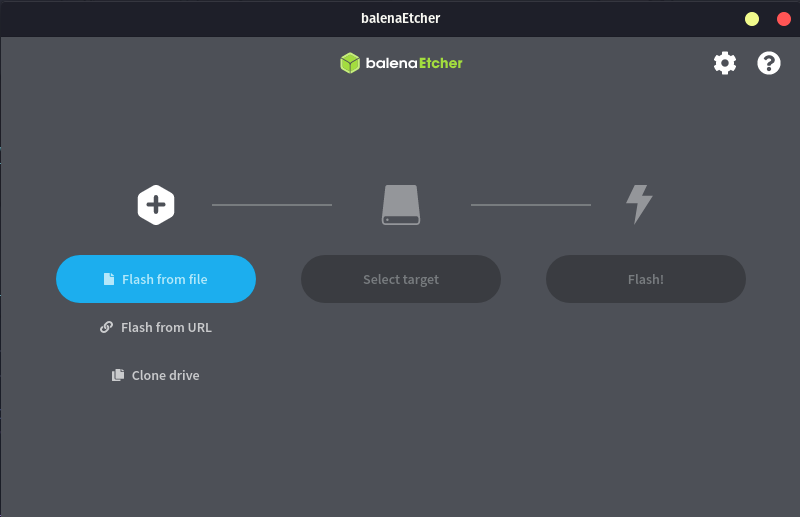
El programa tiene una interfaz realmente sencilla, tan solo tendremos que seguir los pasos. Seleccionamos la imagen del sistema operativo que acabamos de descargar. Seguidamente elegiremos con cuidado el usb en el que queremos flashear la imagen. Le daremos a empezar, esperamos a que termine y listo.
Una vez todo preparado deberas seguir los siguiente pasos:
- Apaga tu ordenador
- Conecta el usb al ordenador
- Enciende tu ordenador manteniendo simultanemaente la tecla para elegir medio de boot, en mi caso F10 aunque depende de cada ordenador. Las teclas comunes son ESC, F2, F10, F11, F12.
- Seleccionaremos la opcion en la que aparezca Ubuntu.
- Una vez dentro de ubuntu iremos rellenando toda la información que nos pida.
- Cuando llegues a las particiones del disco te saldra automaticamente todo preconfigurado para ser instalado en dual boot.
- Termina la instalación
- Apaga el ordenador
- Desconecta el USB
- Listo ya tienes Ubuntu instalado en paralelo a Windows. Ahora cada vez que enciendas el ordenador podrás elegir que sistema operativo quieres (esto se puede configurar).
Si tienes algún problema en algún paso del proceso cualquier miembro del equipo de firmware estara encantado de ayudarte no dudes en pregutar.
In order to start developing first you must install the necessary tools. The tools you need are the following:
- Git
- STM32CubeIDE
- STM32CubeProgrammer
- Visual Studio
- Github
- Trello
As a version control tool we use git. This tool is widely used and you probably already know how it works. If this is not the case, it is recommended to learn the basic operation through a tutorial.
Git can be downloaded through the following link.
As the main code development IDE at a lower level, such as HALAL, we use STM32CubeIDE, which is the official IDE provided by ST to facilitate the programming of its microcontrollers.
We use the following version:
Version: 1.10.1
Build: 12716_20220707_0928 (UTC)
It is important to have the same version to avoid compatibility problems. If it were updated to a later version, all developers would be notified.
We can download this tool from the next link. Once we are on the page we will choose the indicated version. The page will ask you to enter your email and will send you the download link to it.
STM32CubeProgrammer is a very useful tool that allows us to program the microcontrolers without having to use the STM32CubeIDE and allows us to observe and manipulate the microcontroller's memory.
Can be downloaded from the next link. The steps to follow are the same as in the previous tool.
Visual Studio is the IDE we use for the development of the higher level code of the library. This tool is widely known and relatively easy to use.
Can be downloaded from the next link. If you are a UPV student, you can use the Microsoft account provided by the university to obtain the professional version, although the free version is more than enough.
As online repository for git we use github. If you are reading this you don't need more information ;).
Trello is an online tool, which can be downloaded as an application, which allows us to keep track of the tasks that are being carried out.
You can access through the following link. Once inside the page you just have to register and request access to the team trello.
Before starting to develop, it is important that you know what our methodology is when using git and github. There are three important aspects of using our repository. The first and most important is our organization of the branches and operation of the pull requests, other important aspects are the issues and the wiki of the repo. These three aspects will be explained below.
We follow a relatively standard gitflow. The main branch represents the current stable release, from this branch the development branch, which represents the current stable development version, is divided into two more branches (at least for now) which are HALAL and STLIB_LOW. These two branches represent the current state of development.
These are the main branches of the repository. These branches are protected and can only be merged through pull request and these must be accepted by at least two developers other than the one that has developed the code to be merged. In this way we make sure that the code to be uploaded is high quality code.
All new features that you want to implement must start from either the HALAL branch or the STLIB_LOW branch. The branches should represent specific characteristics and be small or medium in size. If a task is complex and requires a lot of code, it should be divided into several branches. These branches must follow the following naming convention: features/<feture-name> for example features/Flash.
gitGraph
        checkout main
        commit id: "1 Initial commit"
        commit id: "2 New branch"
        branch development
        commit id: "3 New branch"

        branch HALAL
        commit id: "4 New branch"

        checkout HALAL
        branch features/Flash
        checkout features/Flash
        commit id: "6 Read flash finished"
        commit id: "8 Write and tests"

        checkout HALAL
        merge features/Flash
        checkout development
        merge HALAL
        checkout main
        merge development
Once we finish developing the feature in the corresponding branch we must make a pull request to be able to upload this code to the corresponding main branch, for example if you were doing the flash memory service as in the previous example you would make a pull request that does the next merge features/Flash -> HALAL.
Pull requests must follow a standard structure to facilitate their interpretation. They may contain the following points:
- Explanation of the feature
- Examples of use
- Tests that have passed
- Notes and/or warnings
At least a pull request must contain points 1 and 3. Depending on the complexity of the feature it will be highly recommended to add usage examples. As an example of a minimum pull request (explanation and tests) it can be seen in the following link (the documentation and error handler section in this pull request would count as part of the explanation).
There are two types of pull requests, normal pull requests and draft pull requests. The first ones, as soon as they are published, they will be pending to be reviewed and approved. The second ones are interesting because they are useful for when the branch is still under development or has yet to pass the tests but you want other developers to be able to review it to receive feedback without it being accepted until you indicate it. The type of pull request can be chosen by clicking on the arrow next to the option to create the pull request.
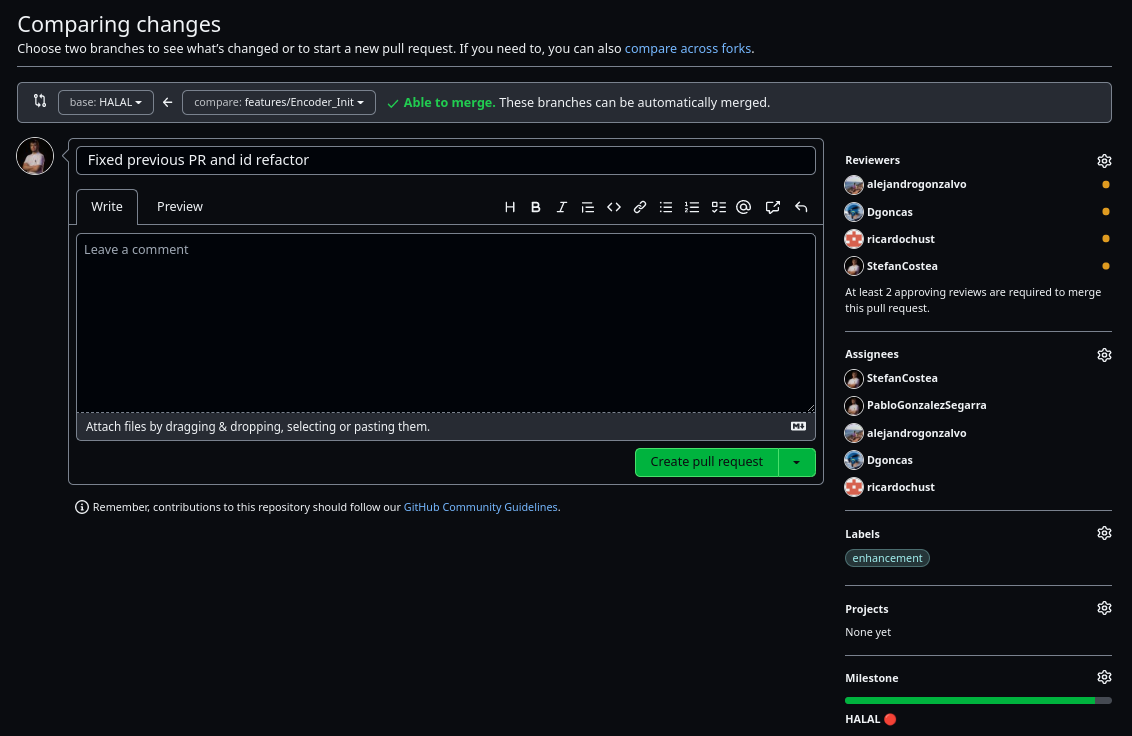
Before creating the pull request it is also important to add as reviewers and assignees all the developers so that the Slack bot notifies them. You must also add the corresponding labels and milestones.
Once your pull request has been accepted you will be able to merge. Finally, if it is not a very important feature, it is recommended to delete the branch.
| ❗ Do not upload your local config files ❗ |
When uploading your code to the repository it is important that you keep in mind a few things. The first and most important is that you should avoid uploading the local configuration files of the project. That is, you should not upload the contents of .cproject among others.
Before you start developing, use this commands to tell git that you don't want to update the standard configuration files:
git update-index --skip-worktree .\.cproject
git update-index --skip-worktree .\.settings\
git update-index --skip-worktree .\.settings\language.settings.xml
It may also be necesary to ignore other files, in this case it is as simple as using the same command but specifying the path to the folder or file that you want to ignore.
If you want to undo this, just do:
git update-index --no-skip-worktree .\.cproject
git update-index --no-skip-worktree .\.settings\
git update-index --no-skip-worktree .\.settings\language.settings.xml
If you are using Linux, remember to change the \ for /.
Issues are an important aspect of development, they allow us to keep track of problems that are found in the library. Anyone who is using our library can open an issue to notify either a problem or a feature that is missing and would like it to be there.
The issues do not have a defined structure but should have a short but descriptive title and in the body of the issue should be explained in as much detail as possible.
It is also important to assign developers and add the corresponding tags. An example of an issue can be seen in the following link
The wiki is becoming more and more important as it serves as a user guide and to document the library. One of the objectives of H8 is to document all the work to be able to transmit all the acquired knowledge and this github option gives us the possibility to do it in a structured way. This allows the access to the information to be comfortable, easy and fast.
Therefore you should learn how to use this tool provided by github. The wiki is made up of pages. Even the footer and the sidebar are pages, and like all pages they can be modified.
Pages are written and structured using markdown which is a simple markup language that allows you to format text using plain text. Knowing the basics of markdown is key to be able to write wiki pages, so it is recommended to follow the official github guide (or any other) which can be accessed through the following link to be able to write the best possible wiki pages.
Apart from formatting the markdown text it also allows you to create graphics like the git branches diagram you have seen above or add code with syntax hightlight among many other things.
El trello es un aspecto importante a la hora de desarrollar la ST-LIB. Esta herramienta nos permite mantenernos organizados y mantener un registro de las tareas que hemos, estamos o vamos a realizar.
