| slug | setting-up-android-push-notifications | |||||||||||||||||||||||||||||||||||||||||||||||||||||||||||||||||||||||||||||||||
|---|---|---|---|---|---|---|---|---|---|---|---|---|---|---|---|---|---|---|---|---|---|---|---|---|---|---|---|---|---|---|---|---|---|---|---|---|---|---|---|---|---|---|---|---|---|---|---|---|---|---|---|---|---|---|---|---|---|---|---|---|---|---|---|---|---|---|---|---|---|---|---|---|---|---|---|---|---|---|---|---|---|---|
| feature | push-notifications | |||||||||||||||||||||||||||||||||||||||||||||||||||||||||||||||||||||||||||||||||
| archetype | feature | |||||||||||||||||||||||||||||||||||||||||||||||||||||||||||||||||||||||||||||||||
| sdk_min_version | 3.7.0 | |||||||||||||||||||||||||||||||||||||||||||||||||||||||||||||||||||||||||||||||||
| sdk_artifact | iterableapi | |||||||||||||||||||||||||||||||||||||||||||||||||||||||||||||||||||||||||||||||||
| title | Setting up Android Push Notifications | |||||||||||||||||||||||||||||||||||||||||||||||||||||||||||||||||||||||||||||||||
| source_url | https://support.iterable.com/hc/articles/115000331943 | |||||||||||||||||||||||||||||||||||||||||||||||||||||||||||||||||||||||||||||||||
| source_repo | Iterable/iterable-docs | |||||||||||||||||||||||||||||||||||||||||||||||||||||||||||||||||||||||||||||||||
| source_path | docs/developer-and-api-docs/push-notifications/setting-up-android-push-notifications/index.md | |||||||||||||||||||||||||||||||||||||||||||||||||||||||||||||||||||||||||||||||||
| source_ref | 16ae7f4a908f84d6eb15fe6f5390f07cc5afe20d | |||||||||||||||||||||||||||||||||||||||||||||||||||||||||||||||||||||||||||||||||
| source_sha | 45fa32087746810e08046766184fd4c2eb1acc94 | |||||||||||||||||||||||||||||||||||||||||||||||||||||||||||||||||||||||||||||||||
| fetched_at | 2026-05-25 15:11:43 UTC | |||||||||||||||||||||||||||||||||||||||||||||||||||||||||||||||||||||||||||||||||
| polished_at | 2026-06-05 13:59:18 UTC | |||||||||||||||||||||||||||||||||||||||||||||||||||||||||||||||||||||||||||||||||
| layer | a | |||||||||||||||||||||||||||||||||||||||||||||||||||||||||||||||||||||||||||||||||
| snippets |
|
|||||||||||||||||||||||||||||||||||||||||||||||||||||||||||||||||||||||||||||||||
| summary | This guide describes the technical setup necessary to use Iterable to send push notifications to Android devices. |
This guide describes the technical setup necessary to use Iterable to send push notifications to Android devices.
Tip
For details about push notifications on Android, read Google's Notifications Overview document.
Follow the steps below to configure Iterable to send Android push notifications:
To send Android push notifications, Iterable uses Firebase Cloud Messaging (FCM). To learn how to set up Firebase for your Android app, read Google's Add Firebase to your Android project document.
In your Iterable projects, you can define mobile apps that correspond to your real-world mobile apps. Each mobile app in Iterable stores details about an app's name, identifier, platform, and store URL.
To create a mobile app in Iterable:
-
Navigate to Settings > Apps and Websites.
-
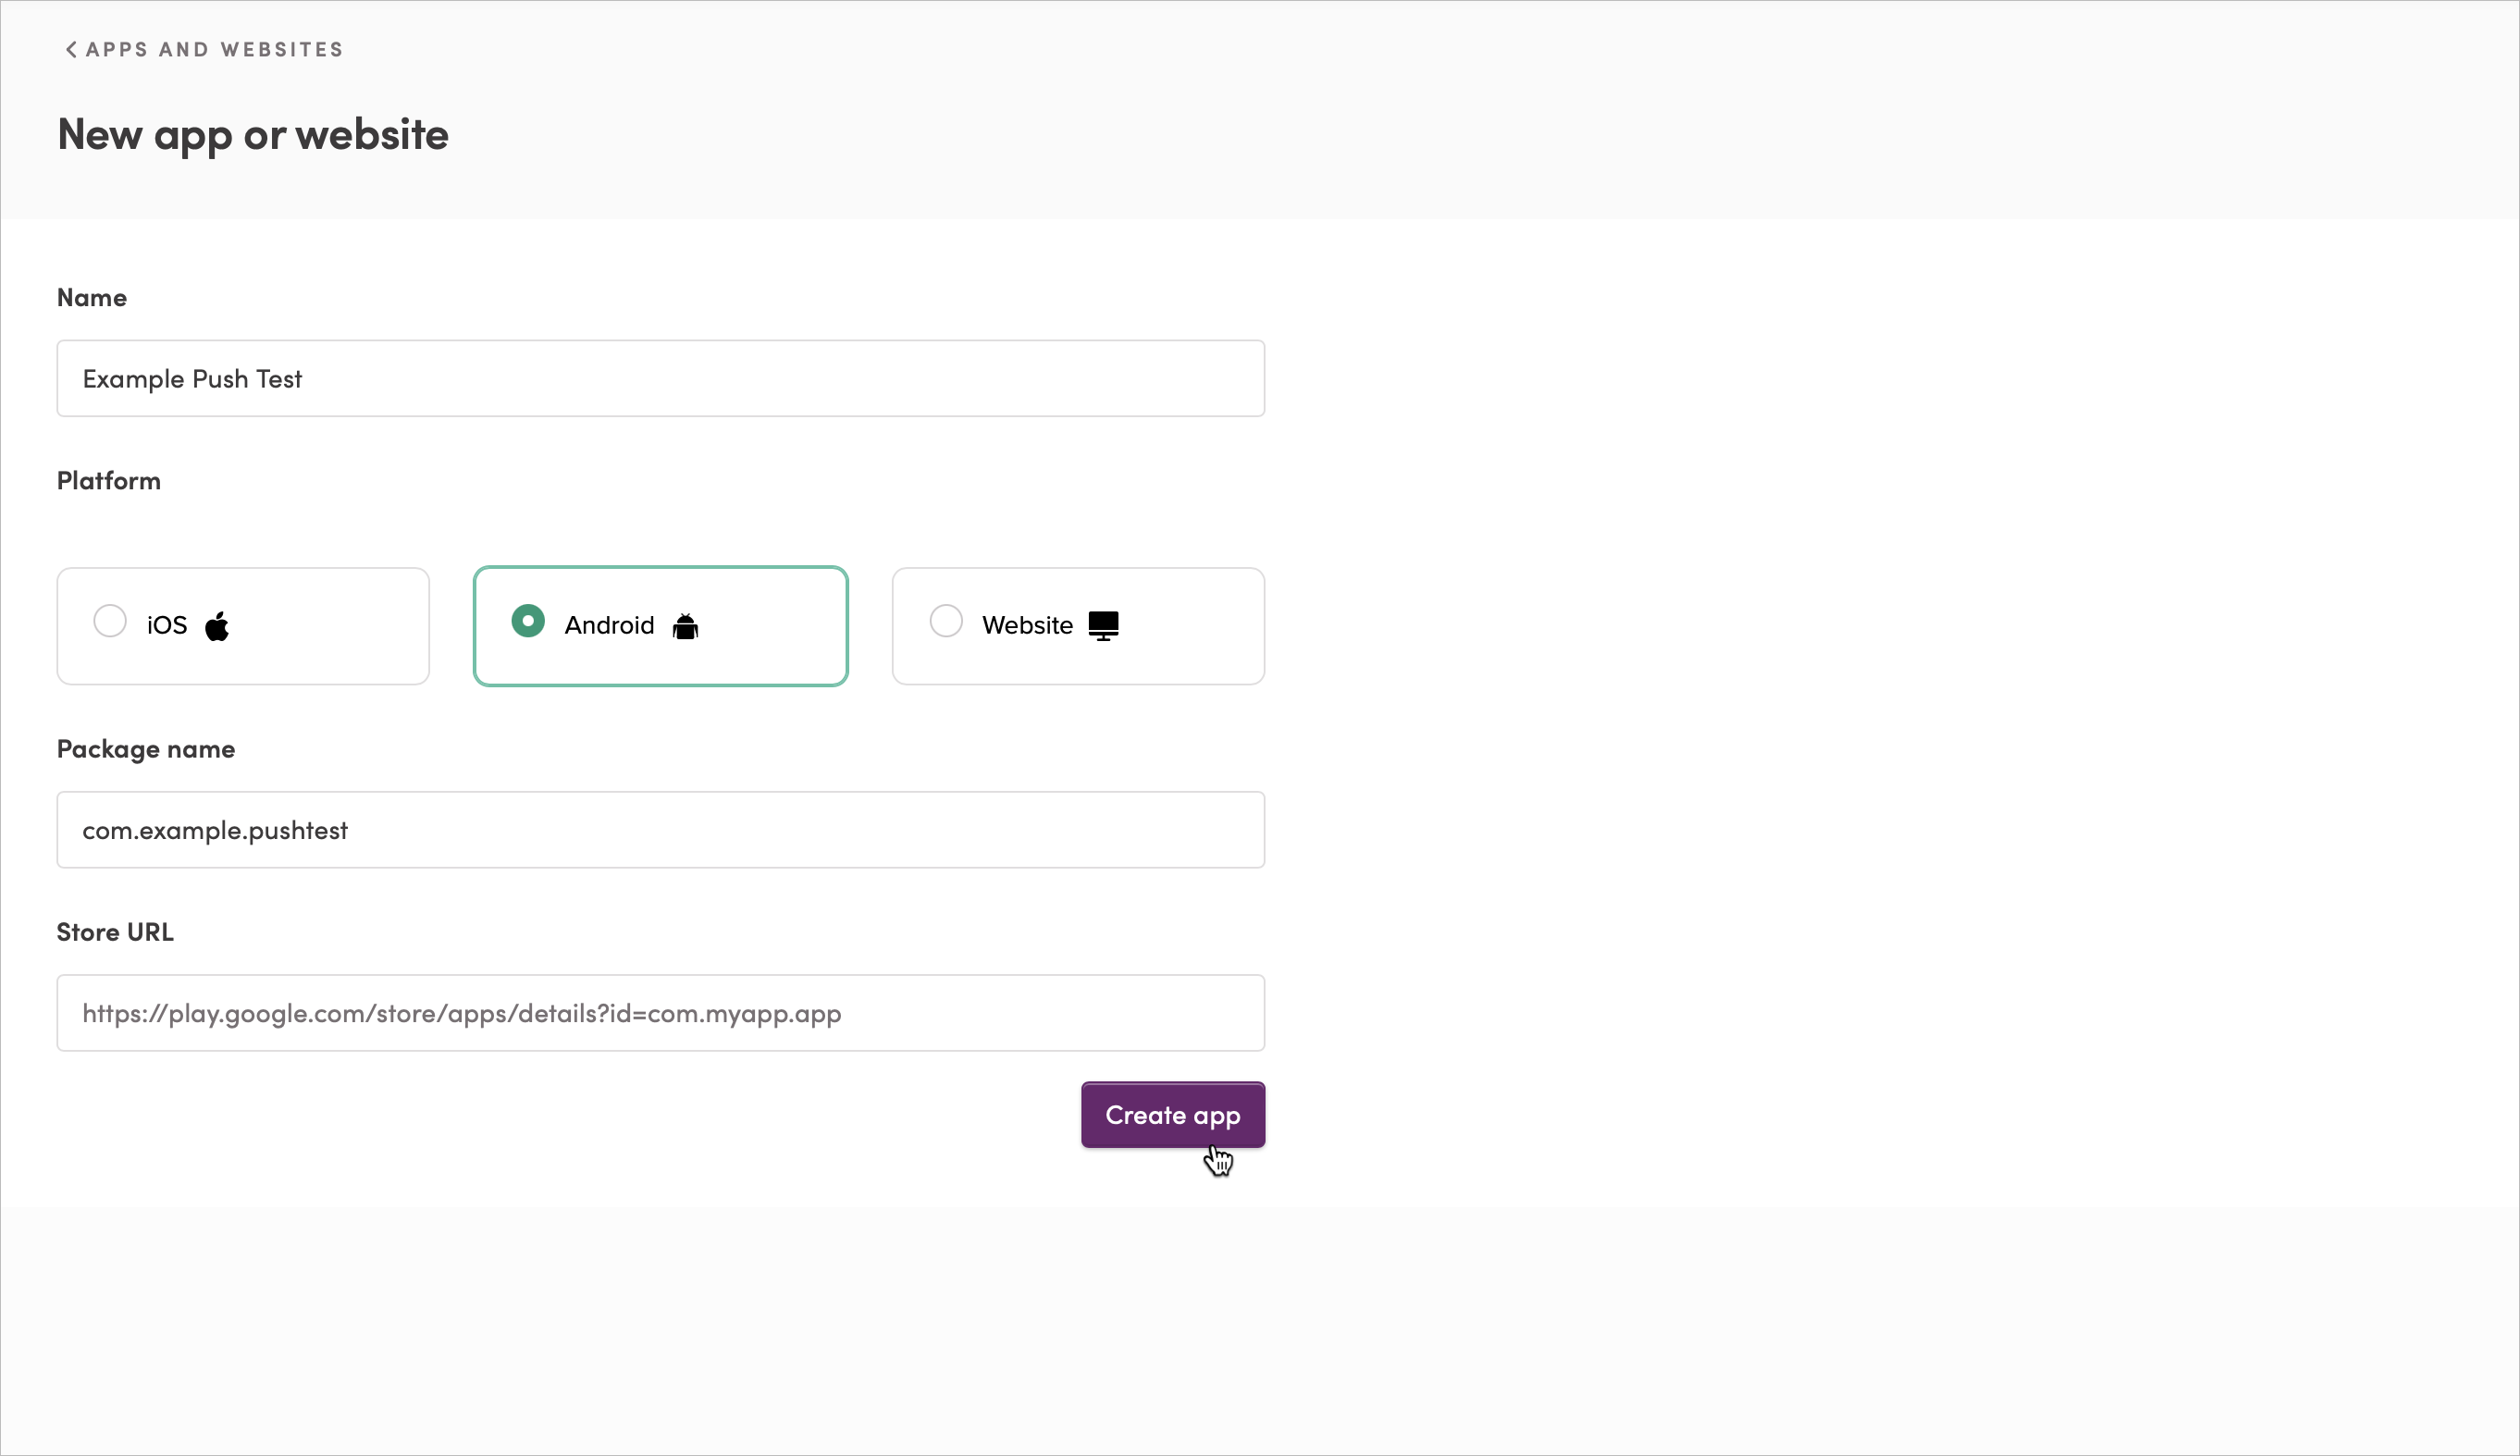
Click New app or website. This brings up the New app or website page:
-
For Name, enter the name of your app. For example,
Example Push Test. -
For Platform, select Android.
-
For Package name, enter your app's package name. For example,
com.example.pushtest. -
(Optional) For Store URL, enter your app's Play Store URL.
-
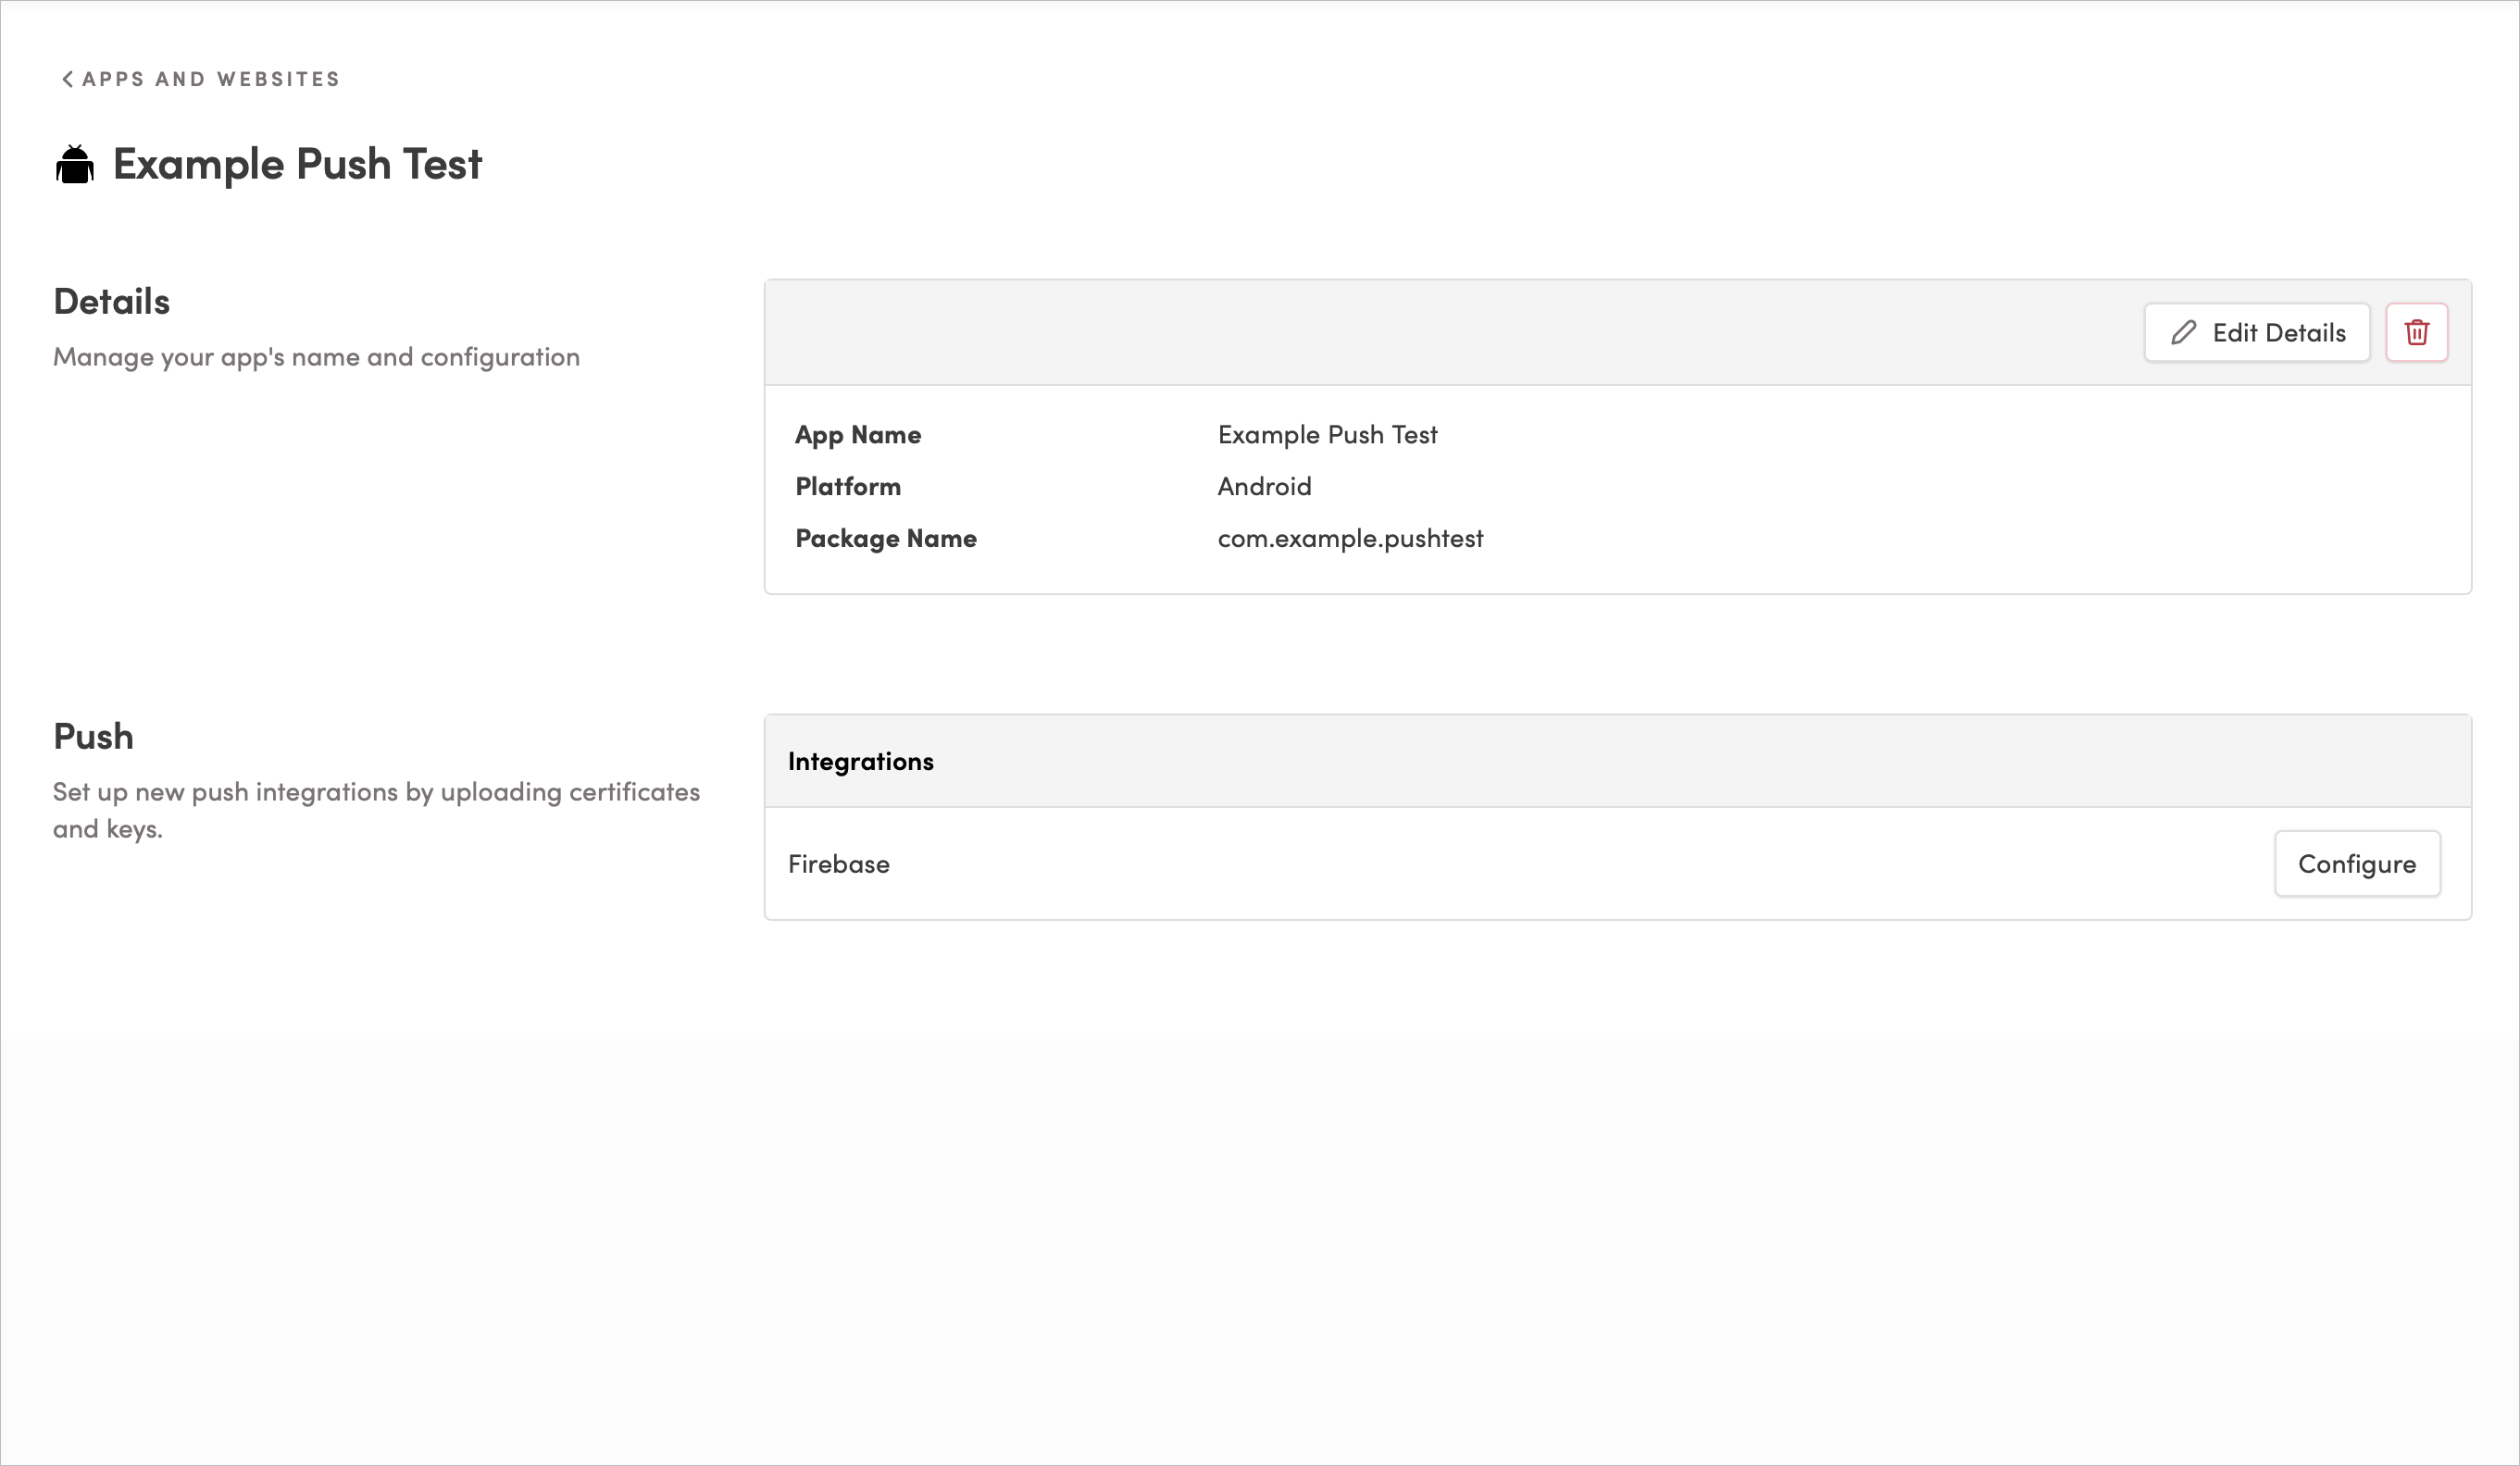
Click Create app. You'll be taken to the app's details page:
A push integration stores the credentials Iterable uses to authenticate with FCM when sending push notifications. Push integrations are stored in the mobile apps you create in your Iterable project.
To create a push integration:
- Create a service account in Firebase.
- Create a JSON private key that Iterable can use to authenticate with Firebase.
- Configure the push integration in Iterable.
- Send a test push notification.
Warning
Firebase Cloud Messaging (FCM) has deprecated their legacy HTTP APIs and replaced them with the FCM HTTP v1 API. If you have any existing push integrations that use legacy FCM HTTP API credentials, you'll need to update them. For more information, read Migrating to the FCM HTTP v1 API for Push Notifications.
First, create a service account in Firebase and give it the necessary permissions to send push notifications on your behalf.
Tip
Read Google's Create service accounts document for more information.
To create and configure a service account:
-
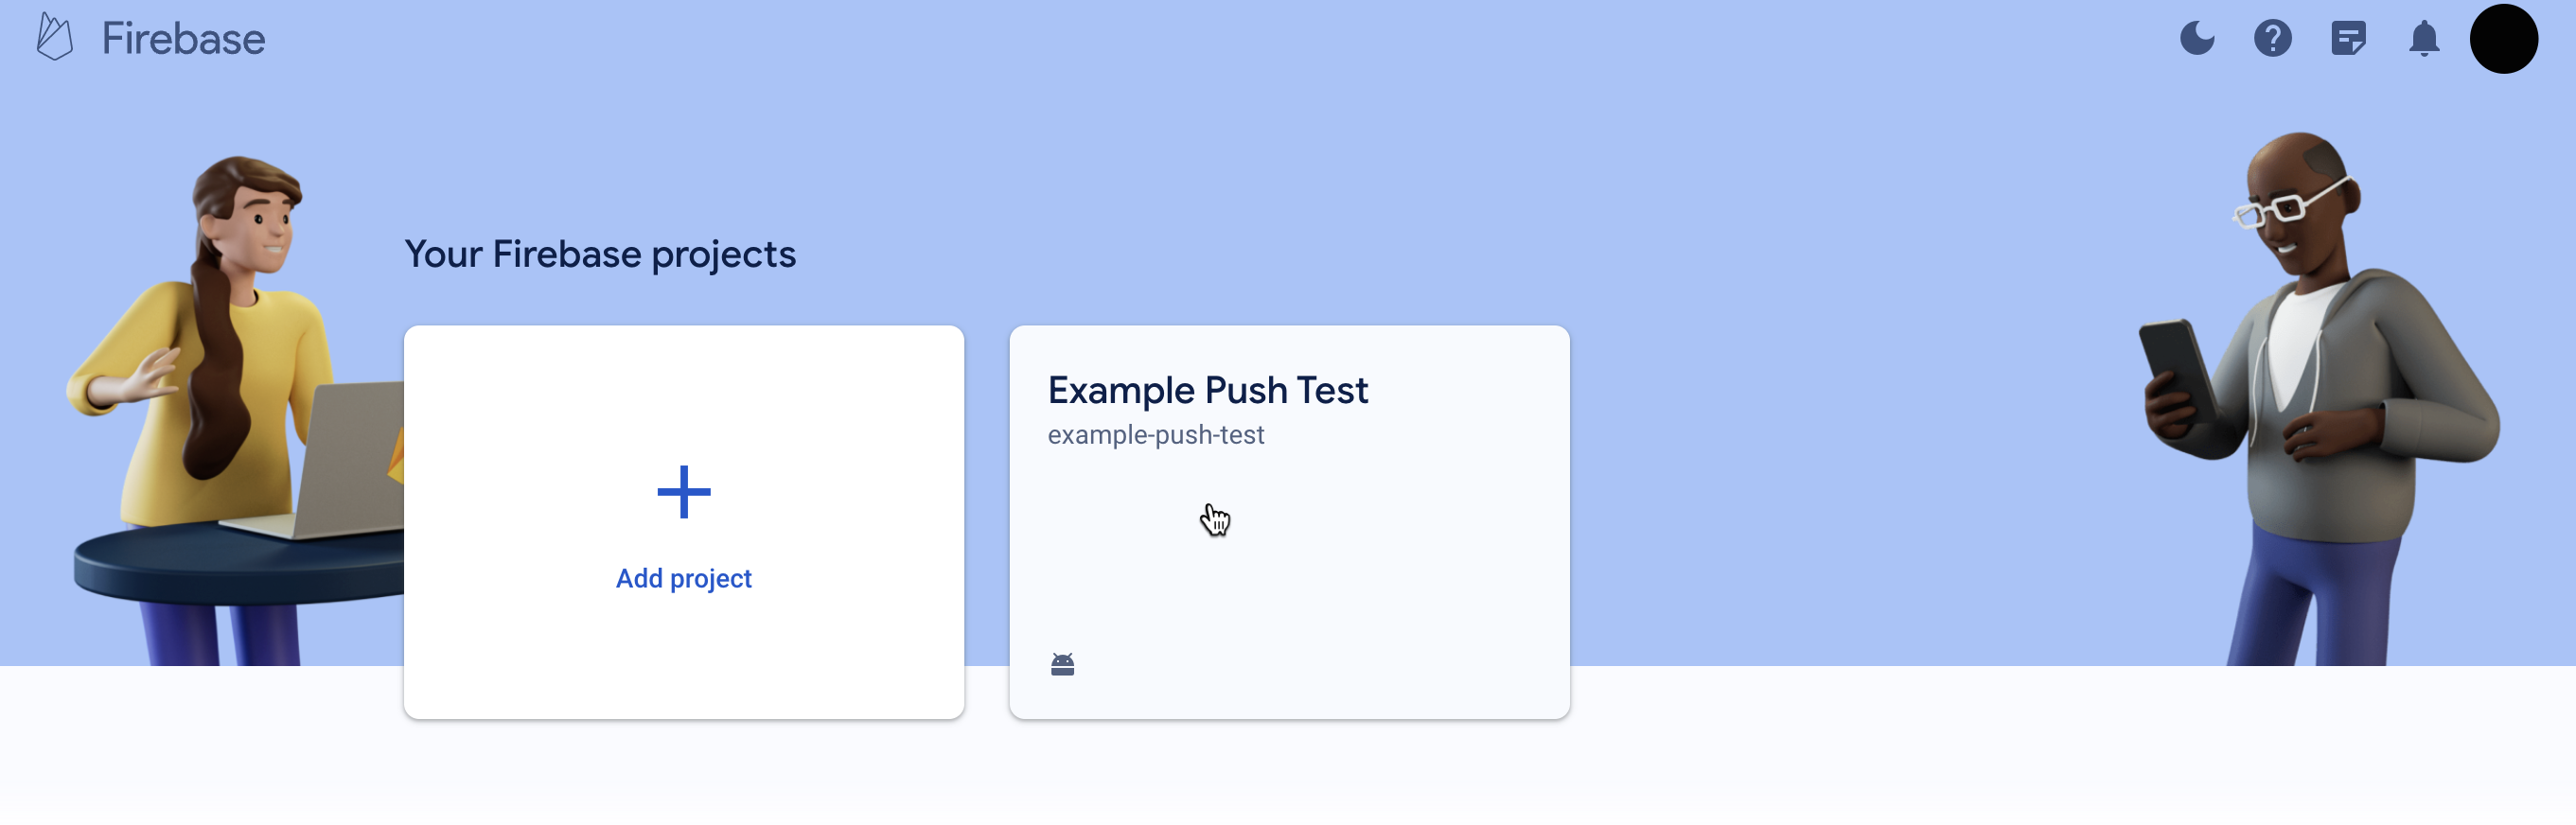
Sign in your Firebase account. Open the Firebase project that contains the app to which you'll send push notifications.
-
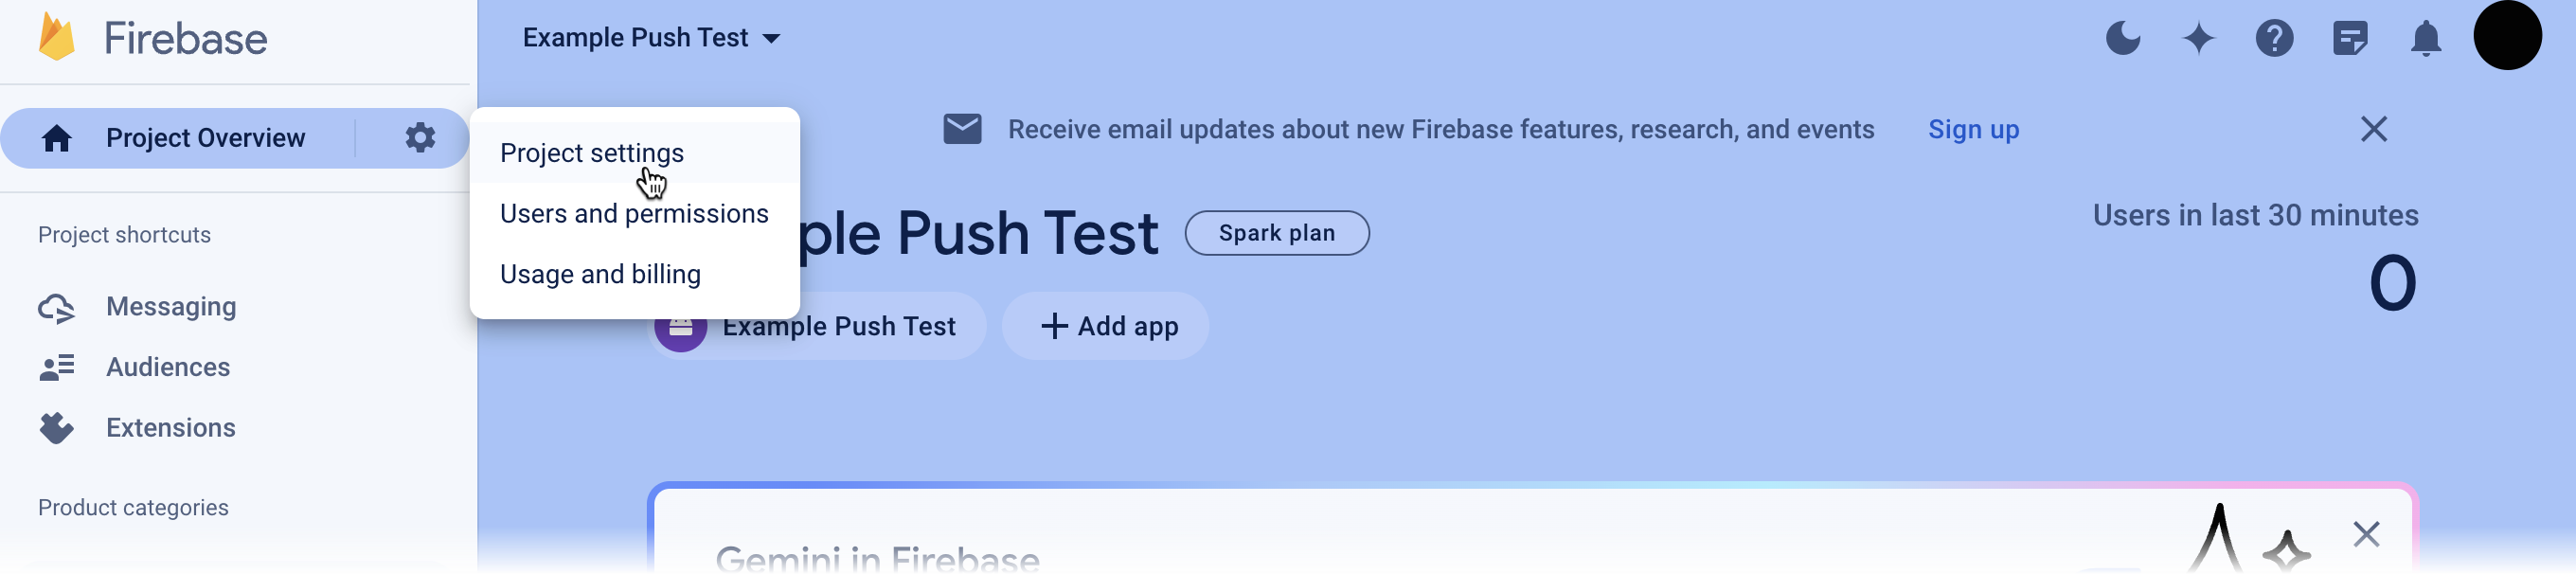
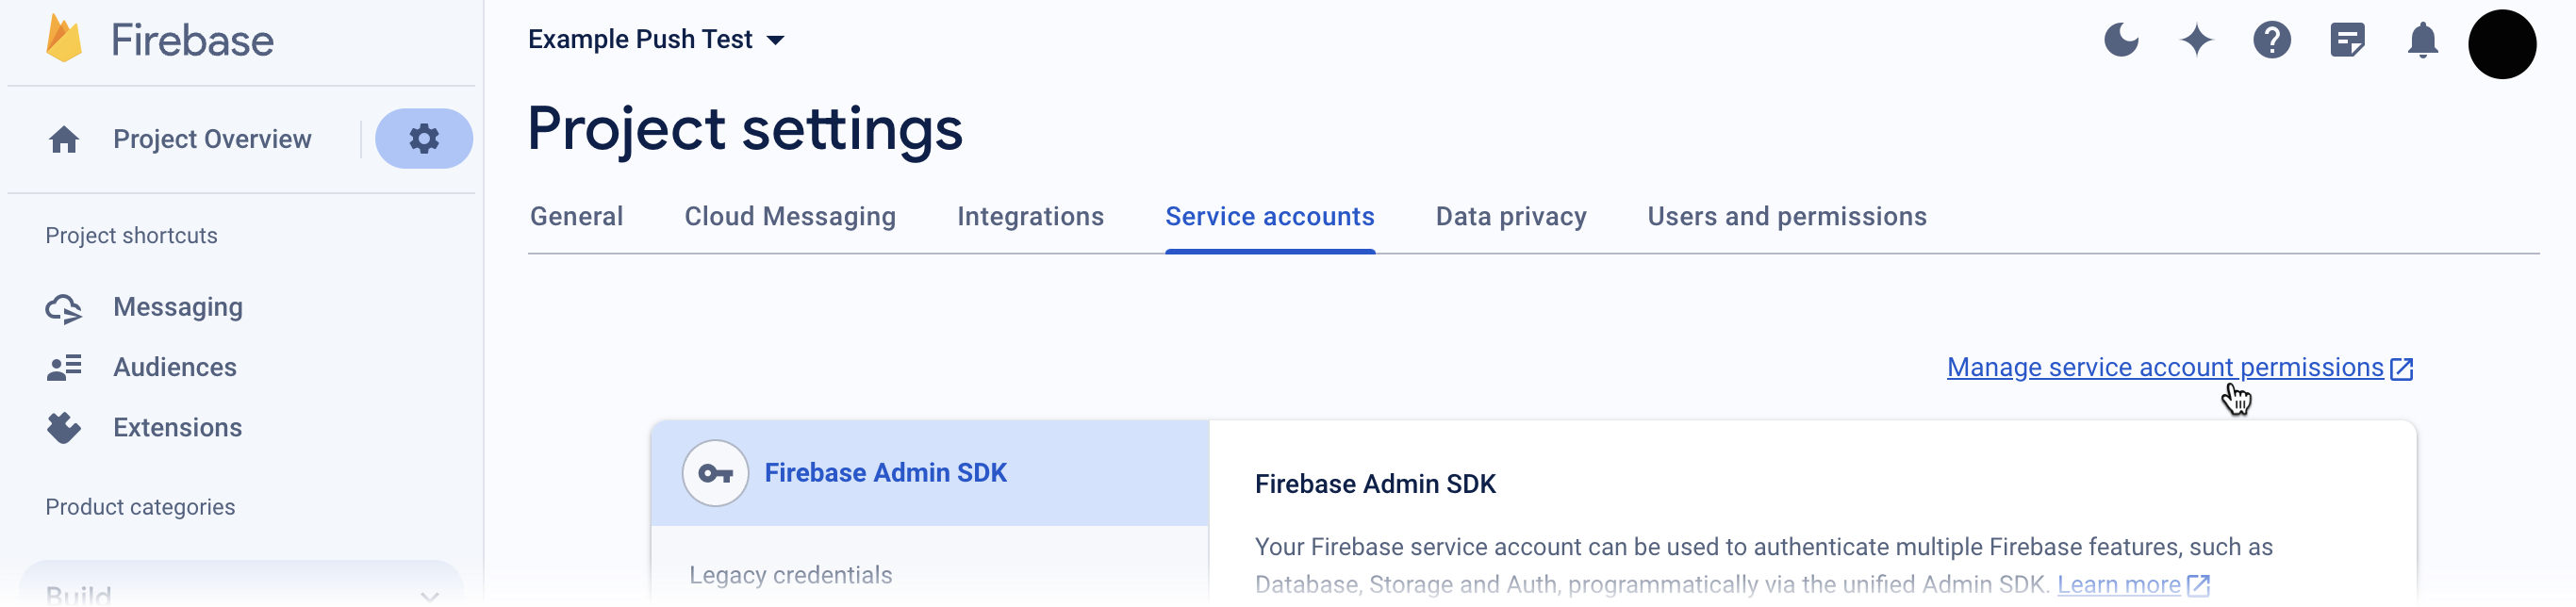
Click the gear button (in the upper-left). From the menu, choose Project settings.
-
Navigate to the Service accounts tab and click Manage service account permissions.
-
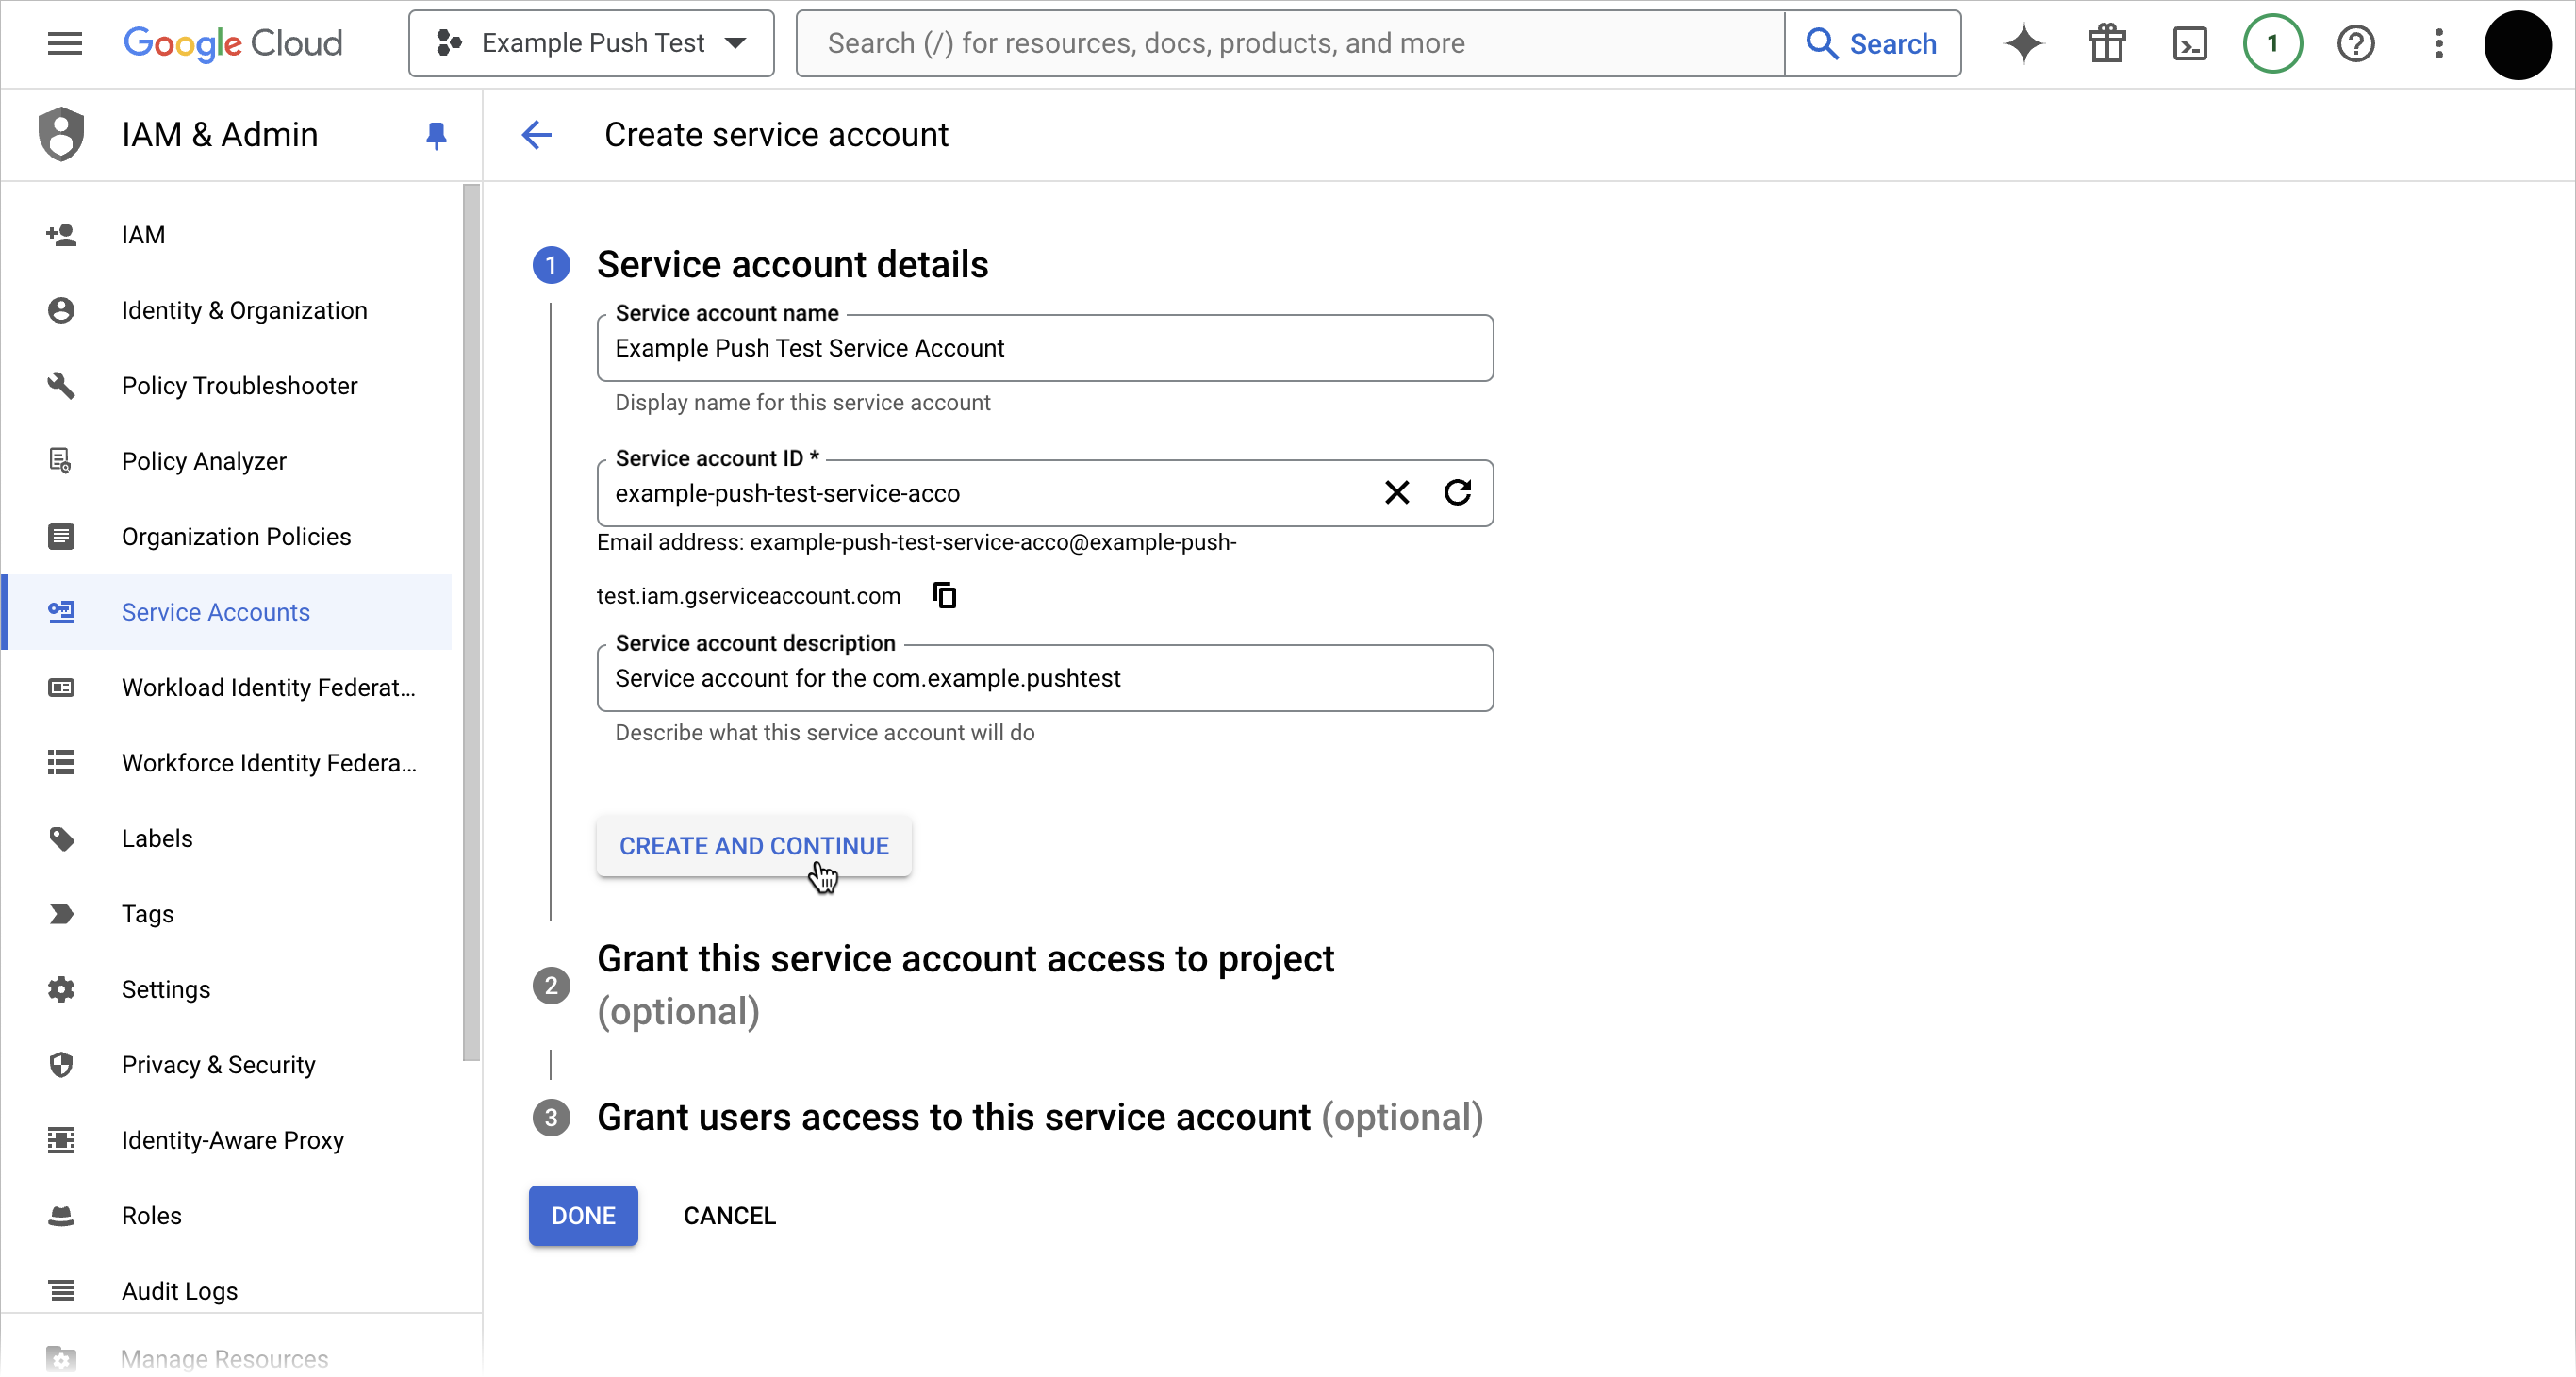
To create a new service account, click Create Service Account.
-
Under Service account details, enter a name, account ID, and description. Then, click Create and Continue.
-
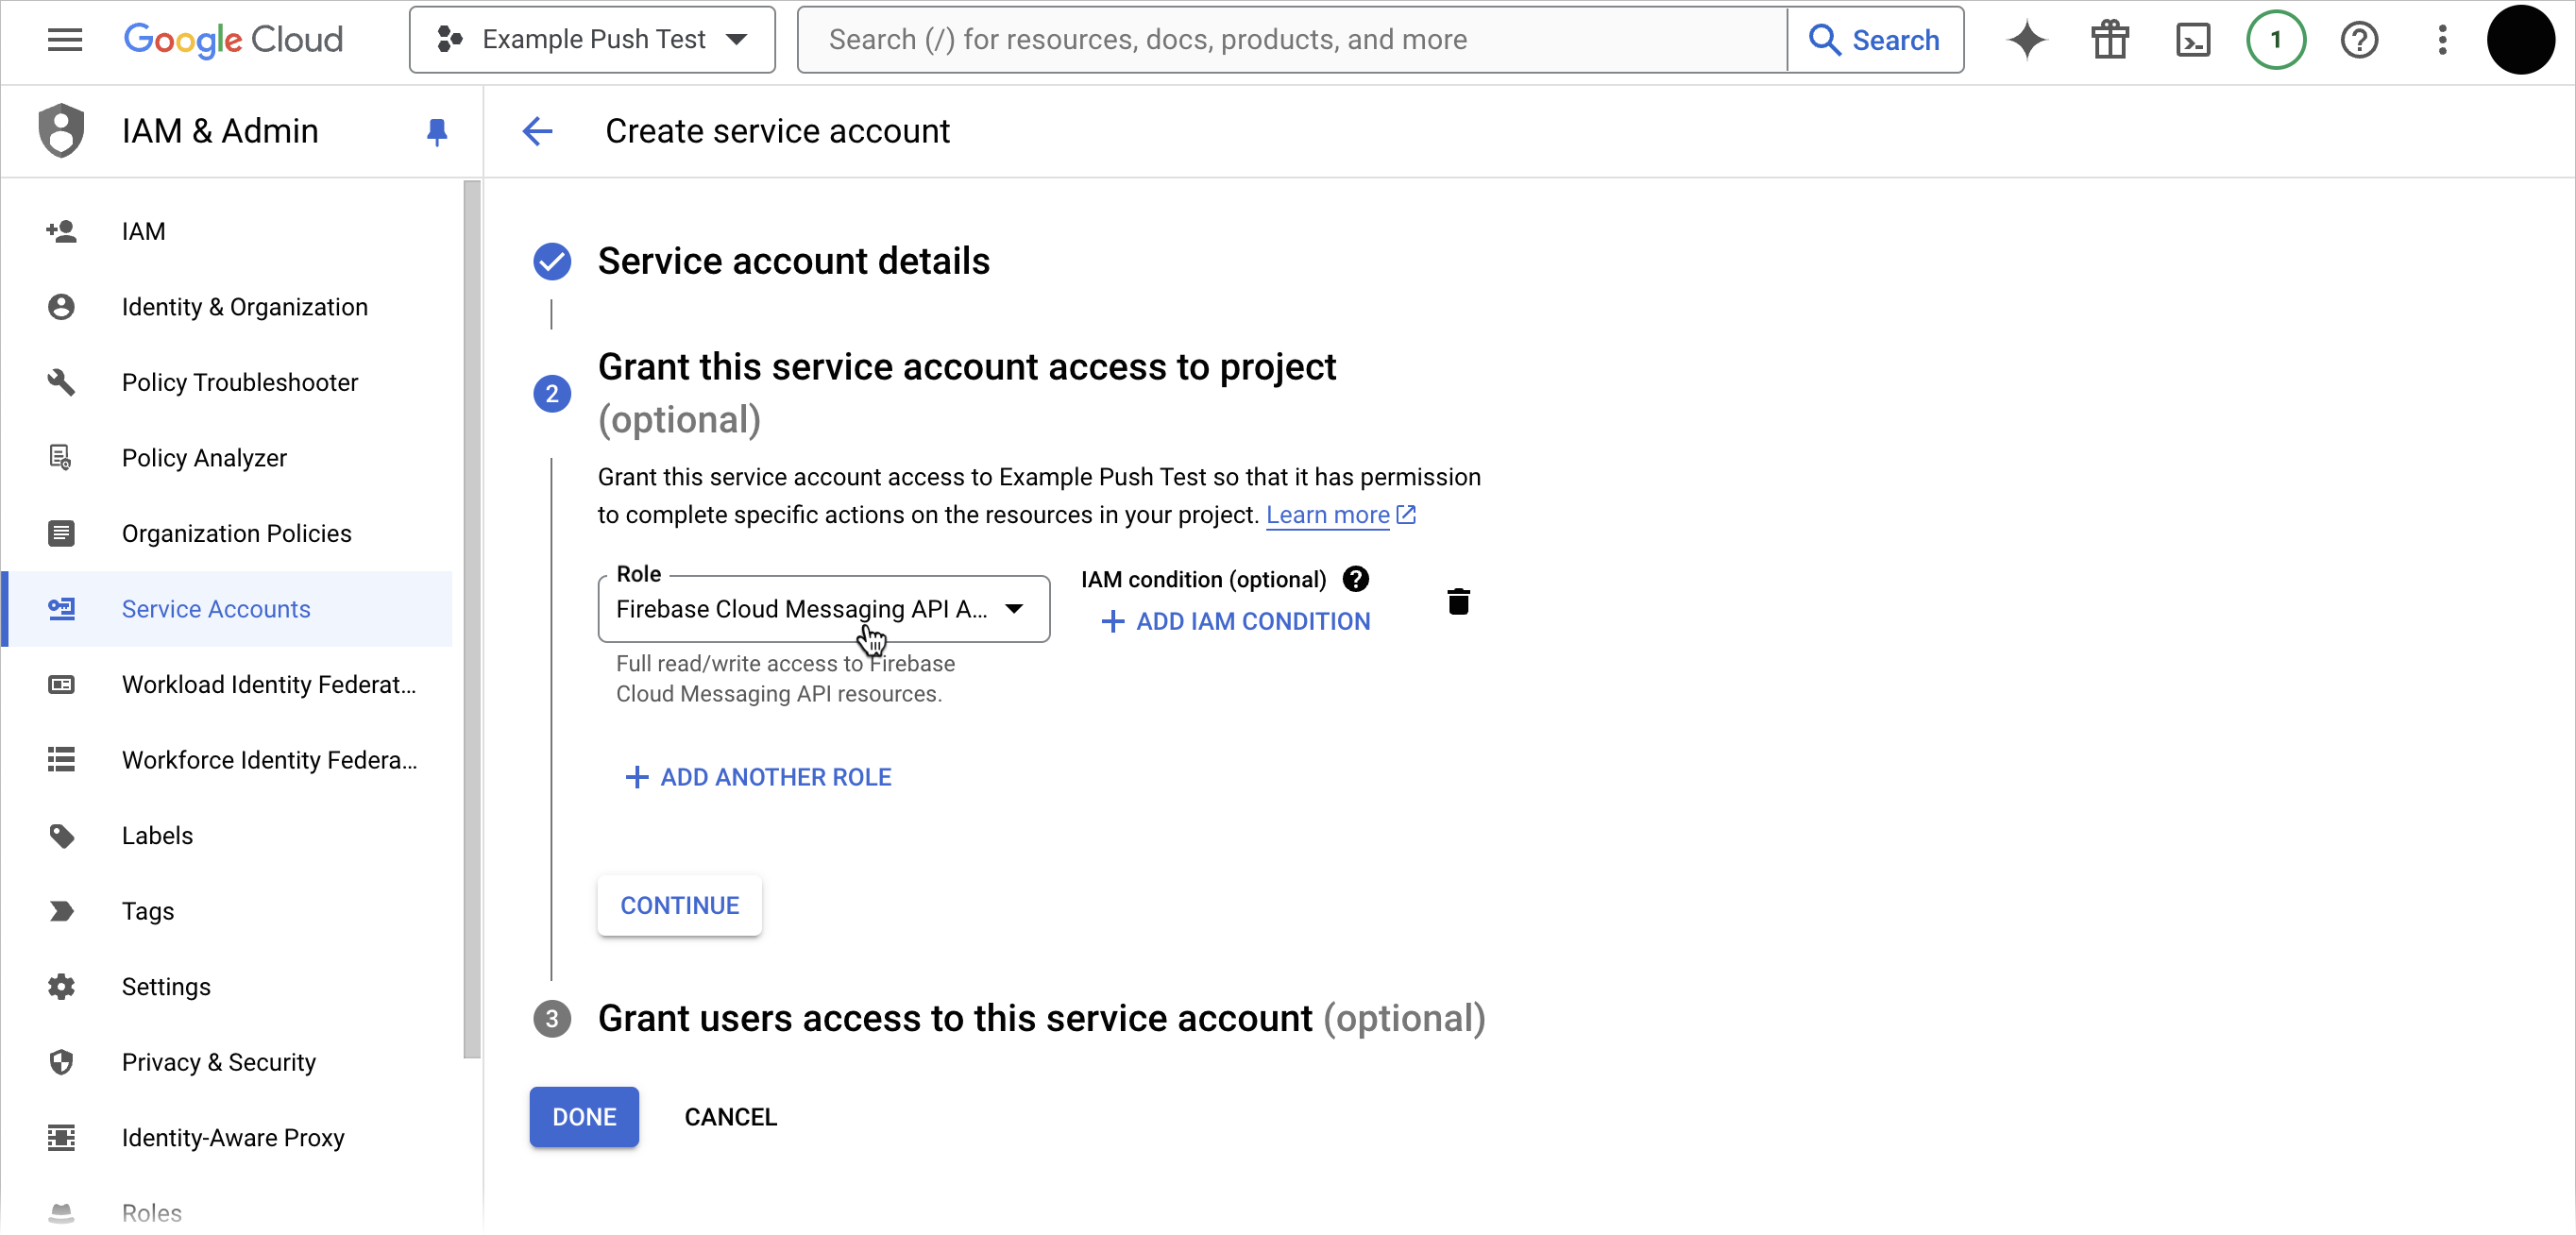
Under Grant this service account access to project, select role Firebase Cloud Messaging API Admin. Or, choose a custom role that has the
cloudmessaging.messages.createpermission. Then, click Continue.:::tip TIP To learn about creating and managing custom Identity and Access Management (IAM) roles in Google Cloud, read Google's Create and manage custom roles document. :::
-
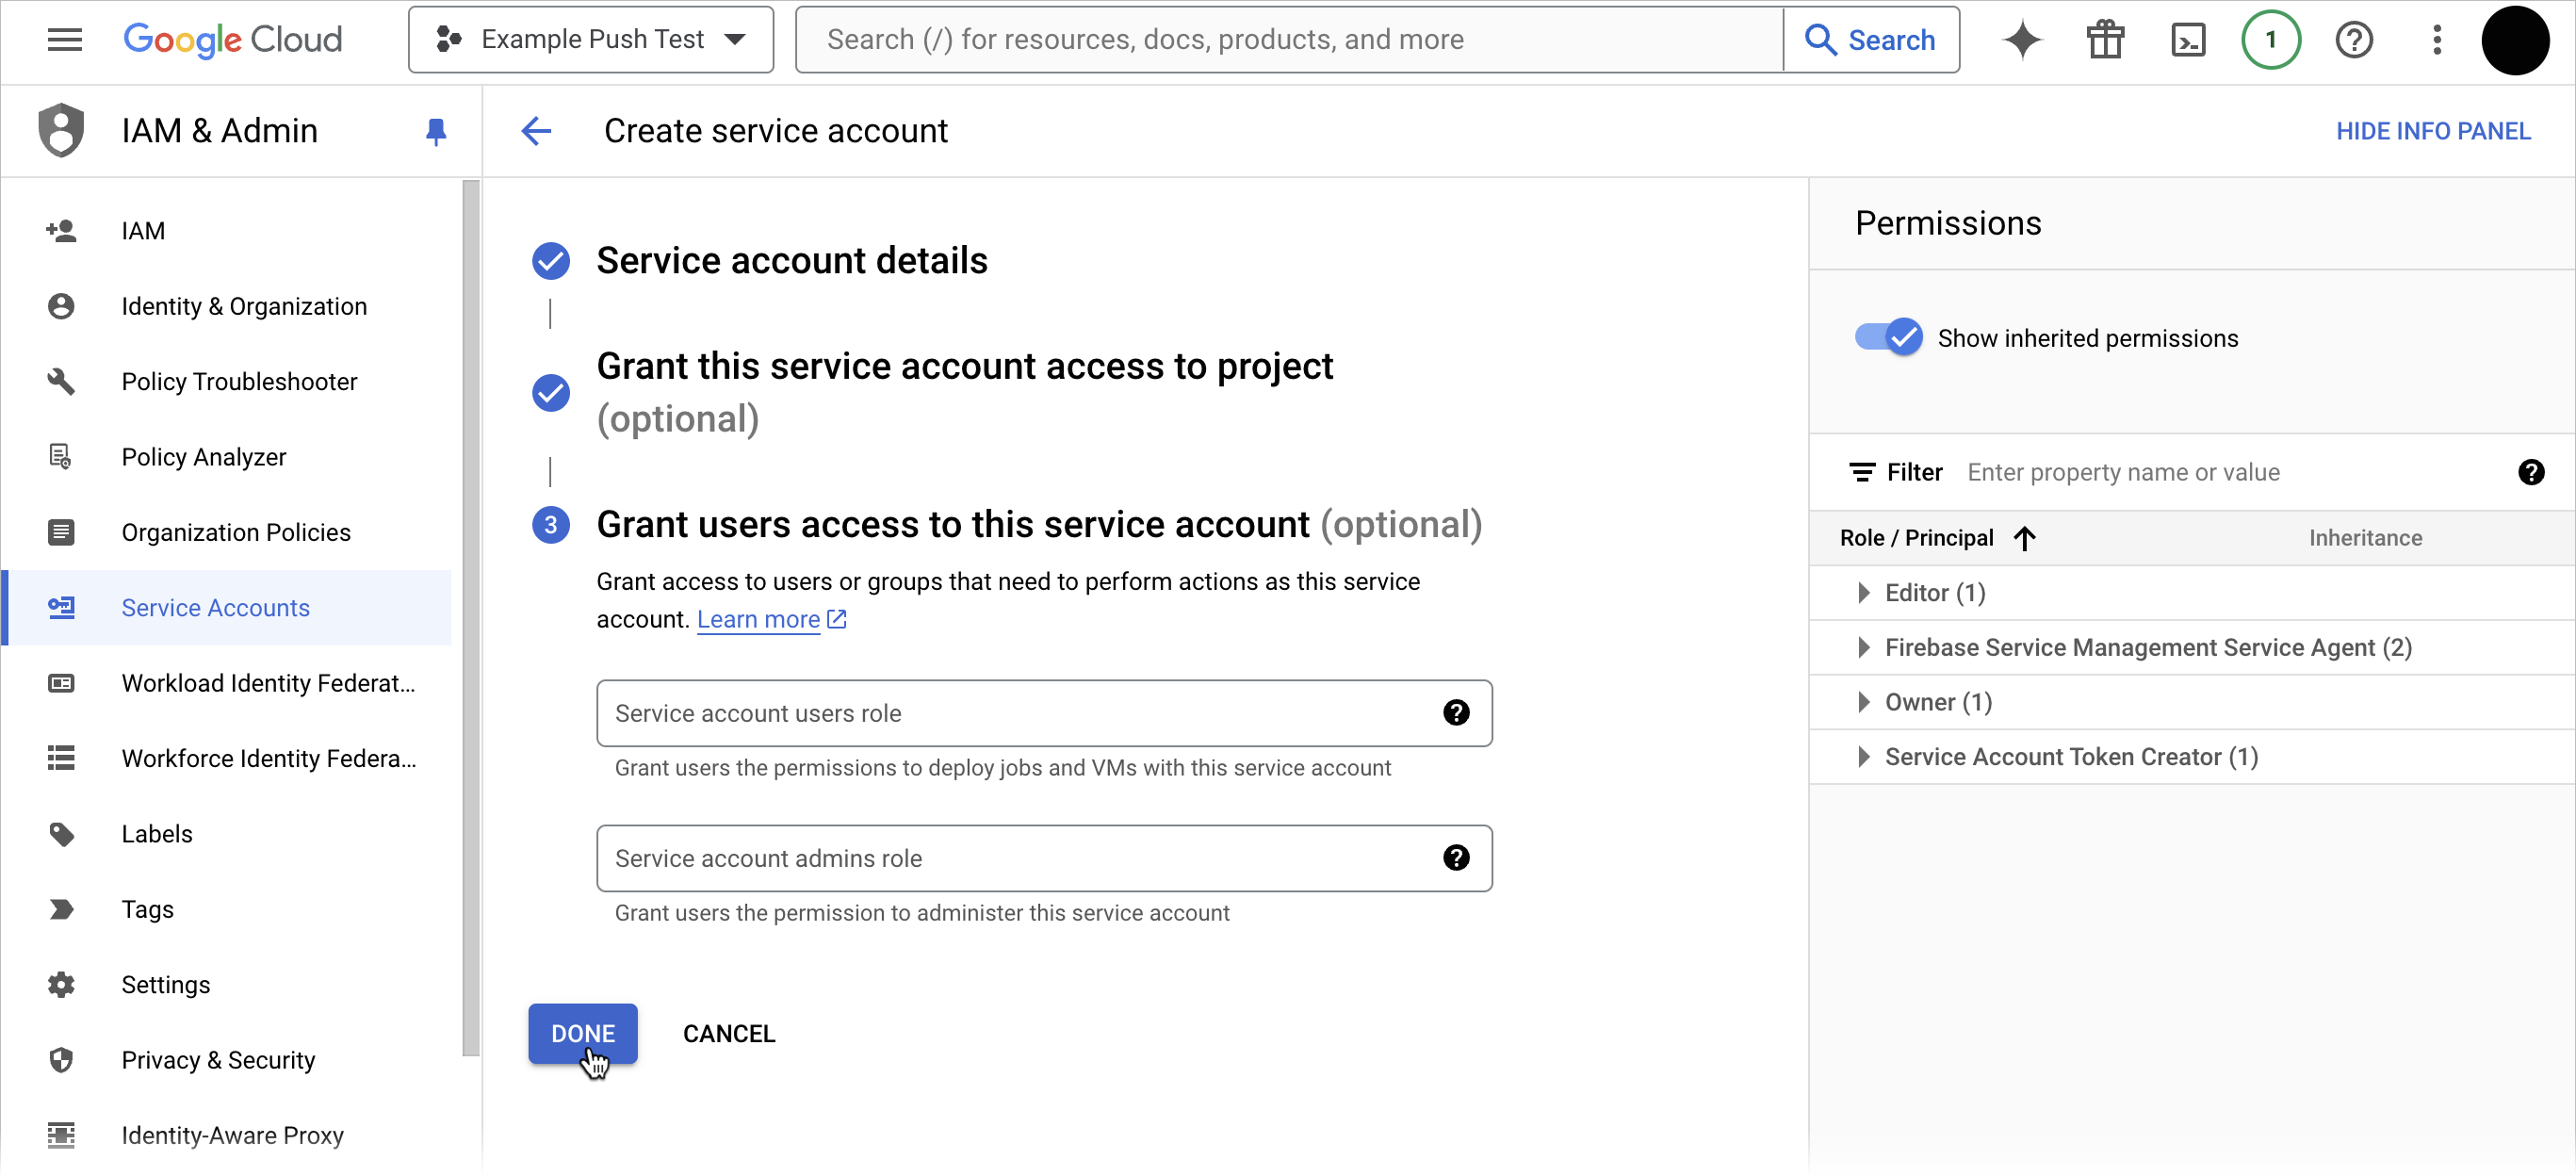
Under Grant users access to this service account, leave both fields blank.
-
Click Done. You'll be taken back to the Service Accounts page.

Now, create and download a JSON private key that Iterable can use to authenticate with FCM when sending push notifications.
-
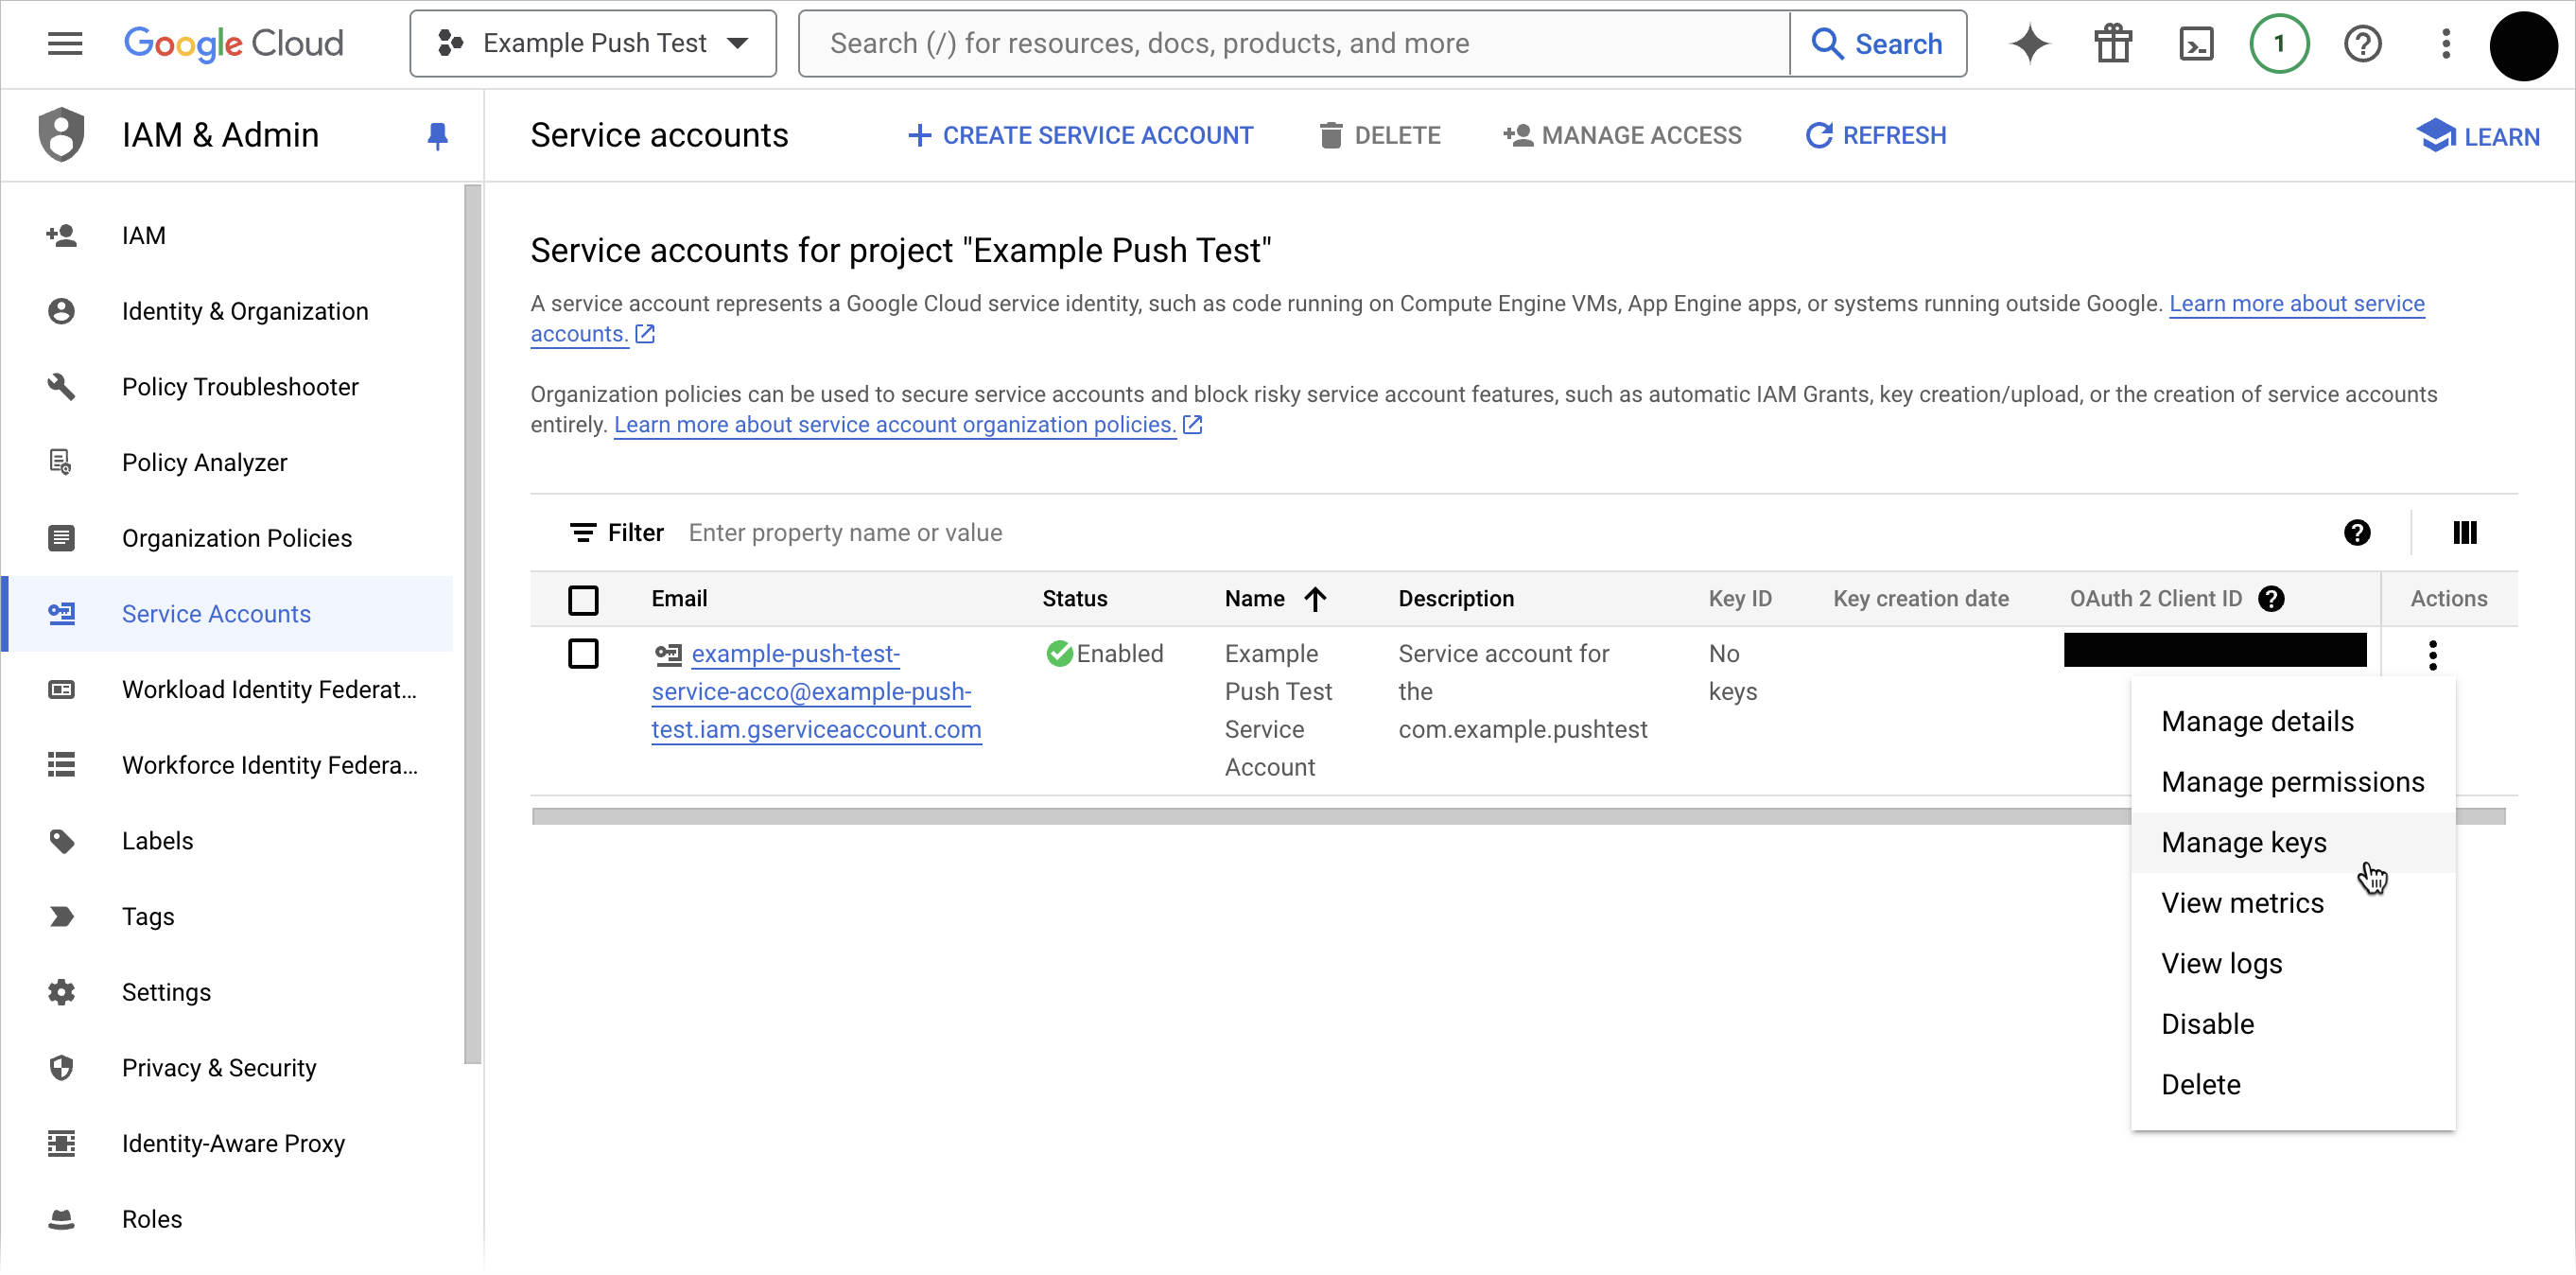
On the Service Accounts page, in the row for your new service account, click the three dots in the Actions column. Choose Manage keys.
-
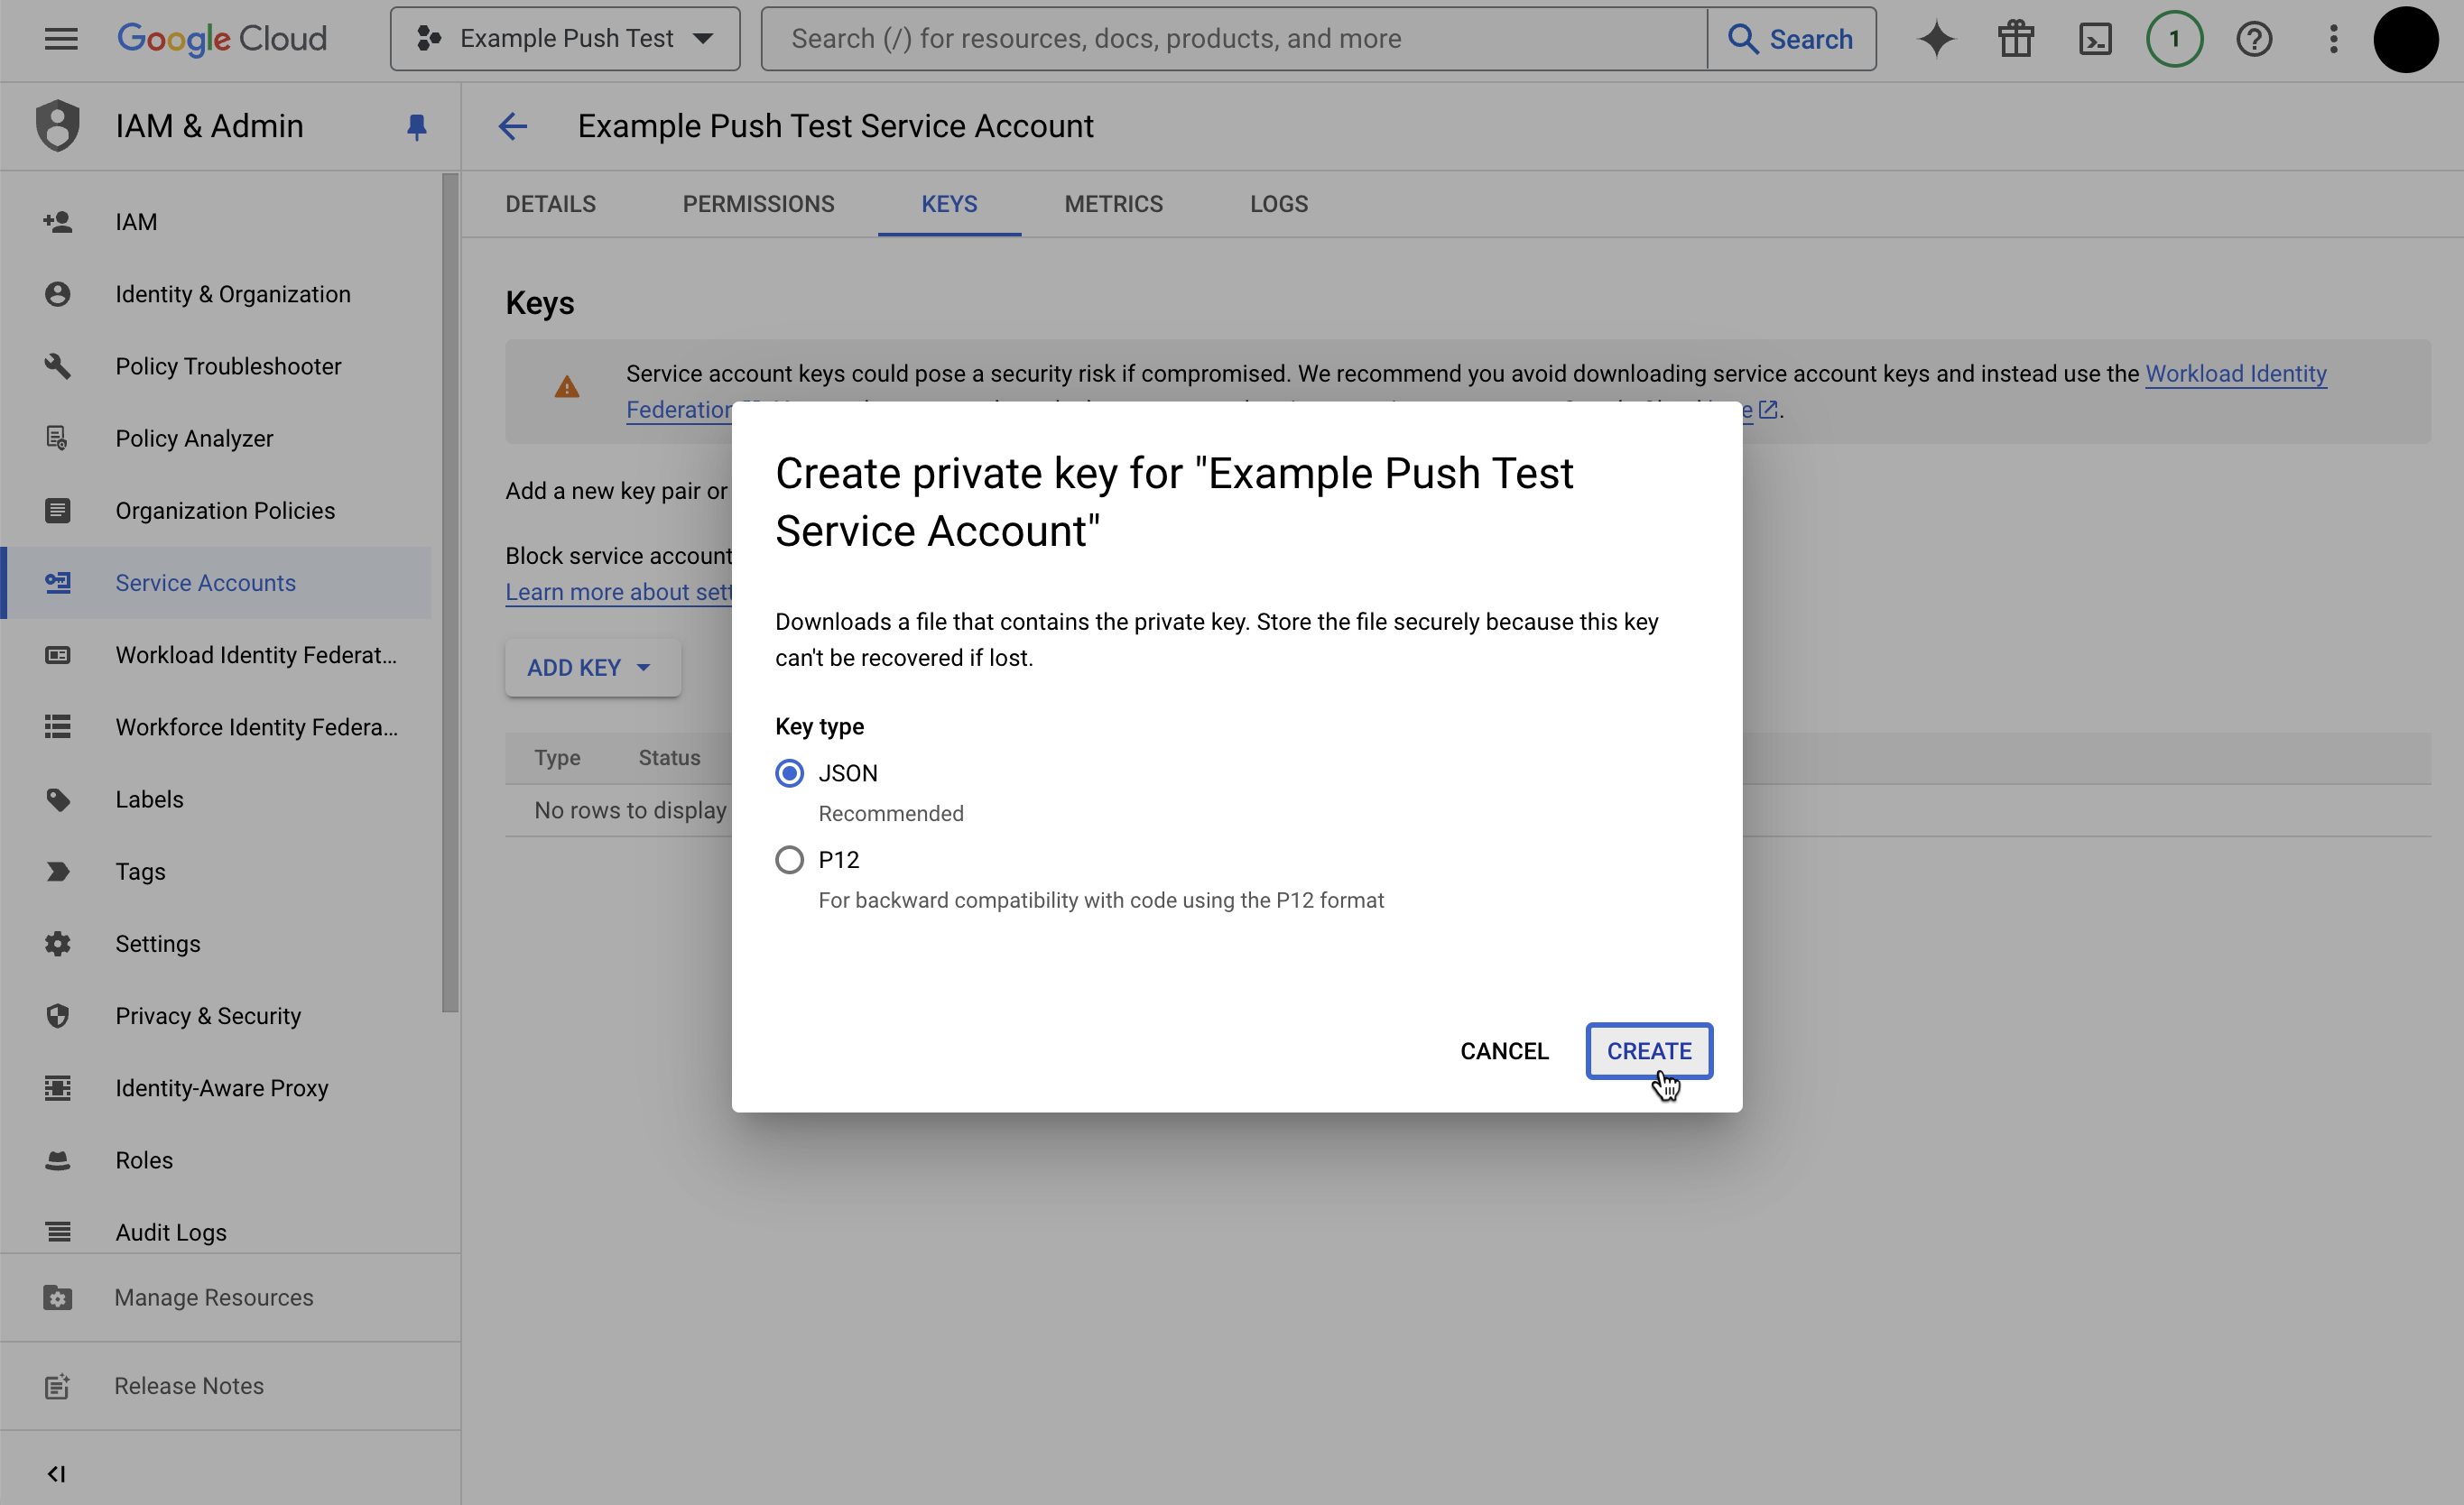
Click Create new key, and then choose JSON.
-
Click Create. This downloads the JSON private key to your machine.
Back in Iterable, configure your mobile app's push integration:
-
Navigate to Settings > Apps and Websites and open your app.
-
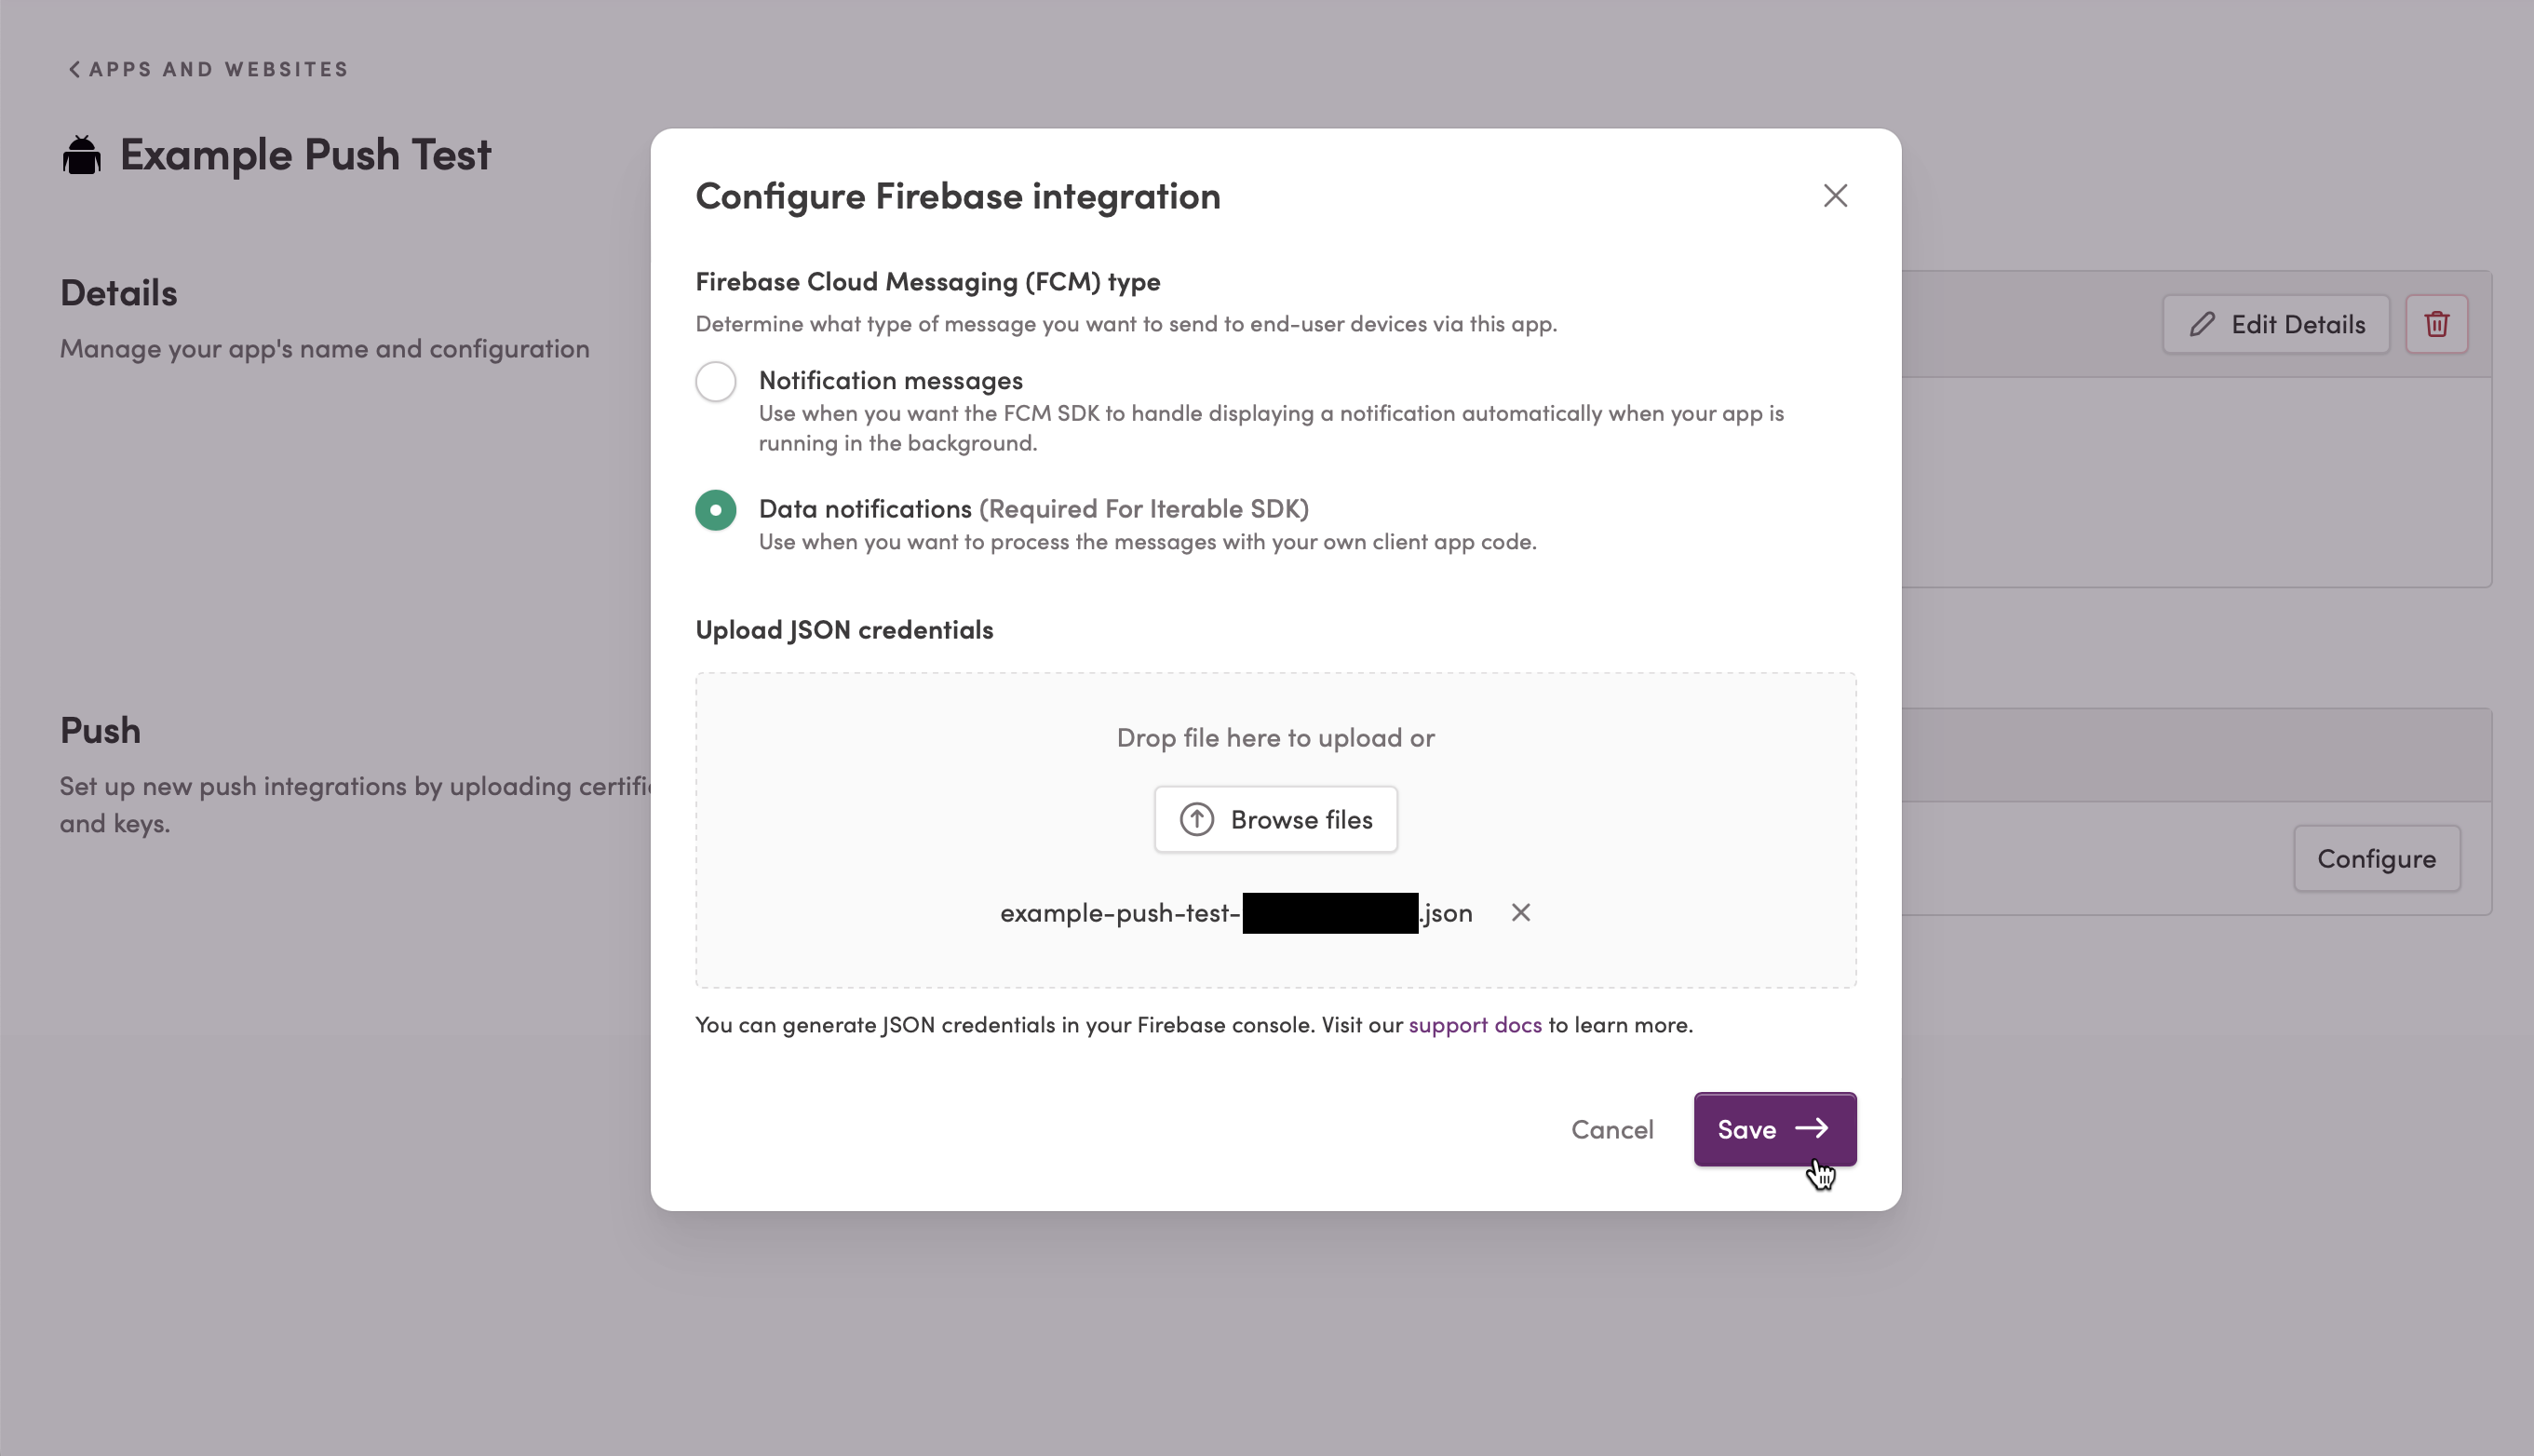
In the Push sections, under Integrations, in the Firebase row, click Configure. A Configure Firebase integration window will appear.
-
For Firebase Cloud Messaging (FCM) type, choose between:
- Notification messages - The Firebase SDK handles incoming push notifications. Generally, you should only select this option if you aren't using Iterable's Android SDK.
- Data notifications - Iterable's SDK handles incoming push notifications. If you're using Iterable's Android SDK, this is usually the right option.
:::tip TIP For more information about these options, read About FCM messages, from Google. :::
-
Upload the JSON file you created above.
-
Click Save. As soon as you do, Iterable starts using these new credentials to send push notifications to your Android app.
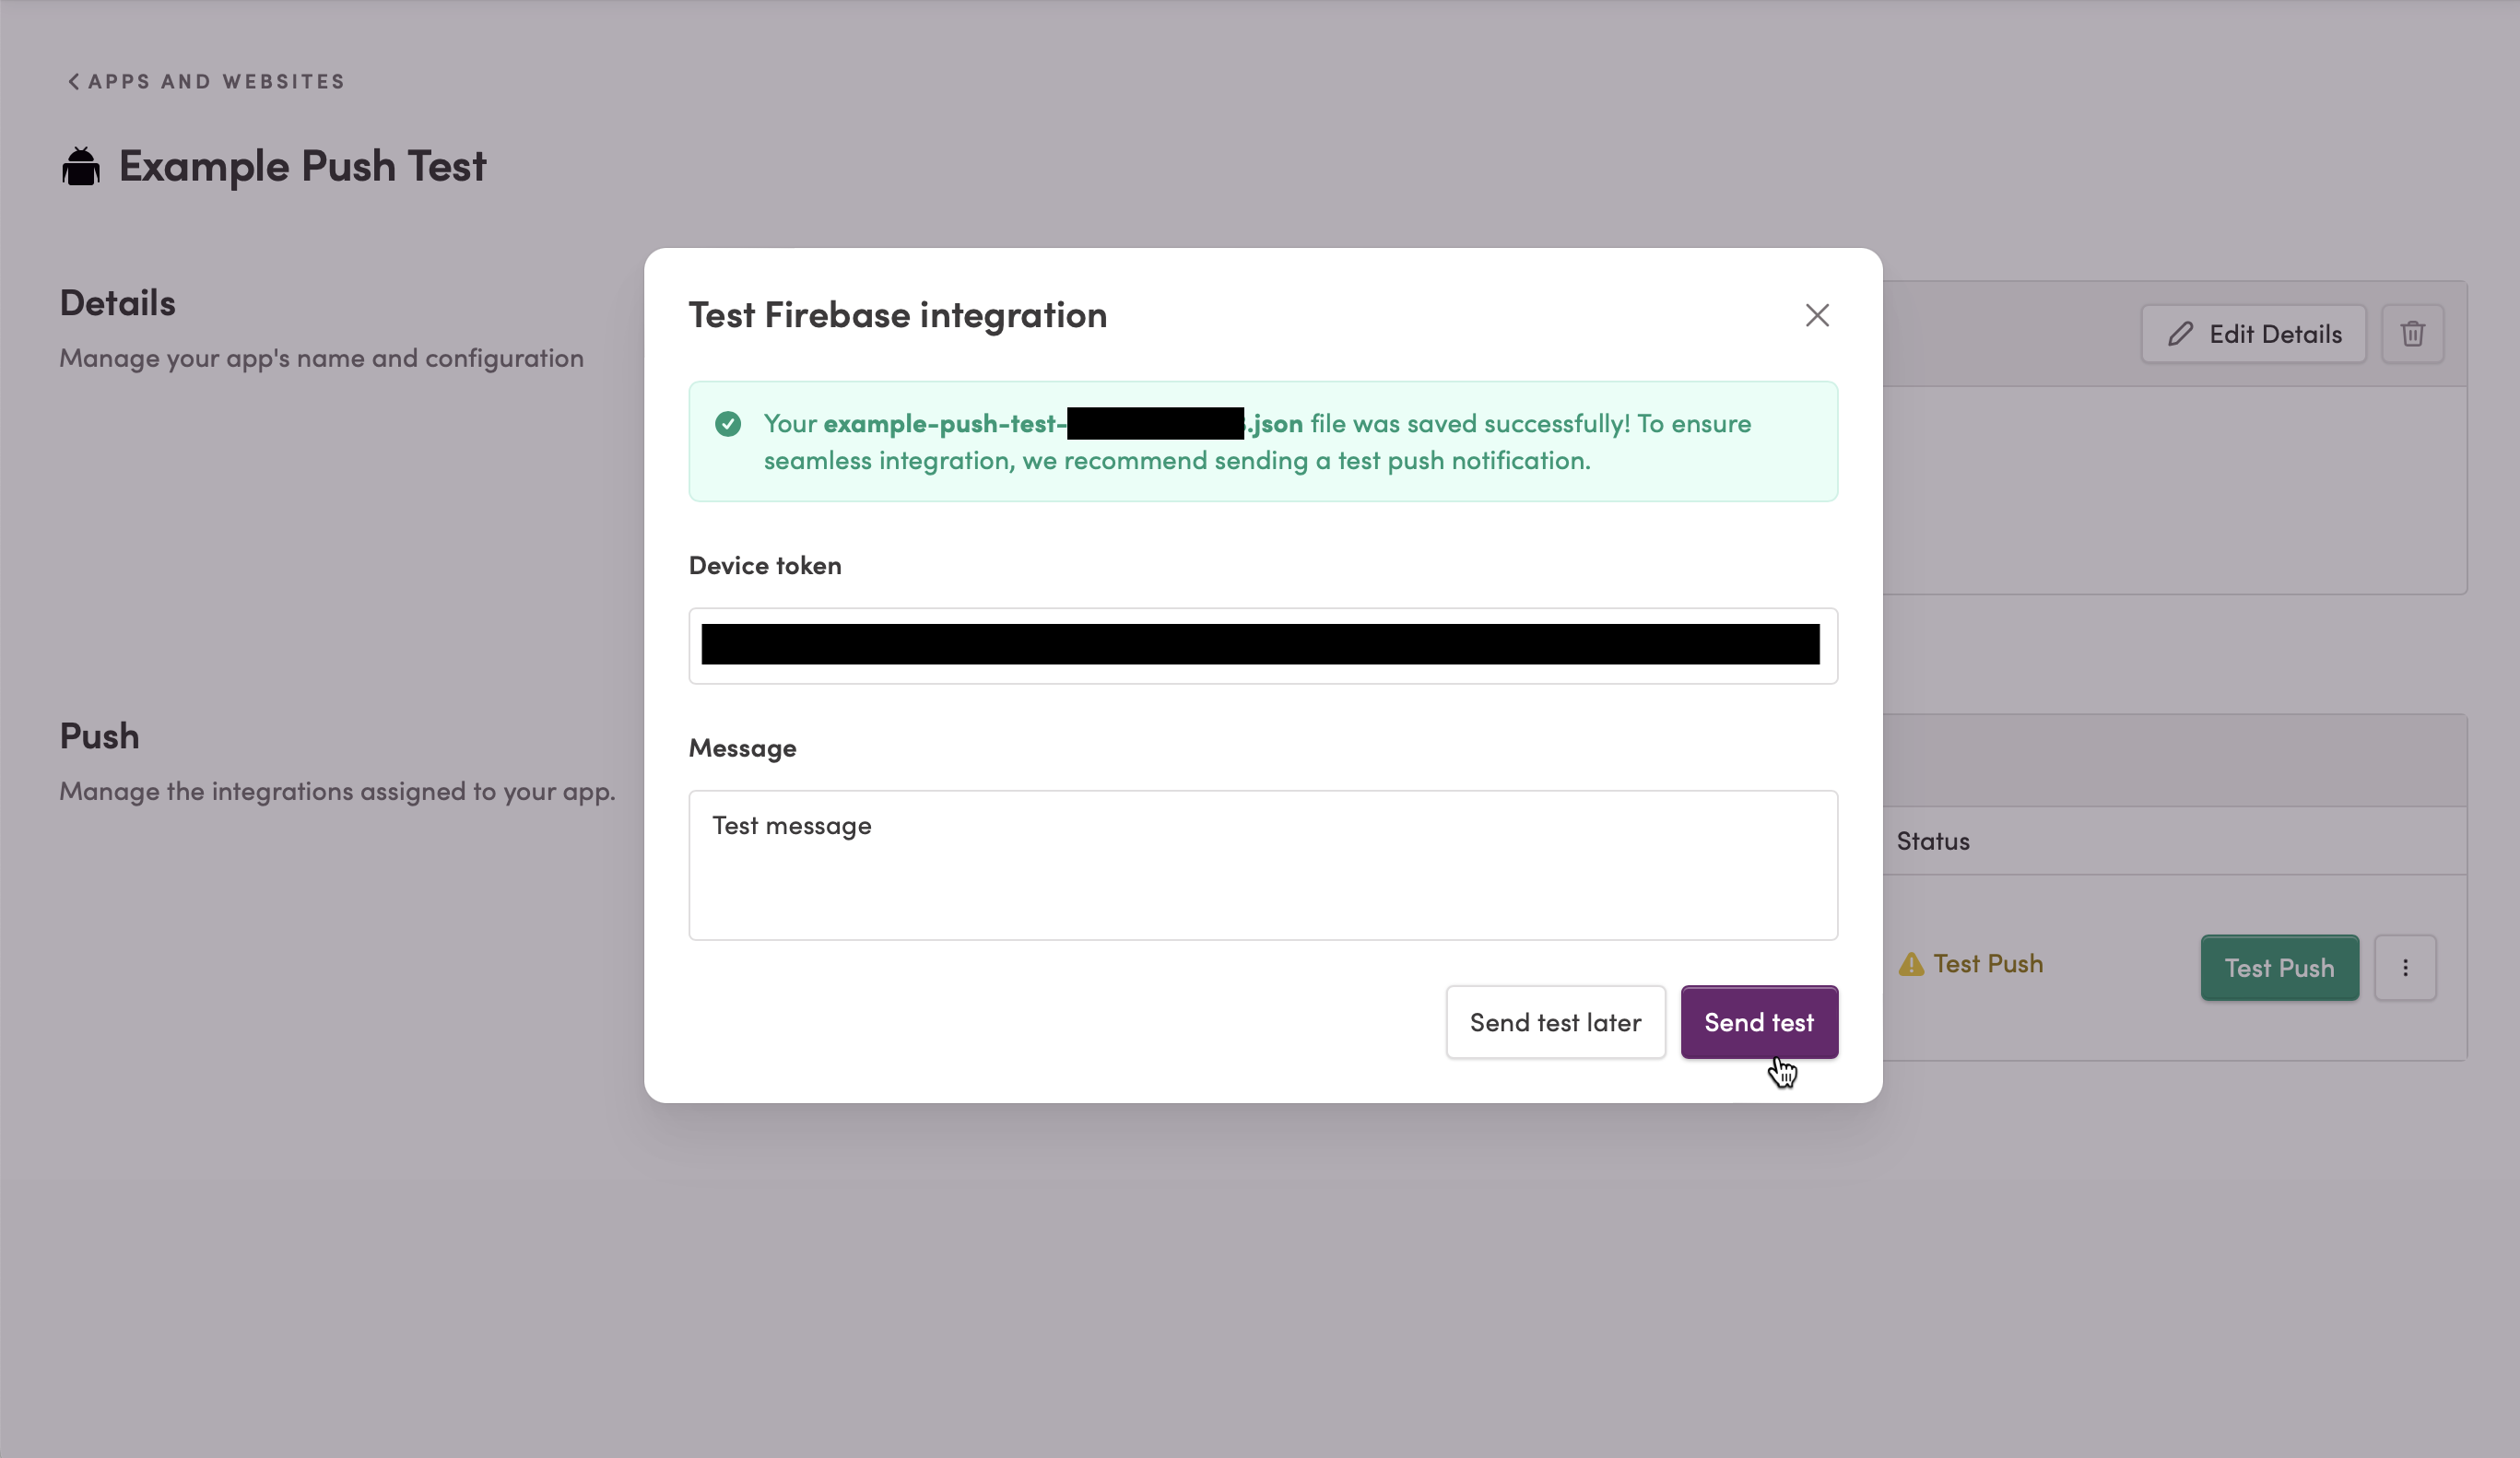
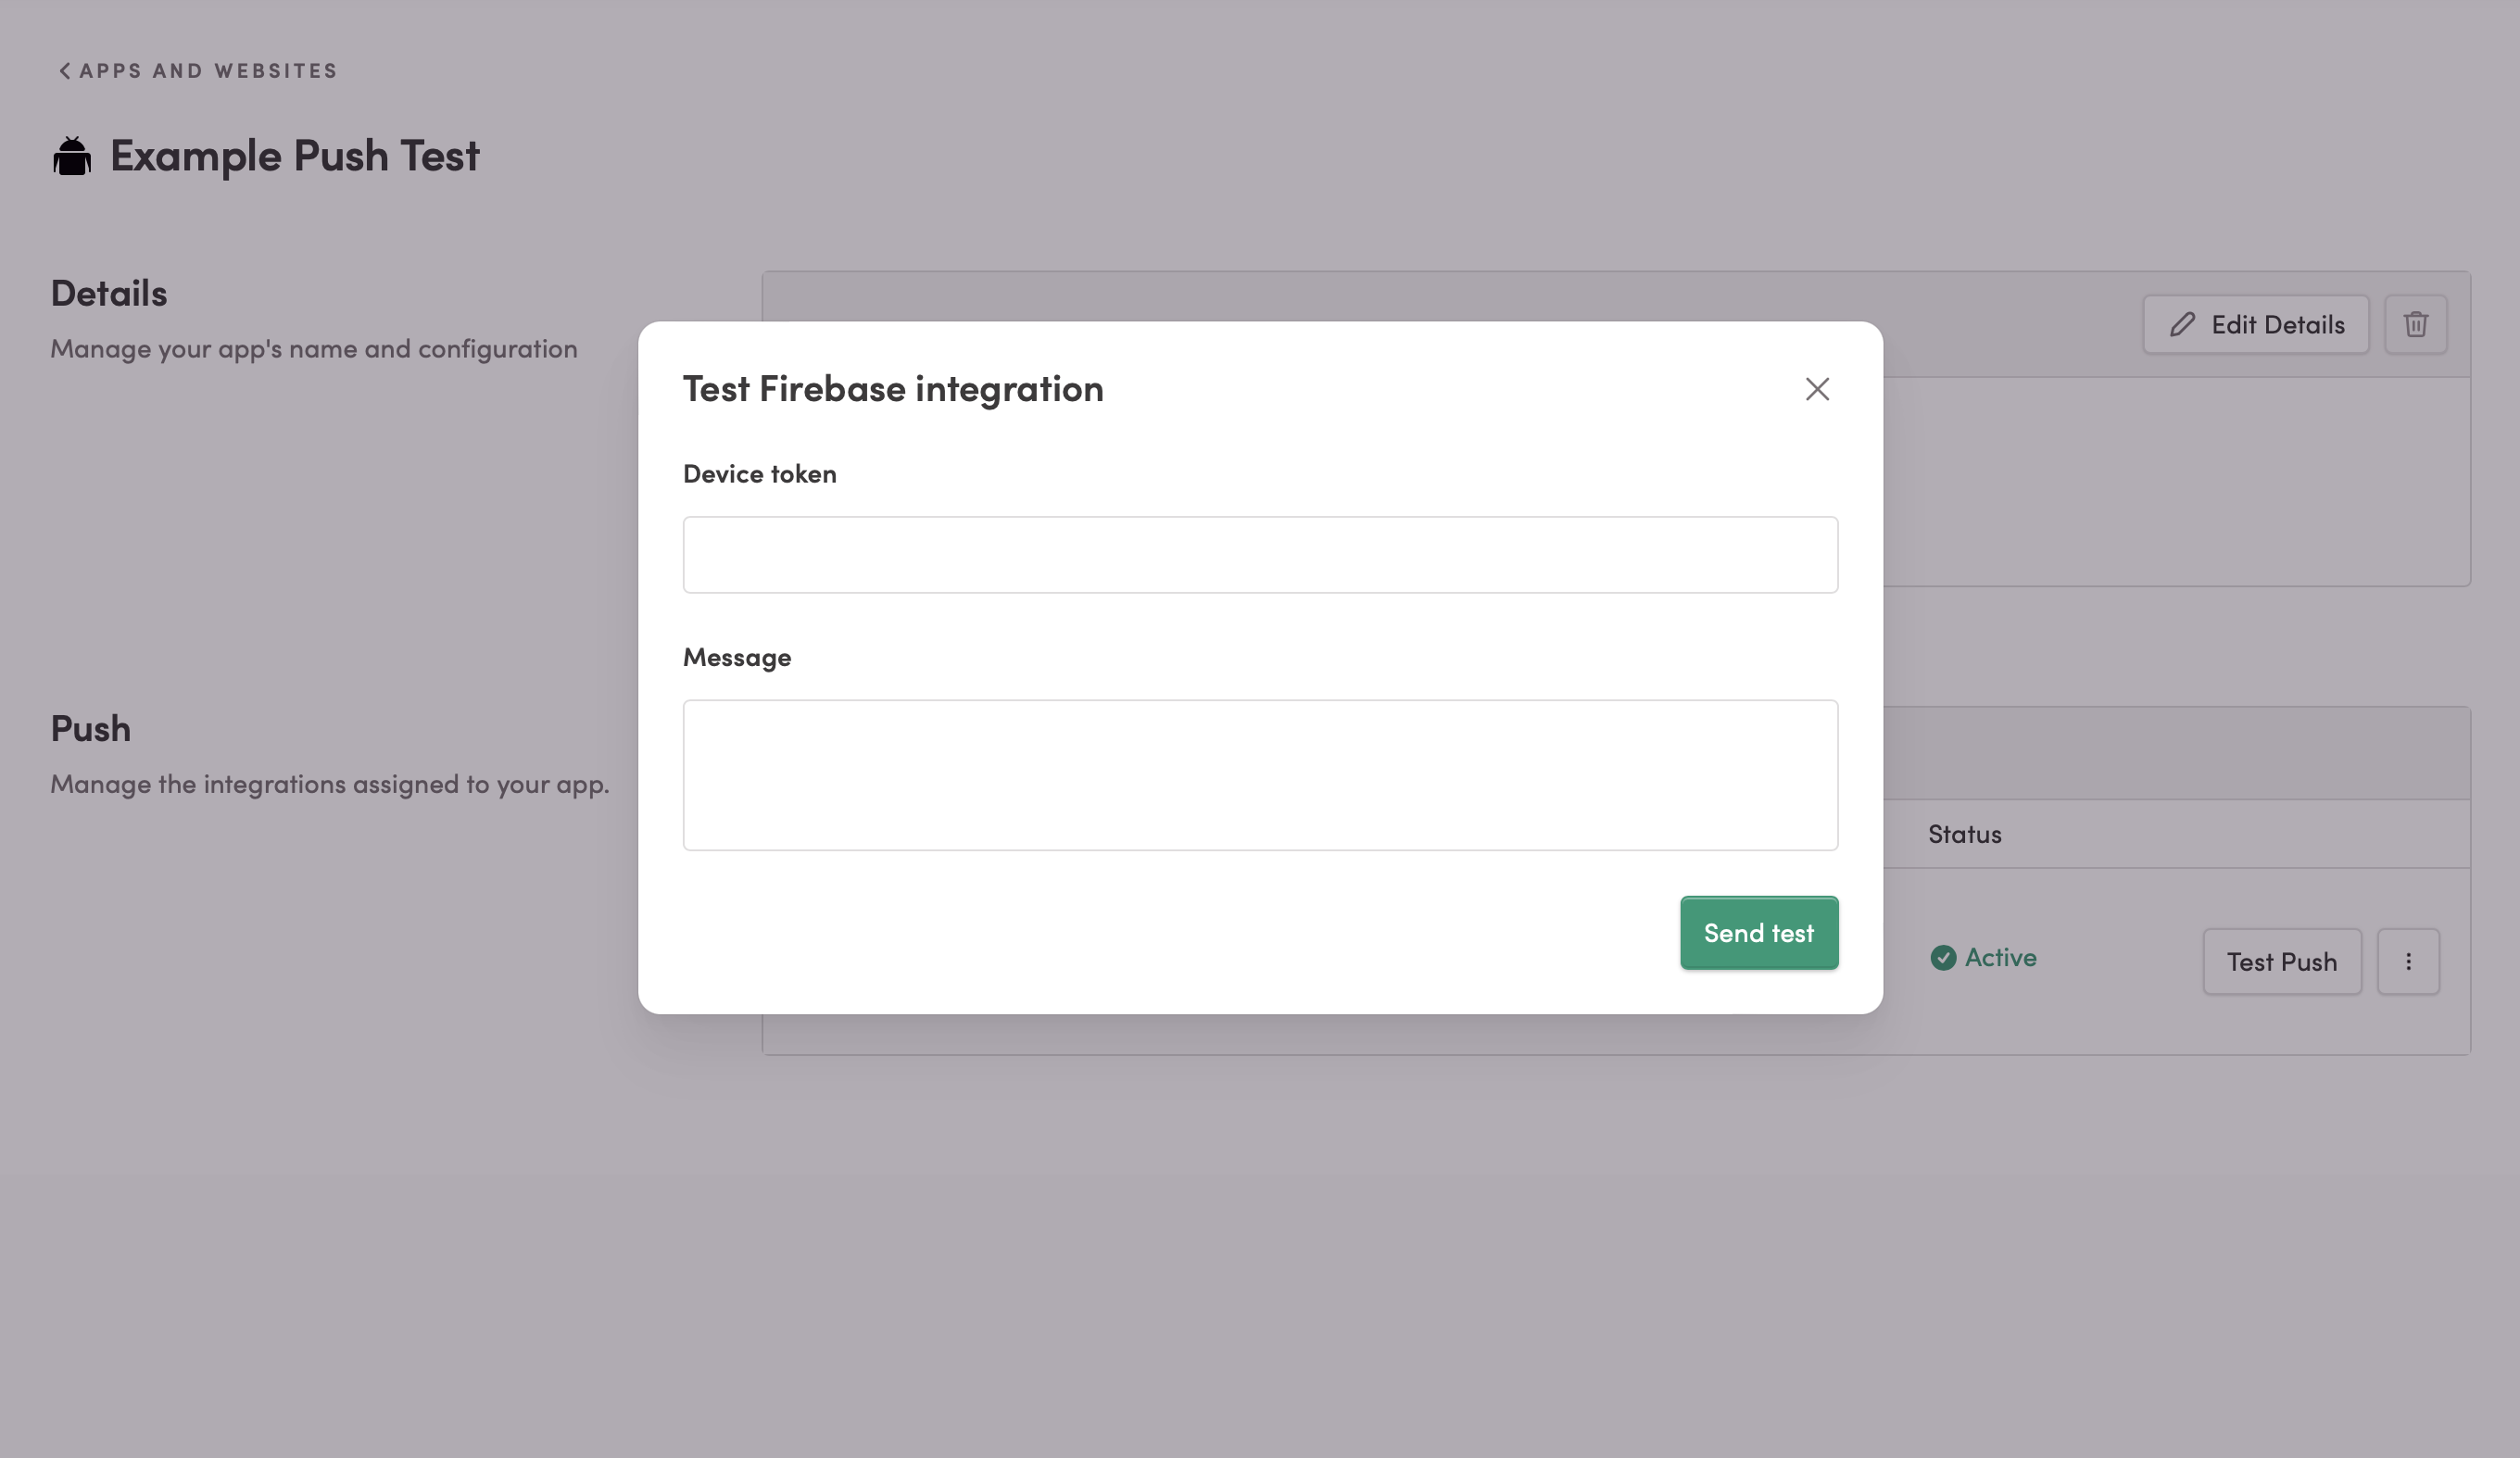
Finally, a Test Firebase integration window appears. Send a test push notification to make sure that everything works as expected (assuming that you've set your app up to receive push notifications, as described further down in this document).
-
Grab a test user's device token:
- Visit Audience > User Lookup.
- Look up an internal user by
emailoruserId(whatever makes sense in your project). - Navigate to the User fields tab.
- Open the
devicesarray. - From an Android device where
appPackageNameis your app's package name, andendpointEnabledistrue, copy thetokenfield.
-
In the Test Firebase integration window:
- Enter the device token and a message.
- Click Send test.
The device should receive the push notification message. If not, check the configuration of the service account in Firebase, fix as necessary, and try again. If you're still having trouble, contact Iterable support.
To learn how to install Iterable's Android SDK, read about Iterable's Android SDK.
Note
You can receive Iterable push notifications without setting up the Android SDK. To do so:
- Set up your Android app as described in Google's Set up a Firebase Cloud Messaging client app on Android document.
- Call
POST /api/users/registerDeviceTokeneach time the app opens. - Call
POST /api/users/disableDeviceeach time the user signs out of the app - Track push notification opens by calling
POST /api/events/trackPushOpen.
The SDK automatically adds a FirebaseMessagingService to the app manifest, so
you don't have to do any extra setup to handle incoming push messages.
If your application implements its own FirebaseMessagingService, make sure you
forward onMessageReceived and onNewToken calls to
IterableFirebaseMessagingService.handleMessageReceived and
IterableFirebaseMessagingService.handleTokenRefresh, respectively:
public class MyFirebaseMessagingService extends FirebaseMessagingService {

    @Override
    public void onMessageReceived(RemoteMessage remoteMessage) {
        IterableFirebaseMessagingService.handleMessageReceived(this, remoteMessage);
    }

    @Override
    public void onNewToken(String s) {
        IterableFirebaseMessagingService.handleTokenRefresh();
    }
}
To handle silent push notifications, use a custom FirebaseMessagingService.
Warning
The step above is mandatory for handling multiple push providers.
Note that FirebaseInstanceIdService is deprecated and replaced with
onNewToken in recent versions of Firebase.
When a user logs out, you typically want to disable push notifications to
that user/device. This can be accomplished by calling disablePush. Please
note that it will only attempt to disable the device if you have previously
called registerForPush.
In order to re-enable push notifications to that device, simply call
registerForPush as usual when the user logs back in.
To send a test Android push notification:
-
In Iterable, navigate to Audience > User Lookup and enter the user's
emailoruserId.- In the
devicesarray, find an object whereappPackageNamecorresponds to your app's package name, andendpointEnabledistrue. - Copy that object's
token.
- In the
-
Navigate to Settings > Apps and Websites.
-
Click the mobile app to which you'd like to send a push notification.
-
In the Integrations section, click Test Push. You'll see a Send Test Push window:
-
Enter the device token you found above, and specify a test message.
-
Click Send test.
Monitor the recipient's device to verify that the push notification arrives.
To learn about the POST_NOTIFICATIONS permission introduced in Android 13,
which allows you to prompt users for permission to send push notifications,
check out this information about Android 13.
The following sections describe the technical setup necessary for various Android push notification customizations in Iterable.
For marketer-specific information about how to configure these features in Iterable when sending a campaign, read Creating a Push Notification Campaign.
Add this line to AndroidManifest.xml to specify the notification color:
<meta-data android:name="iterable_notification_color" android:value="#FFFFFF"/>where #FFFFFF can be replaced with a hex representation of a color of your
choice. In stock Android, the notification icon and action buttons will be
tinted with this color.
You can also use a color resource:
<meta-data android:name="iterable_notification_color" android:resource="@color/notification_color"/>Since Android 8.0, Android requires apps to specify a channel for every
notification. Iterable uses one channel for all notification; to customize the
name of this channel, add this to AndroidManifest.xml:
<meta-data android:name="iterable_notification_channel_name" android:value="Notifications"/>You can also use a string resource to localize the channel name:
<meta-data android:name="iterable_notification_channel_name" android:resource="@string/notification_channel_name"/>Since Android 8.0, apps can indicate that they've received a notification by
displaying a dot (badge) on their icon. By default, Iterable's Android SDK
displays these badges. However, you can explicitly enable or disable them in
AndroidManifest.xml:
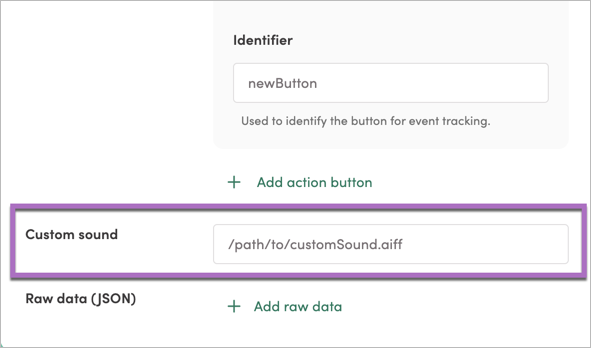
<meta-data android:name="iterable_notification_badging" android:value="false"/>To add sound to Android push notifications sent with Iterable, follow these instructions:
-
Put the necessary sound files in the Android project's res/raw folder.
:::warning IMPORTANT
- Sound file names should be lowercase and should not have any special characters.
- Take a look at Android's documentation about supported media formats. This documentation is not specific about which formats work for push notifications, so it's best to test as necessary. :::
-
Navigate to Content > Templates and open the push notification template.
-
Click Edit details and scroll down.
-
Enter the path to the custom sound file in the Custom sound field.
:::tip NOTES
- To use the default push notification sound, set this field to
default. - Whether or not a device plays the sound or vibrates depends on the user's device settings. :::
- To use the default push notification sound, set this field to
Iterable push notification templates make it possible to set deep link URLs for iOS and Android.
To learn more about using Iterable's Android SDK to handle deep links, read Android App Links.
If your app is not using Iterable's Android SDK, it can still handle a deep
link contained in an Iterable push notification. Iterable provides the deep
link URL in the defaultAction object included in the notification's
payload. When this object's type field is set to openUrl, the data
field will contain the deep link URL.
After a user has opened a tapped on a push notification to open the app,
use the getPayloadData method on IterableApi to access the notification
payload.
To set the background color of a push notification, update the
AndroidManifest.xml file:
<meta-data android:name="iterable_notification_color" android:value="#FFFFFF"></meta-data>#FFFFFF can be replaced with any hex color. In stock Android, the
notification icon and action buttons will be tinted with this color.
Alternatively, you can also use a color resource:
<meta-data android:name="iterable_notification_color" android:resource="@color/notification_color"/>By default, push notifications display the application icon. To use a
different icon, place the image resource inside your app's res/drawable
directory. Then, edit AndroidManifest.xml, adding the following line:
<meta-data android:name="iterable_notification_icon" android:resource="@drawable/ic_notification_icon"/>In this case, ic_notification_icon is the name of the notification icon.
Alternatively, call setNotificationIcon(String iconName) to use the custom
icon, referencing the image asset by name and without a file extension.