Adding Emulator Support
You found an unofficial emulator profile online or and would like to add use it with TrinityCreator.
Simply copy the file to My Documents\TrinityCreator\Profiles.
Then select the profile in the top menu under Config > Choose Emulator Profile and get creating!
Most emulators are forks from eachother and have a similar database structure. So it's recommended to modify an existing profile rather than creating a fresh one.
- Go to the top menu and click on
Advanced Tools > Profile Creator. - Either
Load profile from fileto modify an existing profile or create one from scratch.
Notes:
- You don't need all fields. Some are intended to support different database structures and contradict eachother. (See below)
- Make sure to change the profile info to accurately describe which profile it supports.
- Revisions should only be used when adding new functionality or fixing a bug. If your emulator has changed it's database structure in an update, you should create a new profile for this version.
Since v1.1 you're able to (relatively) easily add support for emulators which are not supported by default, rather than having to rely on me adding support for your specific version of an emulator.
There are few restrictions, however some tools may not work for newer versions of the game (Cataclysm and newer) since these often require additional non-default data that the application cannot provide at this time.
In the Profile Creator tool you can view all the fields that Trinity Creator can export. Aside from those you can also export blank fields and duplicate fields for databases that don't provide default values for unsupported columns.
- Use Google. Maybe someone else has already shared a profile for your emulator & WoW/DB version.
- If you create a working profile, please feel free to add it with a pull request or by opening an issue with the profile file attached.
This is usually "C:\Program Files (x86)\Trinity Creator" unless you chose another install location.
If it's not there and you can't find it, the simplest solution (for me to explain) is to simply uninstall & reinstall the program.
If you don't see a profiles directory, make sure you're on TrinityCreator v1.1 or newer. You may have to update manually.
IMPORTANT: Do not edit an original profile without copying it first. TrinityCreator updates will likely overwrite your changes if you don't copy it.
Instead it's recommended that you copy an original profile and edit that instead, since so many emulators are forks of forks of the original Mangos.
-
Copy a profile: Choose a profile that matches your WoW version - since again, this will most closely match the emulator you want to support.
-
Rename it: Once you've copied the profile, rename the file to "Custom_EmulatorName_112.xml" or something similar. It's recommended to add Custom since otherwise there's a chance I may release a profile with the same name that overwrites it. We obviously don't want that.
Alternatively you can create your own profile and set the value bindings yourself from scratch with the information at the bottom.
All profiles should conform to the following structure:
<?xml version="1.0" encoding="UTF-8"?>
<!-- More info: https://github.com/Nadromar/TrinityCreator/wiki/Adding-Emulator-Support -->
<TrinityCreatorProfile EmulatorName="TrinityCore" DatabaseVersionIdentifier="3.3.5a-64">
	<TrinityItem>
		<Table Name="creature_template">
			<entry>{Id}</entry>
			<Attack_Bonus quotes="false">1.123</Attack_Bonus>
			<Name>This is a string constant</Name>
			...
		</Table>
		<Table Name="creature_template_addon">
			<entry>{Id}</entry>
			...
		</Table>
	</TrinityItem>
	<TrinityQuest>
		<Table Name="quest_template">
			<entry>{Id}</entry>
			...
		</Table>
		...
	</TrinityQuest>
	<TrinityCreature>
		...
	</TrinityCreature>
	<TrinityLoot>
		...
	</TrinityLoot>
	<TrinityVendor>
		...
	</TrinityVendor>
	...
</TrinityCreatorProfile>Let's look at the first lines of that structure and figure out what it all means.
Profile Info
<TrinityCreatorProfile EmulatorName="TrinityCore" DatabaseVersionIdentifier="3.3.5a-64">
This defines the XML file as a TrinityCreator emulator profile.
EmulatorName and DatabaseVersionIdentifier are displayed in the application so you (or another user) know what the profile is for.
You're free to make these values whatever you want, it's only for display purposes.
Duplicate names and DB versions are fine since the application selects the profile based on file name. However duplicate names are not recommended for obvious reasons.
Creator Tab
<TrinityItem> indicates that it will use information from the Item Creator tab.
You don't have to support all the tabs. If a tab is not supported, the user will simply receive an error explaining that this is not implemented yet.
Database Table
<Table Name="creature_template">
Table indicates that all child values will be exported to the database table with the <Table>'s Name.
You can have multiple Tables per TrinityGroup as this is required for some values on most emulators, but it's not required.
IMPORTANT NOTE: The names of TrinityItem, TrinityQuest, etc must remain the same for the profile to work. It's not in reference to your emulator's name but to the class in TrinityCreator it gets it's data from.
User-input values
<entry>{Id}</entry>
<entry> indicates the name of the database column.
{Id} indicates that will use the user-input value corresponding with the value binding that conforms to the key Id.
You can find a list of these value bindings at the bottom of this page.
Constant values
<Attack_Bonus quotes="false">1.123</Attack_Bonus>
Name indicates (once again) the column name in the database.
1.123 indicates the value of your constant. This is useful if your emulator requires a value that's not provided by TrinityCreator and the database doesn't provide a default value.
quotes="false" indicates that the value should be exported to an SQL query as a numeric value rather than a string. By default quotes is implicitly true - so you only have to add this part value is not a string.
Note about constant strings: They will also be cleaned for escape characters. For example "It's sunny outside" would export just fine.
A string constant would look like this: <Name>Every Item Has This Name LOL</Name>
Constants are distinguishable from user-input values by their lack of {}.
This is where the boring data-entry work comes in. I'll explain the approach I usually take.
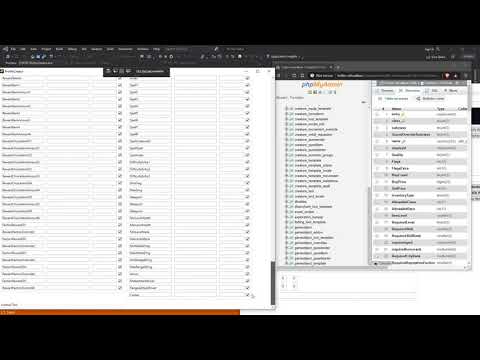
- Open your preferred database editor. I'll use HeidiSQL. But they're all pretty much the same.
2.Connect to your world database.* If you're able to use the program at all, you should know where to find the login info.
- Time for data entry!
Start comparing your copied XML profile to the database structure.
- Columns mighthave slightly different names, try to find them and rename them in the PROFILE (never edit the database structure!)
- Columns might be placed in different tables. if you're doing creatures you might look for tables named
creature_template_addonorcreature_queststarter-- generaly anything withcreature_xxxx - Any values that you can't find should be removed or commented out. Usually they're simply renamed or moved, unless you're on a lower version of WoW.
- You may also have to add values that are not listed in your profile but are listed in the database structure. Look at the Value Bindings below to see if the program has a user-input value for them.
If there is no value binding for them, check the database to see if there's a default value. This is usually the case since there are many irrelevant or implied values. If this is the case, you don't need to include them in your profile.
And finally:
- Test often.
You will need to restart TrinityCreator when you first create your profile before it shows up.
After that it will load up the profile every time you try to export. So you won't need to restart Trinity Creator every time, just save the profile & export.
You can simply export empty quests/items/etc (preferably on a world DB you don't care about) and see which errors you get.
You'll usually get useful information from any errors about which columns "don't exist" so you know which columns to look for (or remove if you're feeling lazy)
This is a list of value binding keys and the way they're described in the application.
If the meaning of a value is unclear, find the equivalent for your emulator through the TrinityCore Wiki. Usually the value binding name matches the column name on the wiki
Note that these are not case-sensitive. However I'll be writing them down as they were originally copied from the TrinityCore database.
{EntryId} Called entry or id depending on the emulator/table
{Name}
{Quote} also called Description
{Class}
{ItemSubClass}
{DisplayId}
{Quality}
{Binds} also called bonding
{MinLevel} also called RequiredLevel
{MaxAllowed} also called maxcount
{AllowableClass} outputs the bitmask value
{AllowableRace} same here
{ValueBuy} in copper
{ValueSell} in copper
{InventoryType} non-equipable, armor, shield, bag, etc...
{Material} outputs the material Id
{Sheath}
{Flags} Outputs the bitmask value
{BuyCount}
{Stackable}
{ContainerSlots}
{MinDamage}
{MaxDamage}
{DamageType}
dmg_xxxxx may also exist but is not supported by TrinityCreator. This will need to be added manually
{Delay} weapon delay in MS
{MaxDurability}
{ItemLevel}
{Brmor}
{Block}
{BagFamily}
{socketBonus}
{FlagsExtra} outputs bitmask value
{StatsCount}
{ItemLevel} 3.3.5a+ item level
Gems (Dynamic Data Control)
<DDC keyPrefix="socketColor_" valuePrefix="socketContent_">{GemSockets}</DDC>
This will output tables like so: socketColor_1, socketContent_1, socketColor_2, ...
Stats (Dynamic Data Control)
<DDC keyPrefix="stat_type" valuePrefix="stat_type">{Stats}</DDC>
Resistance (Dynamic Data Control)
<DDC type="description" keyPrefix="stat_type" key valuePrefix="stat_type">{Resistances}</DDC> ??? wat... good night