In this lab, we'll explore how to provide internet connectivity to EC2 instances in a private subnet using Network Address Translation (NAT). We'll set up a VPC with a public and private subnet. The public subnet will house a bastion host, while the private subnet will contain an AppServer.
To demonstrate how NAT works, we'll SSH into the bastion host and then SSH into the app server, even though the app server resides in a private subnet.
Before we begin, please create the following:
- VPC: Create a VPC with a public and private subnet in different Availability Zones.
- EC2 Instances:
- Bastion Host: Launch an EC2 instance in the public subnet with a public IP address. Use an Amazon Linux 2023 AMI and a t2.micro instance type.
- App Server: Launch an EC2 instance in the private subnet. Use the same key pair as the bastion host and the same AMI and instance type.
Note: We'll configure NAT Gateway and NAT Instance later in the lab. For now, don't create them.
Once you've completed these steps, we'll proceed with the lab.
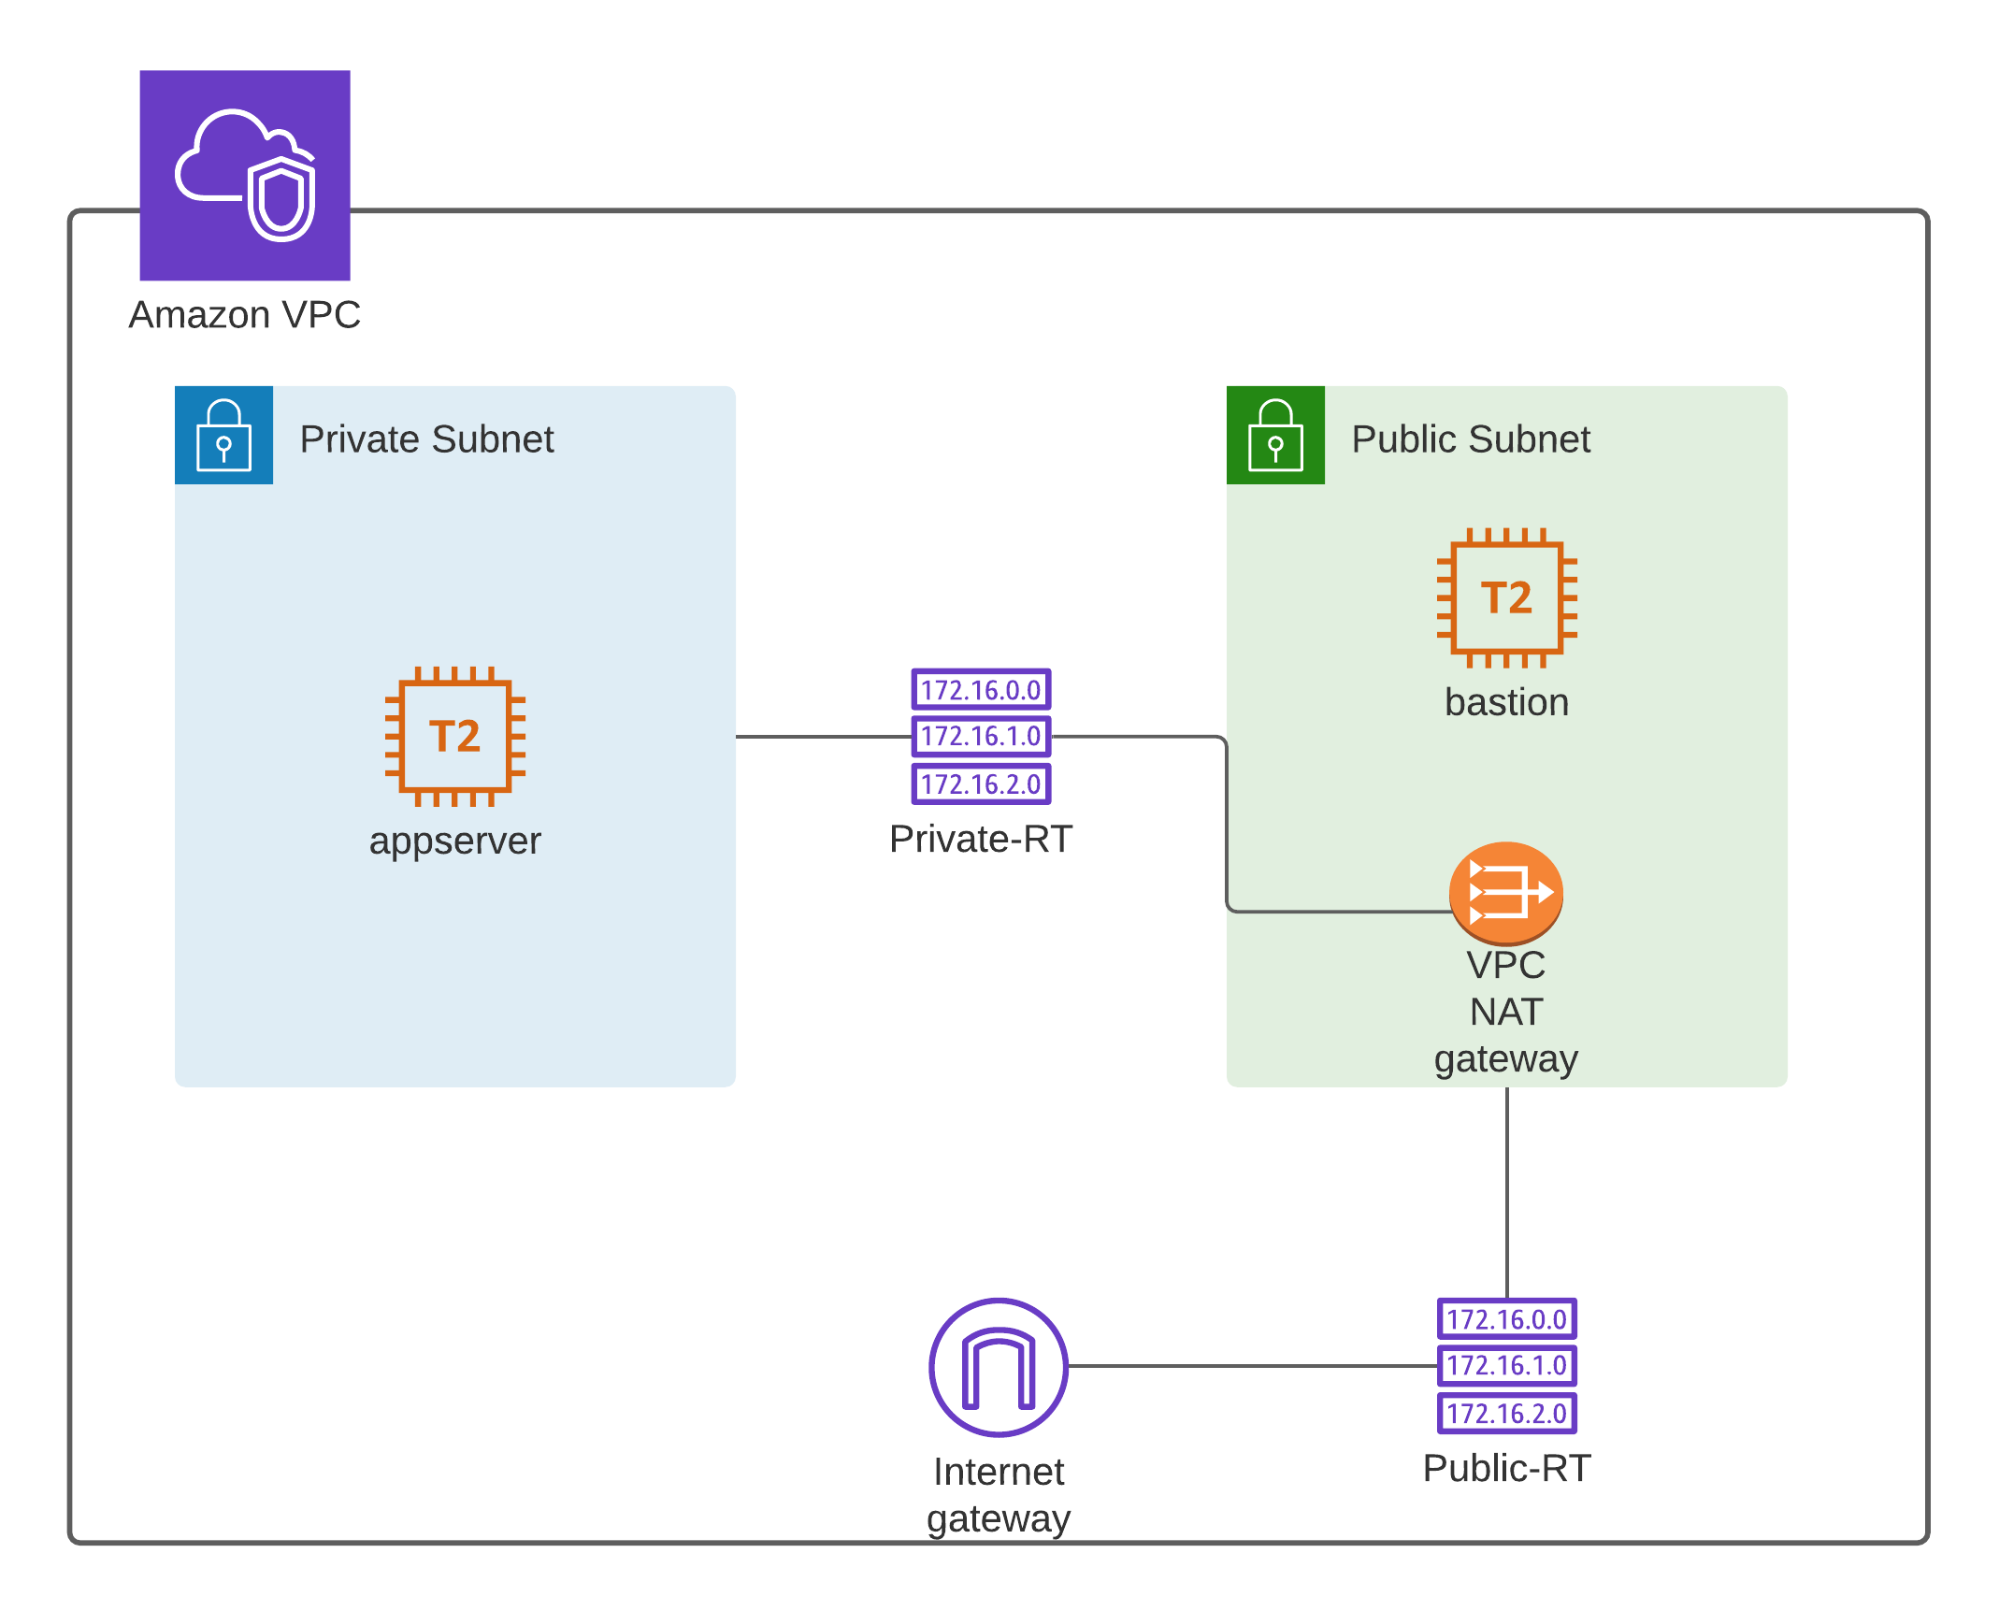
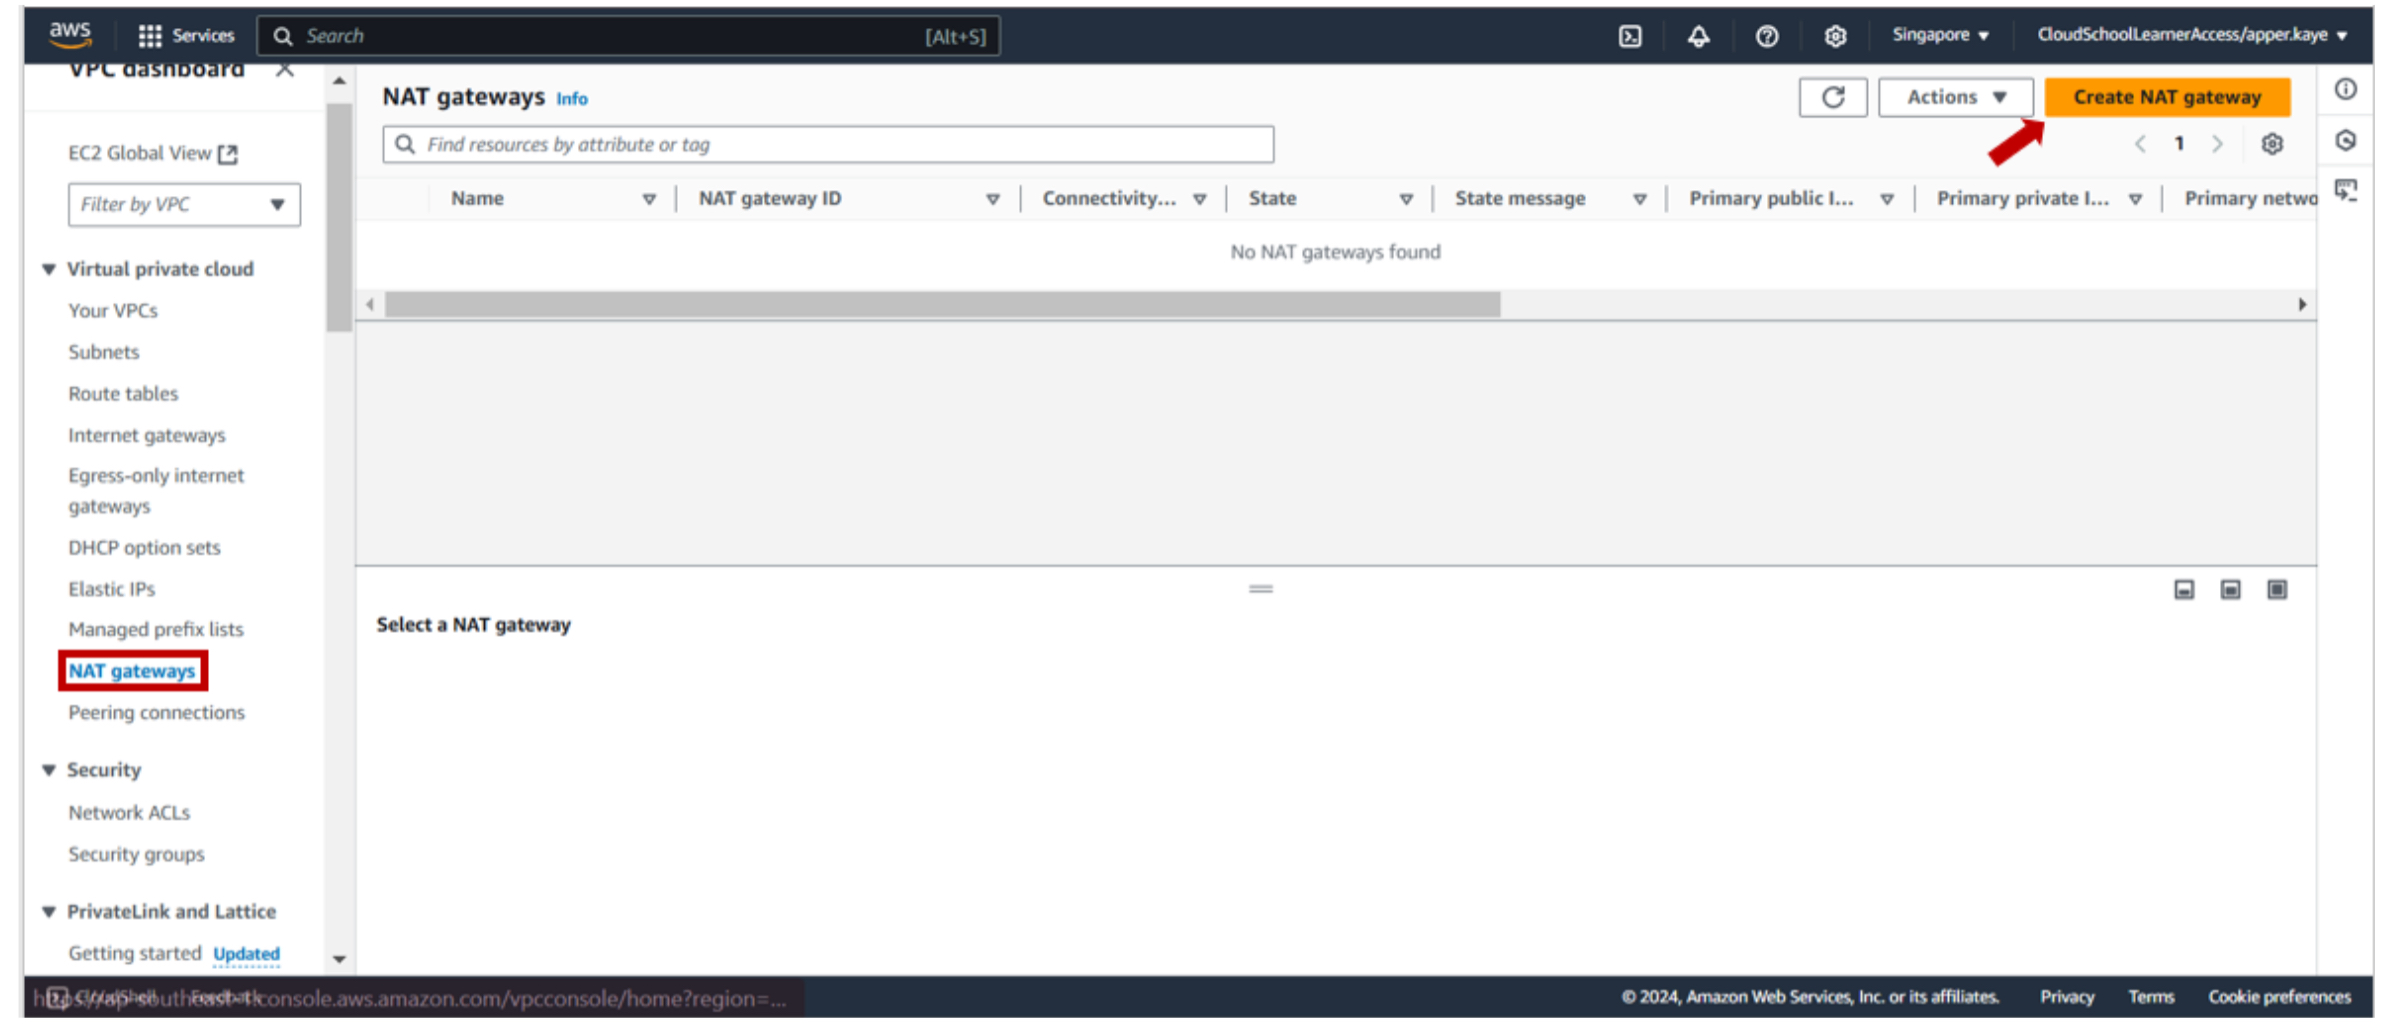
1-a. Navigate to the VPC dashboard. Under the NAT Gateways section, click the Create NAT Gateway button.
1-b. To ensure proper functionality, place the NAT Gateway within a public subnet. Select the desired public subnet from your VPC. Additionally, allocate an Elastic IP address.
An Elastic IP is a static IP address, guaranteeing that it remains unchanged even if you stop and start your EC2 instance.
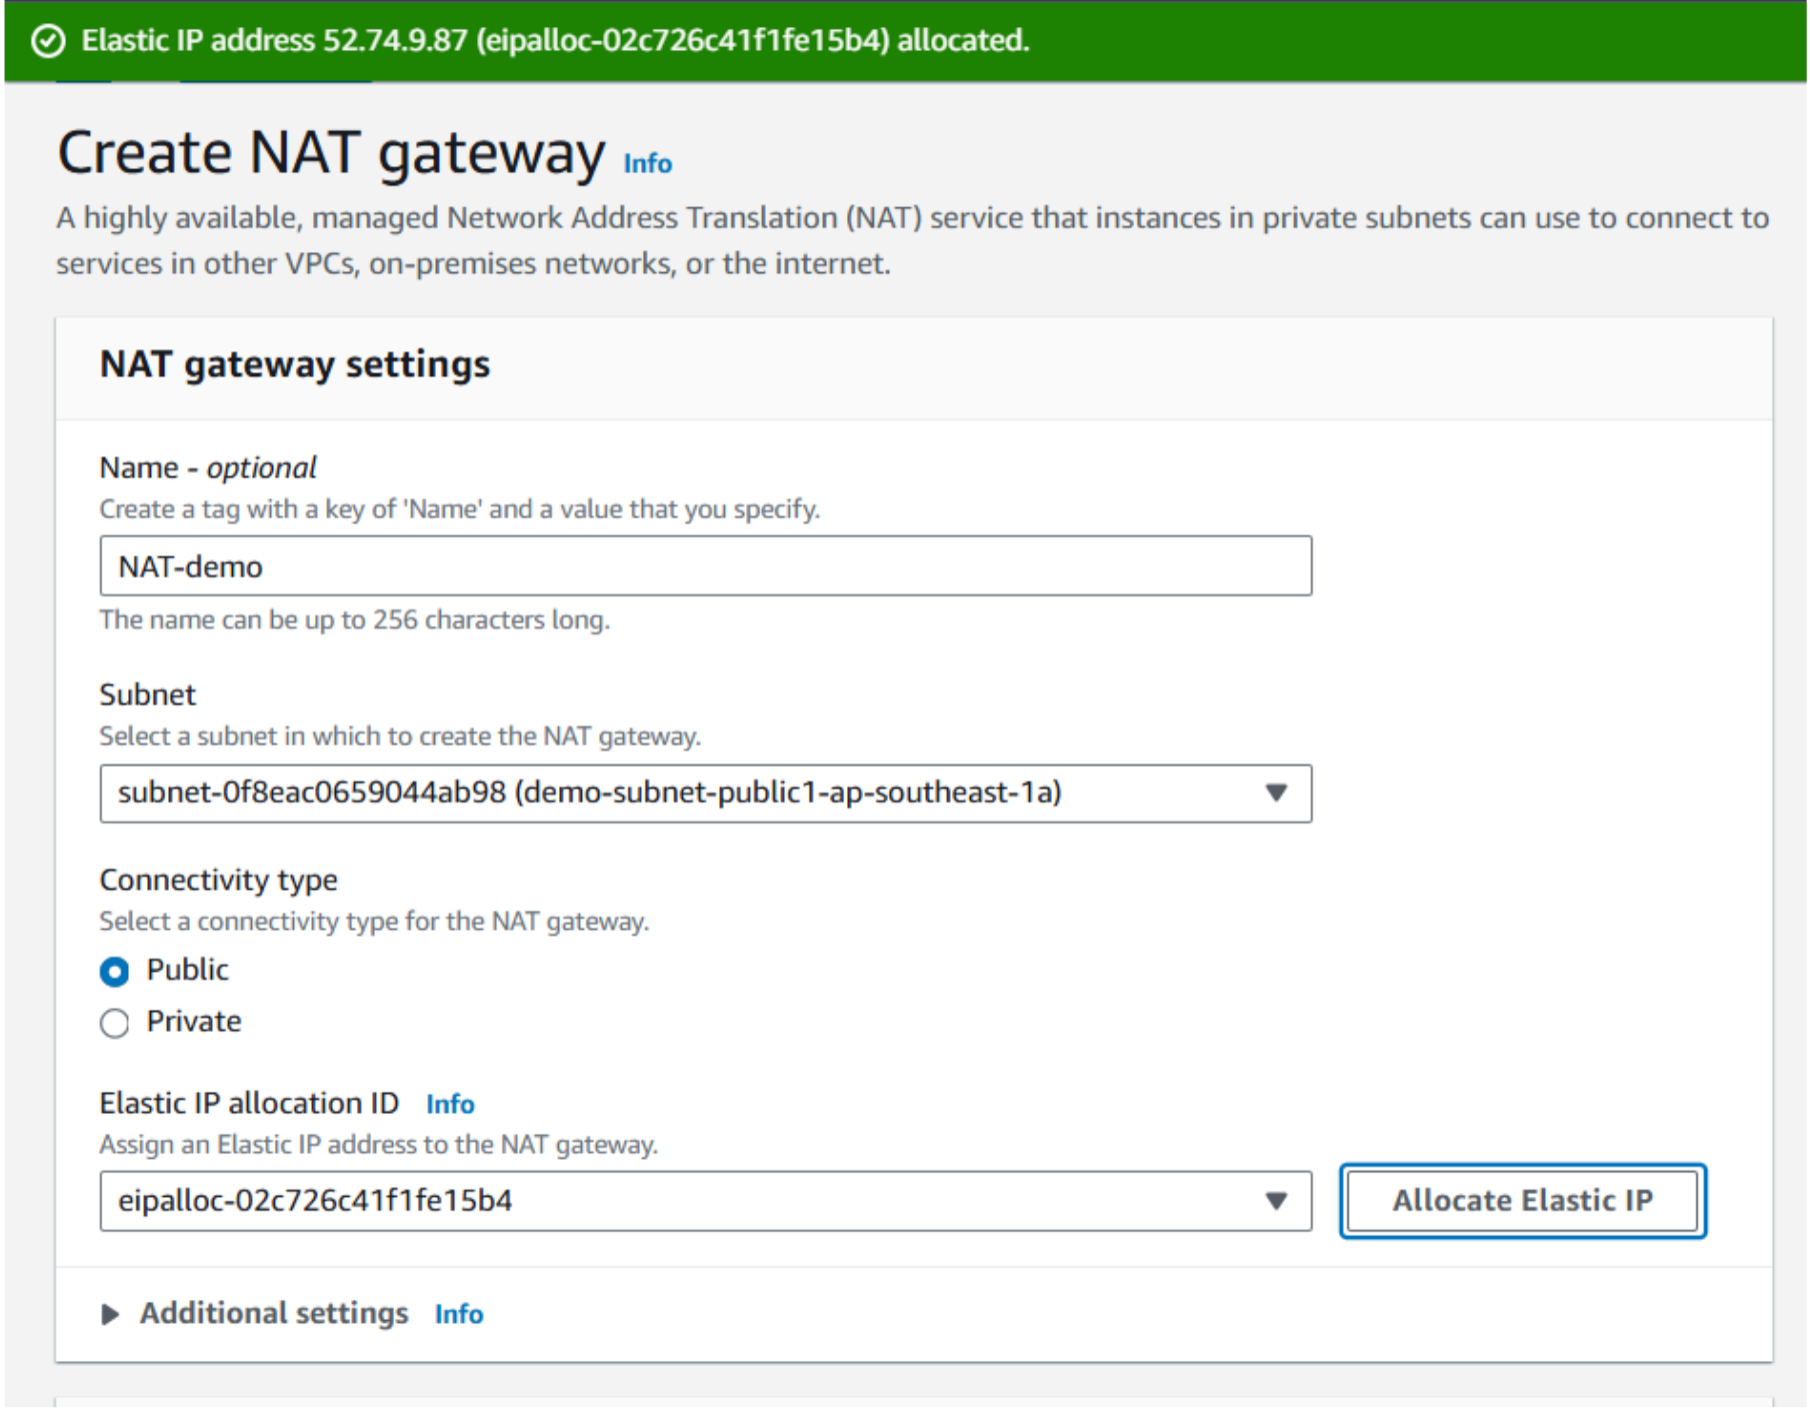
- Click Create NAT Gateway. Update private route table.
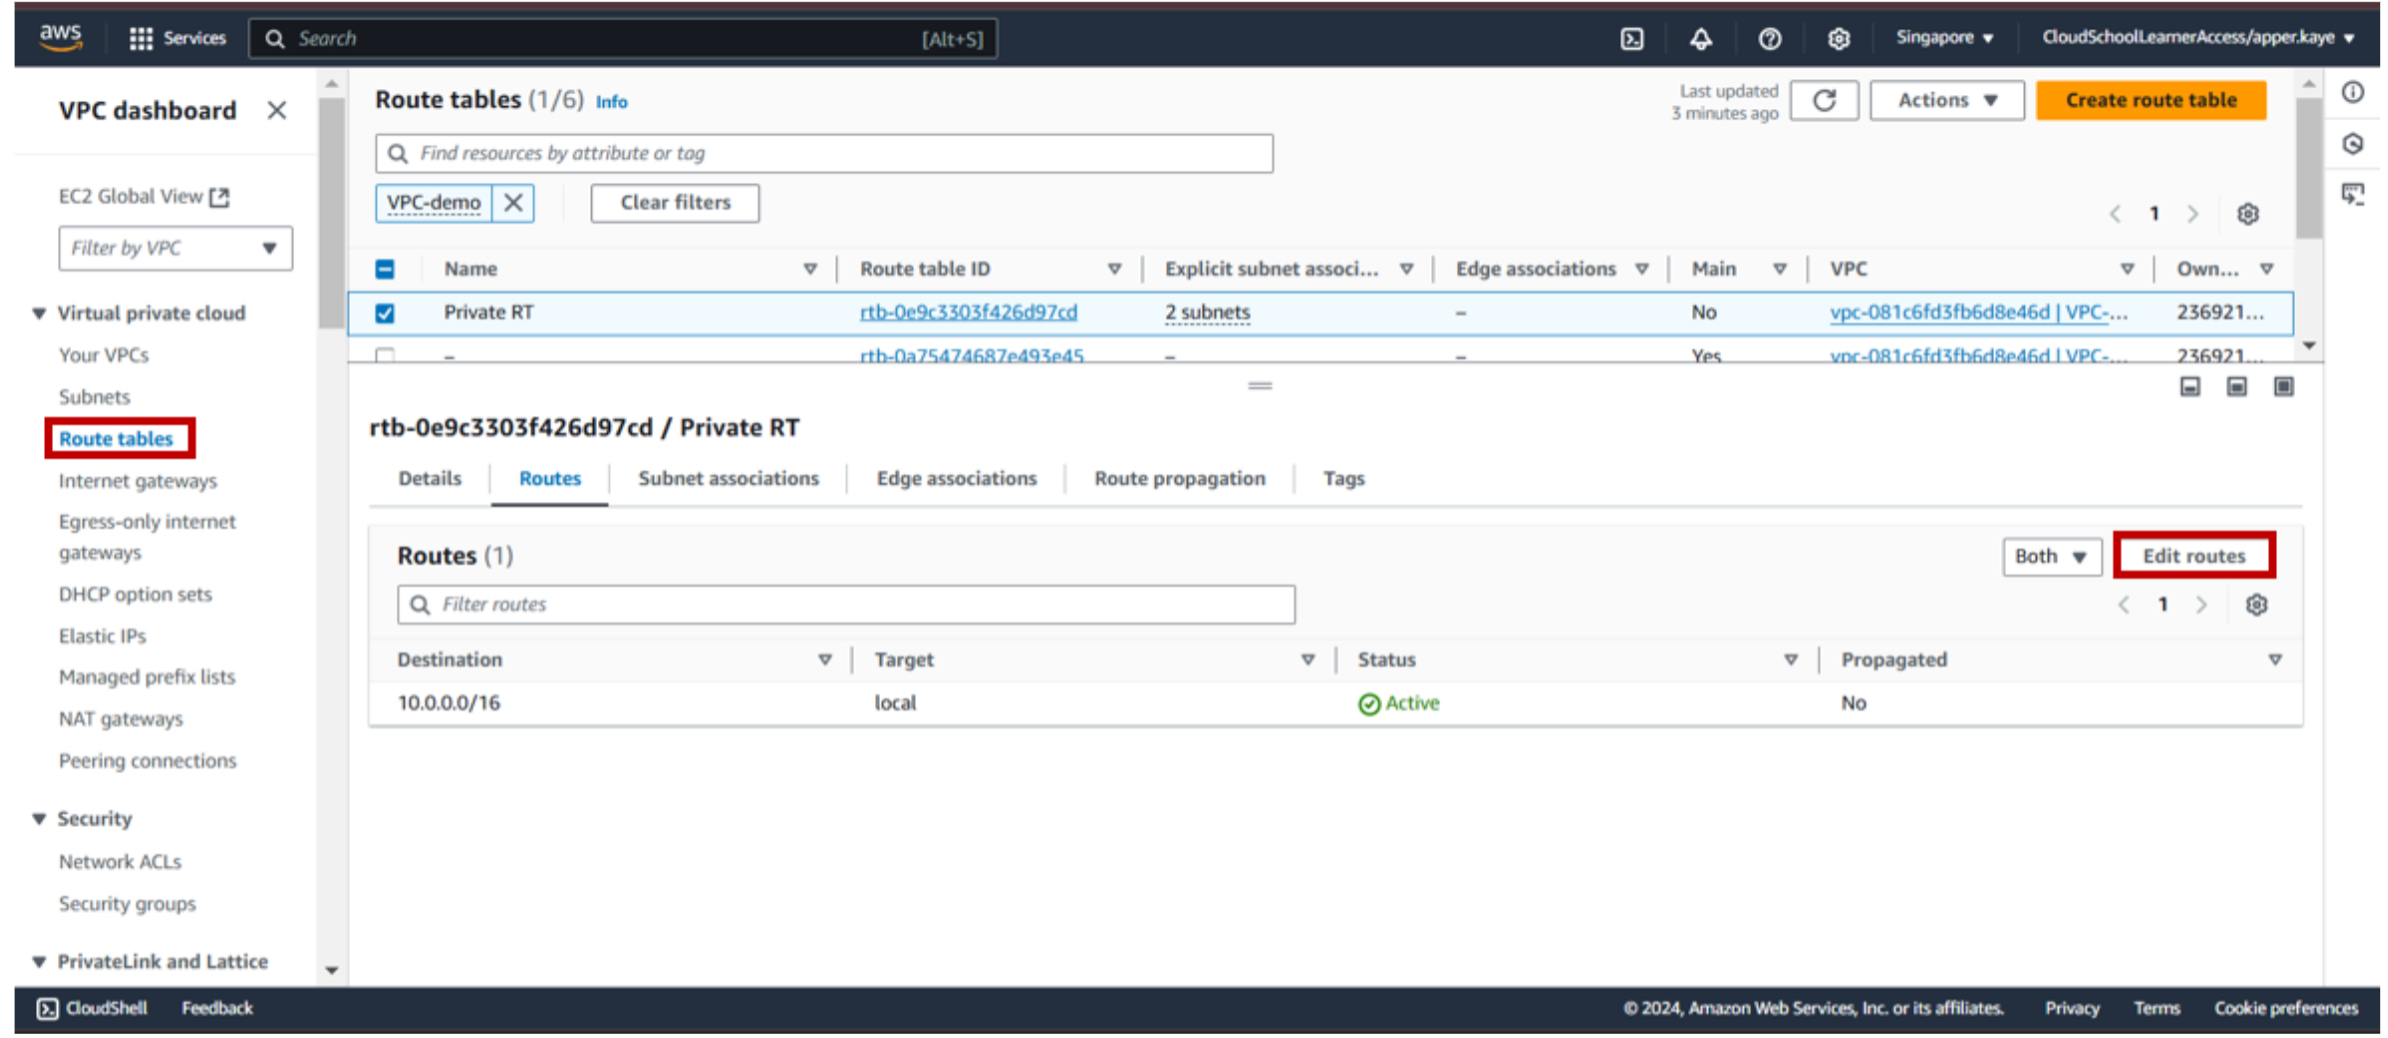
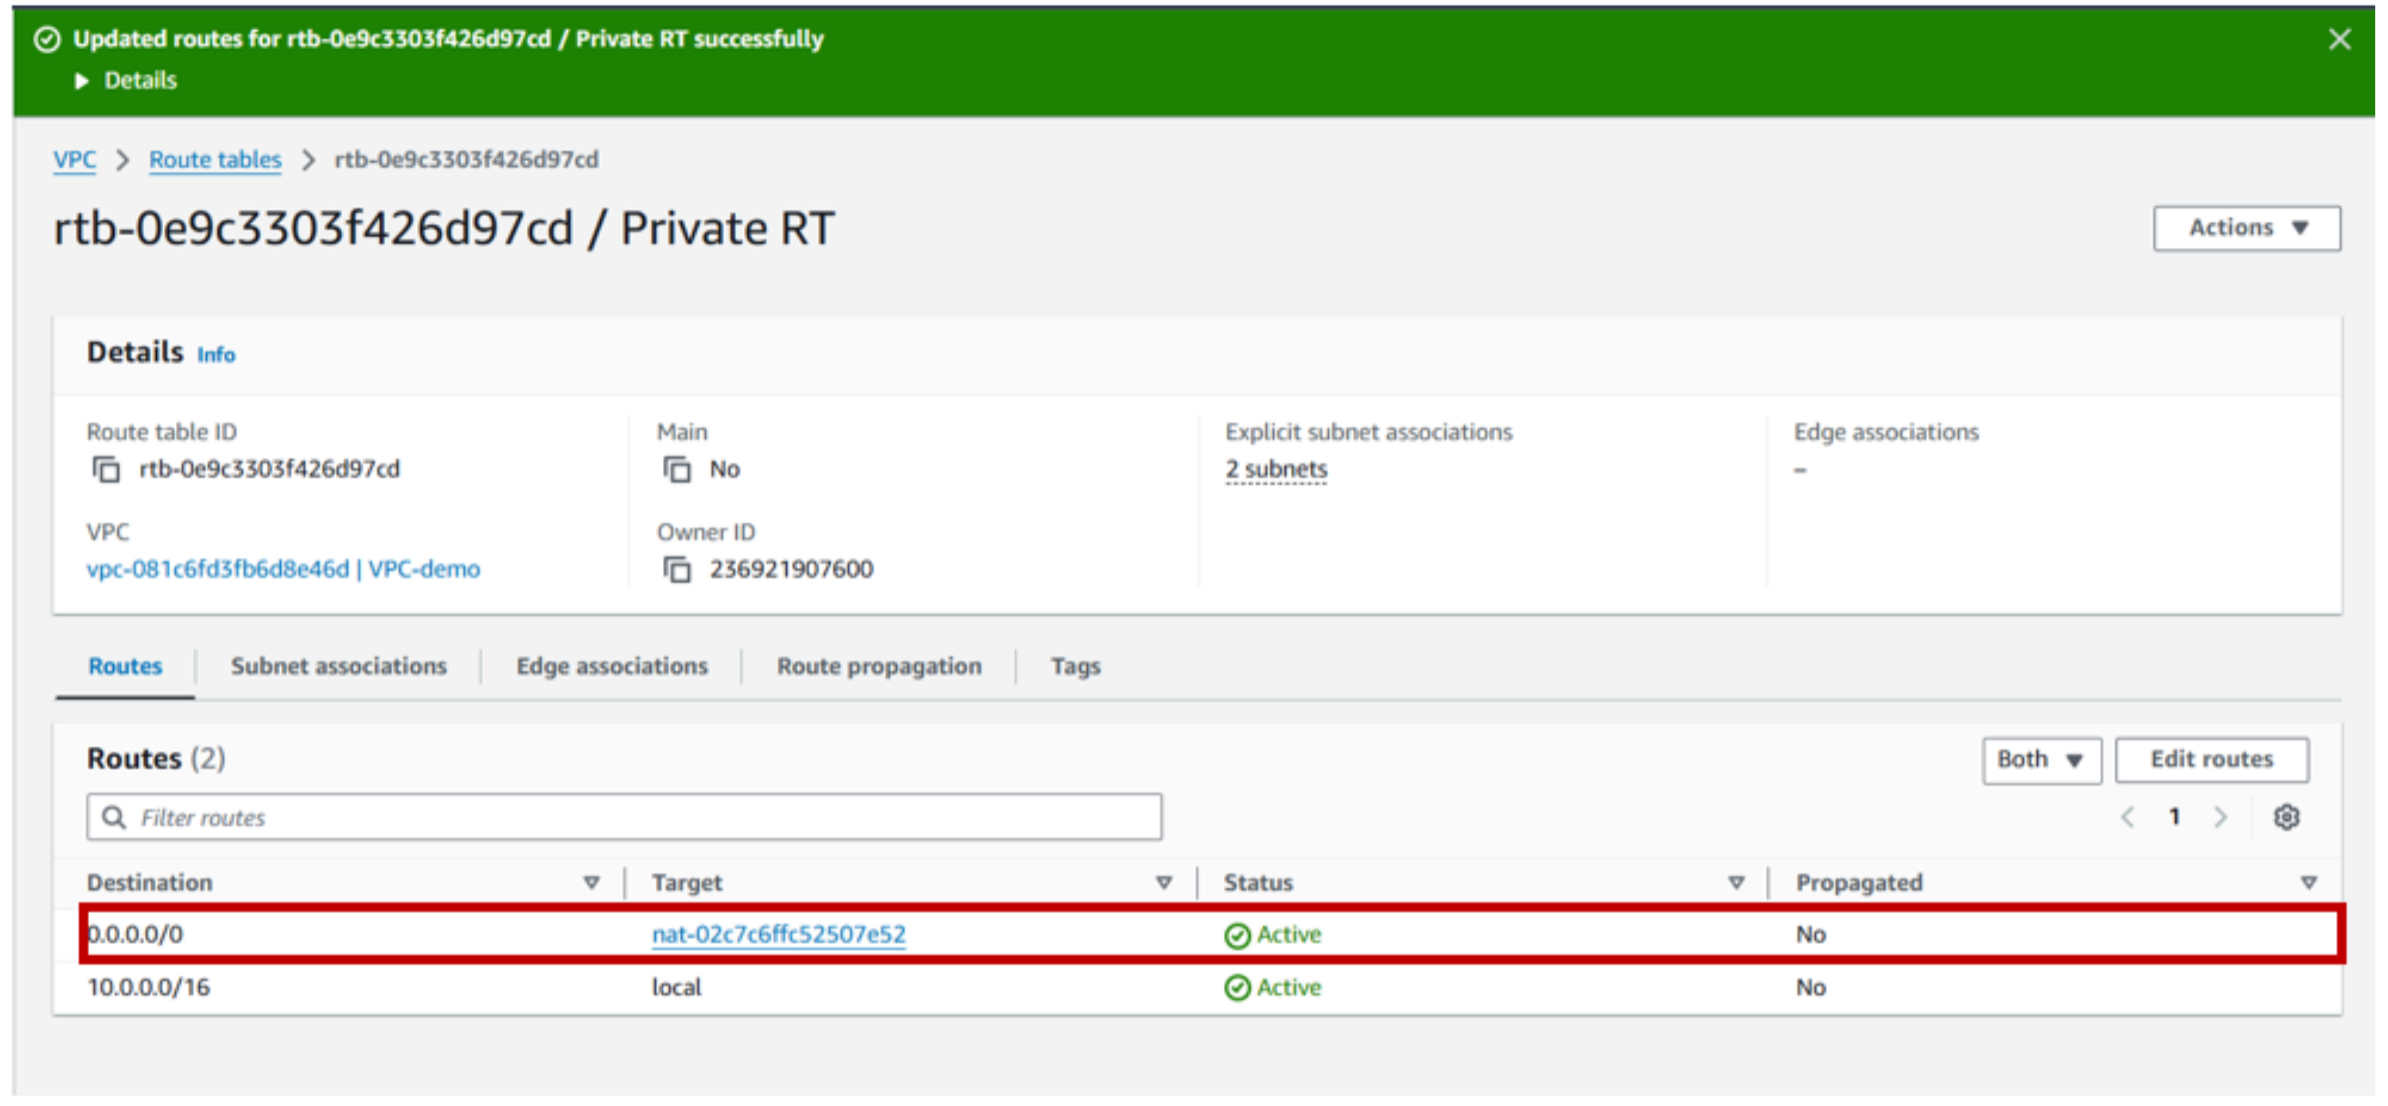
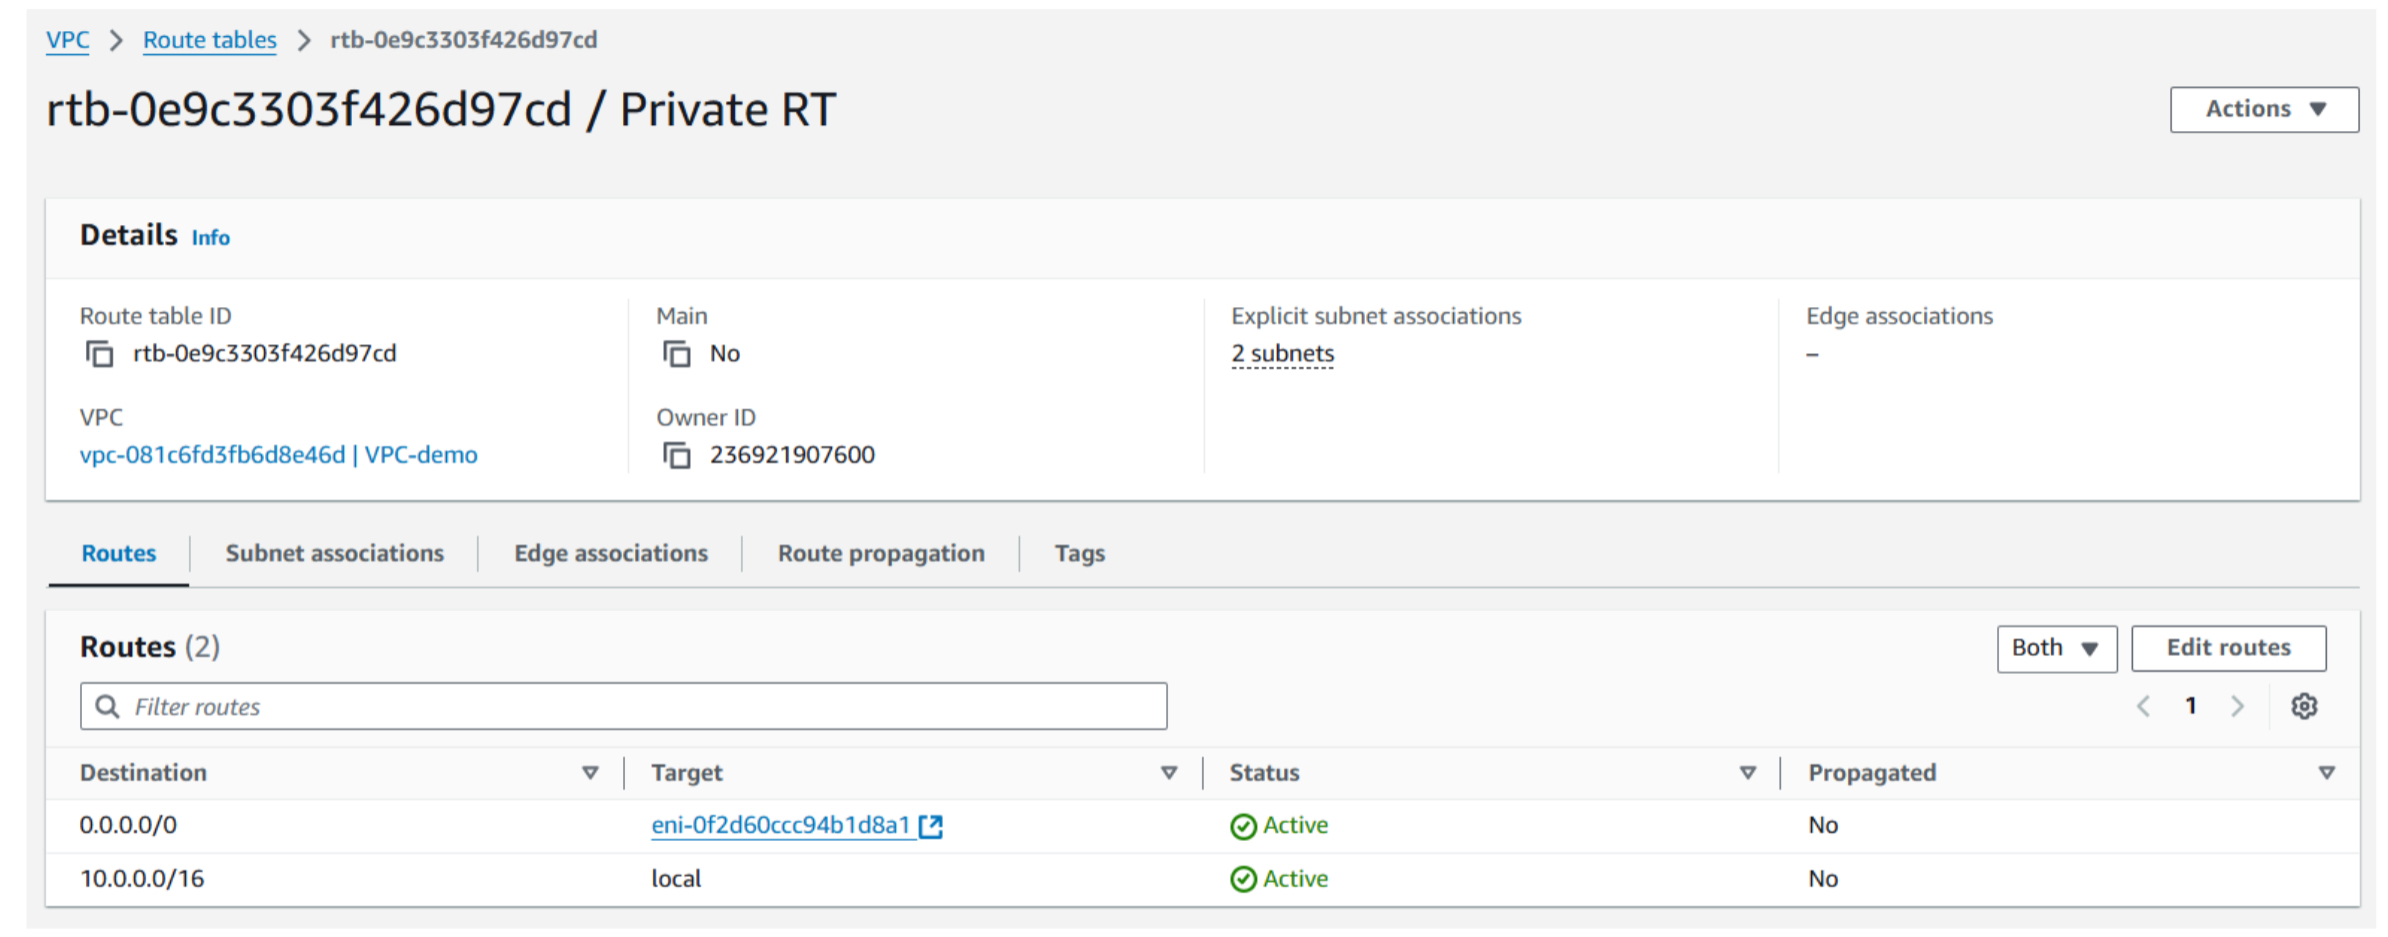
2-a. To enable internet access for instances in the private subnet, modify the private route table. You can do this by navigating through the VPC dashboard and selecting the Route Tables. After clicking on the private route table, Edit routes. Add a new route with a destination CIDR block of 0.0.0.0/0, directing traffic towards the NAT Gateway.
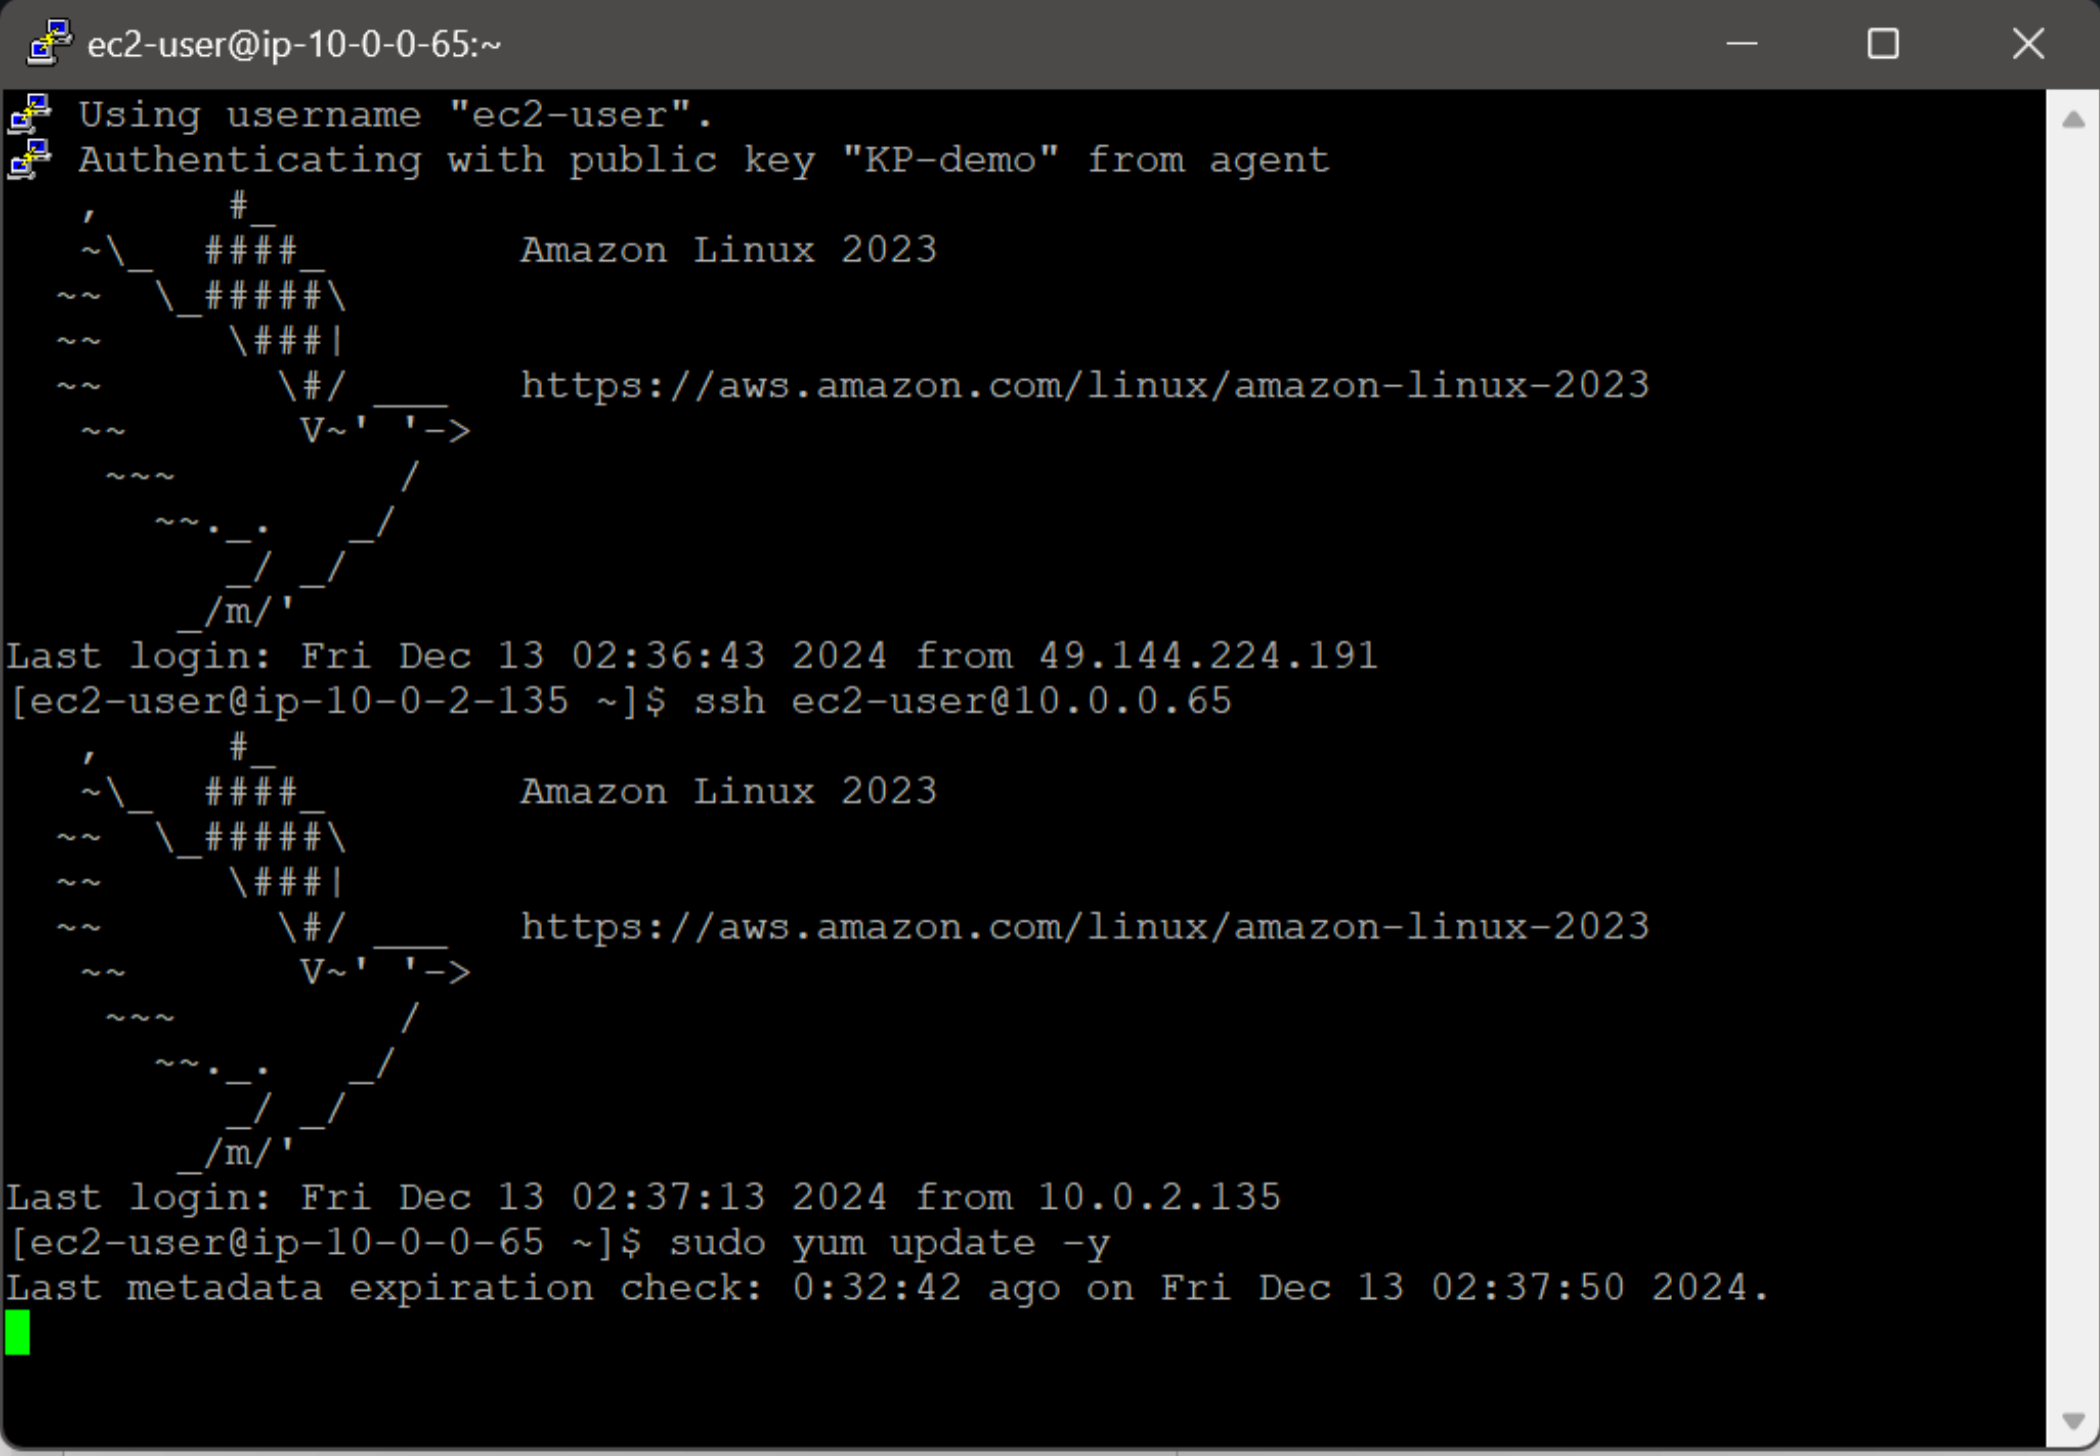
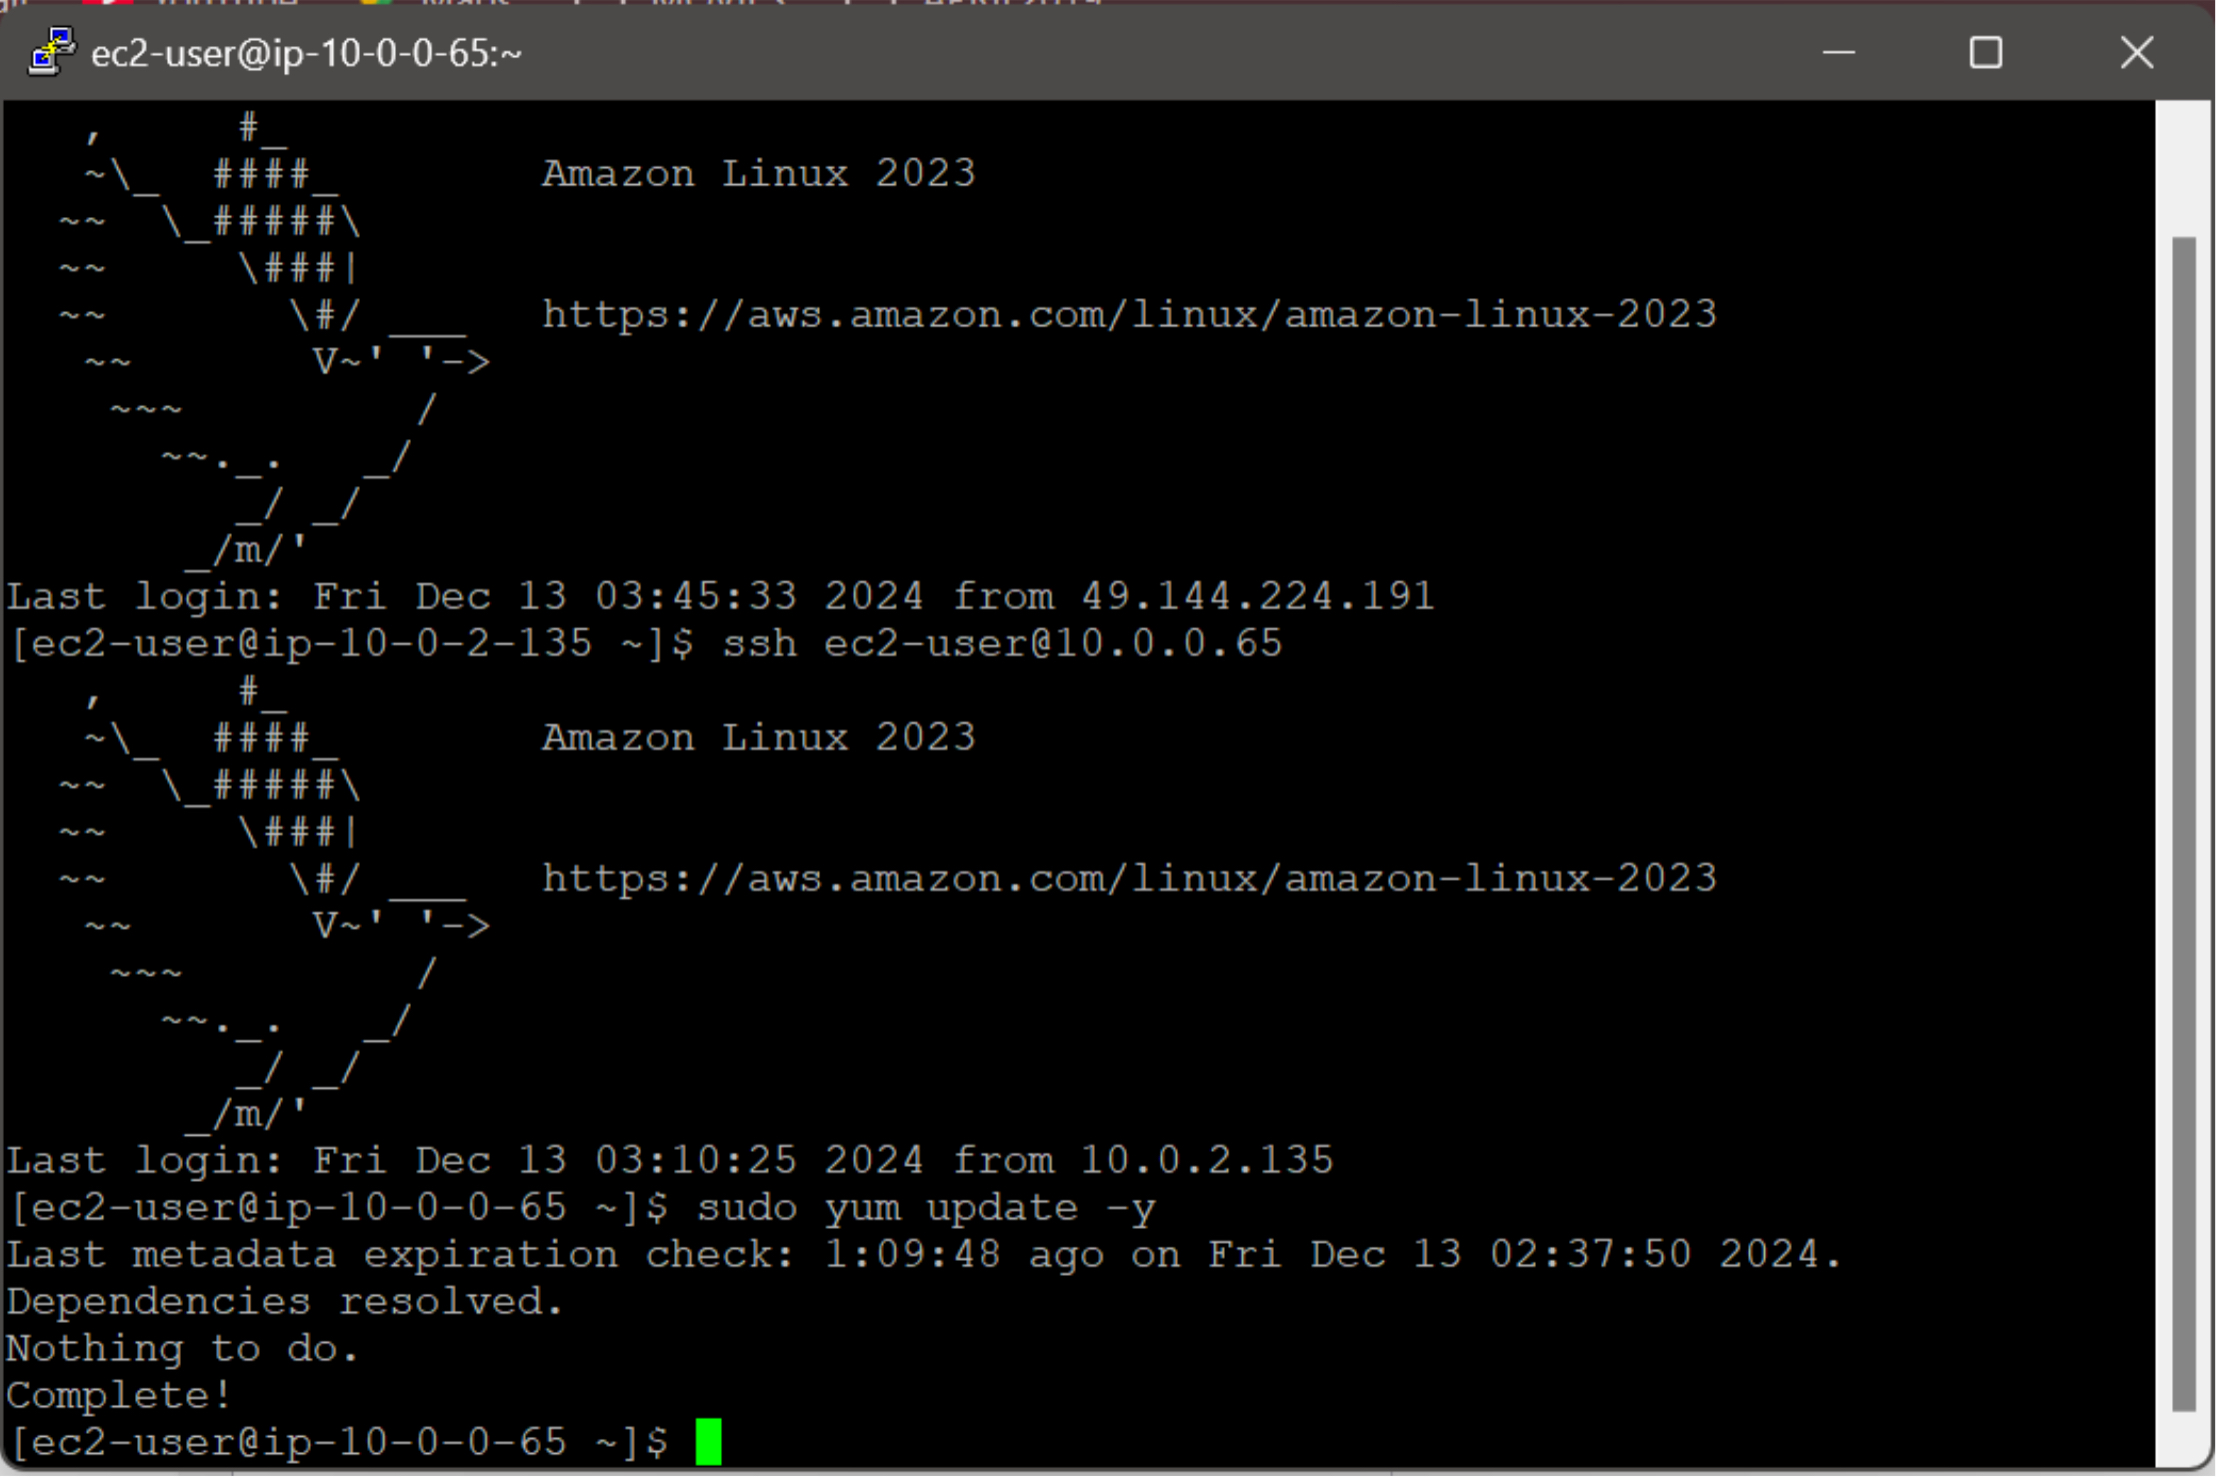
3-a. To securely access the application server, establish an SSH tunnel through the bastion EC2 instance using SSH forwarding.
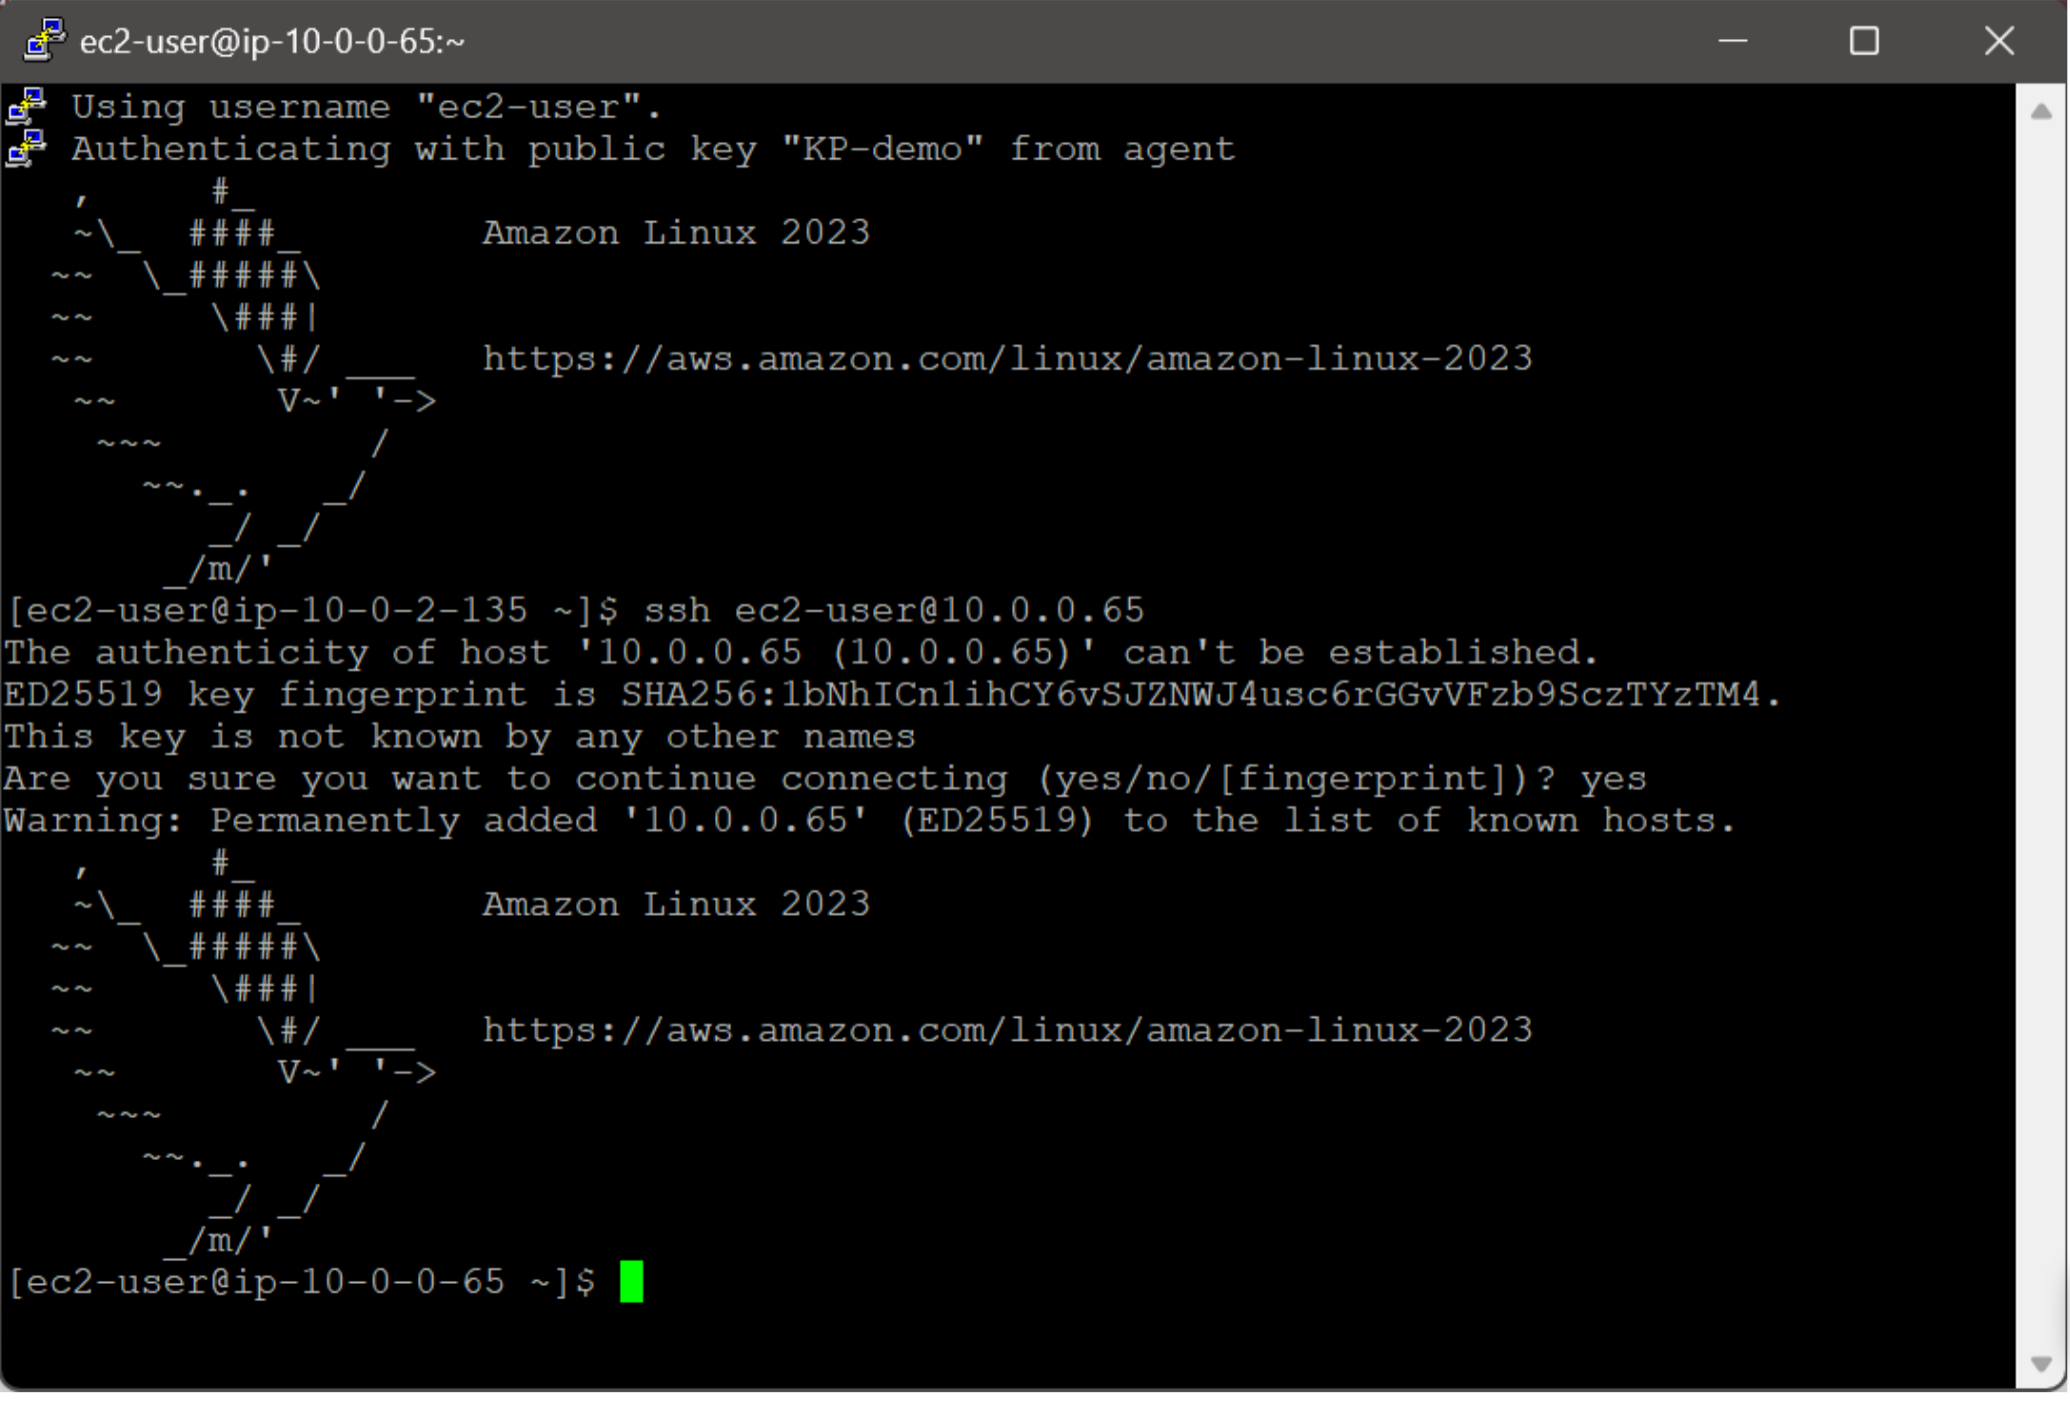
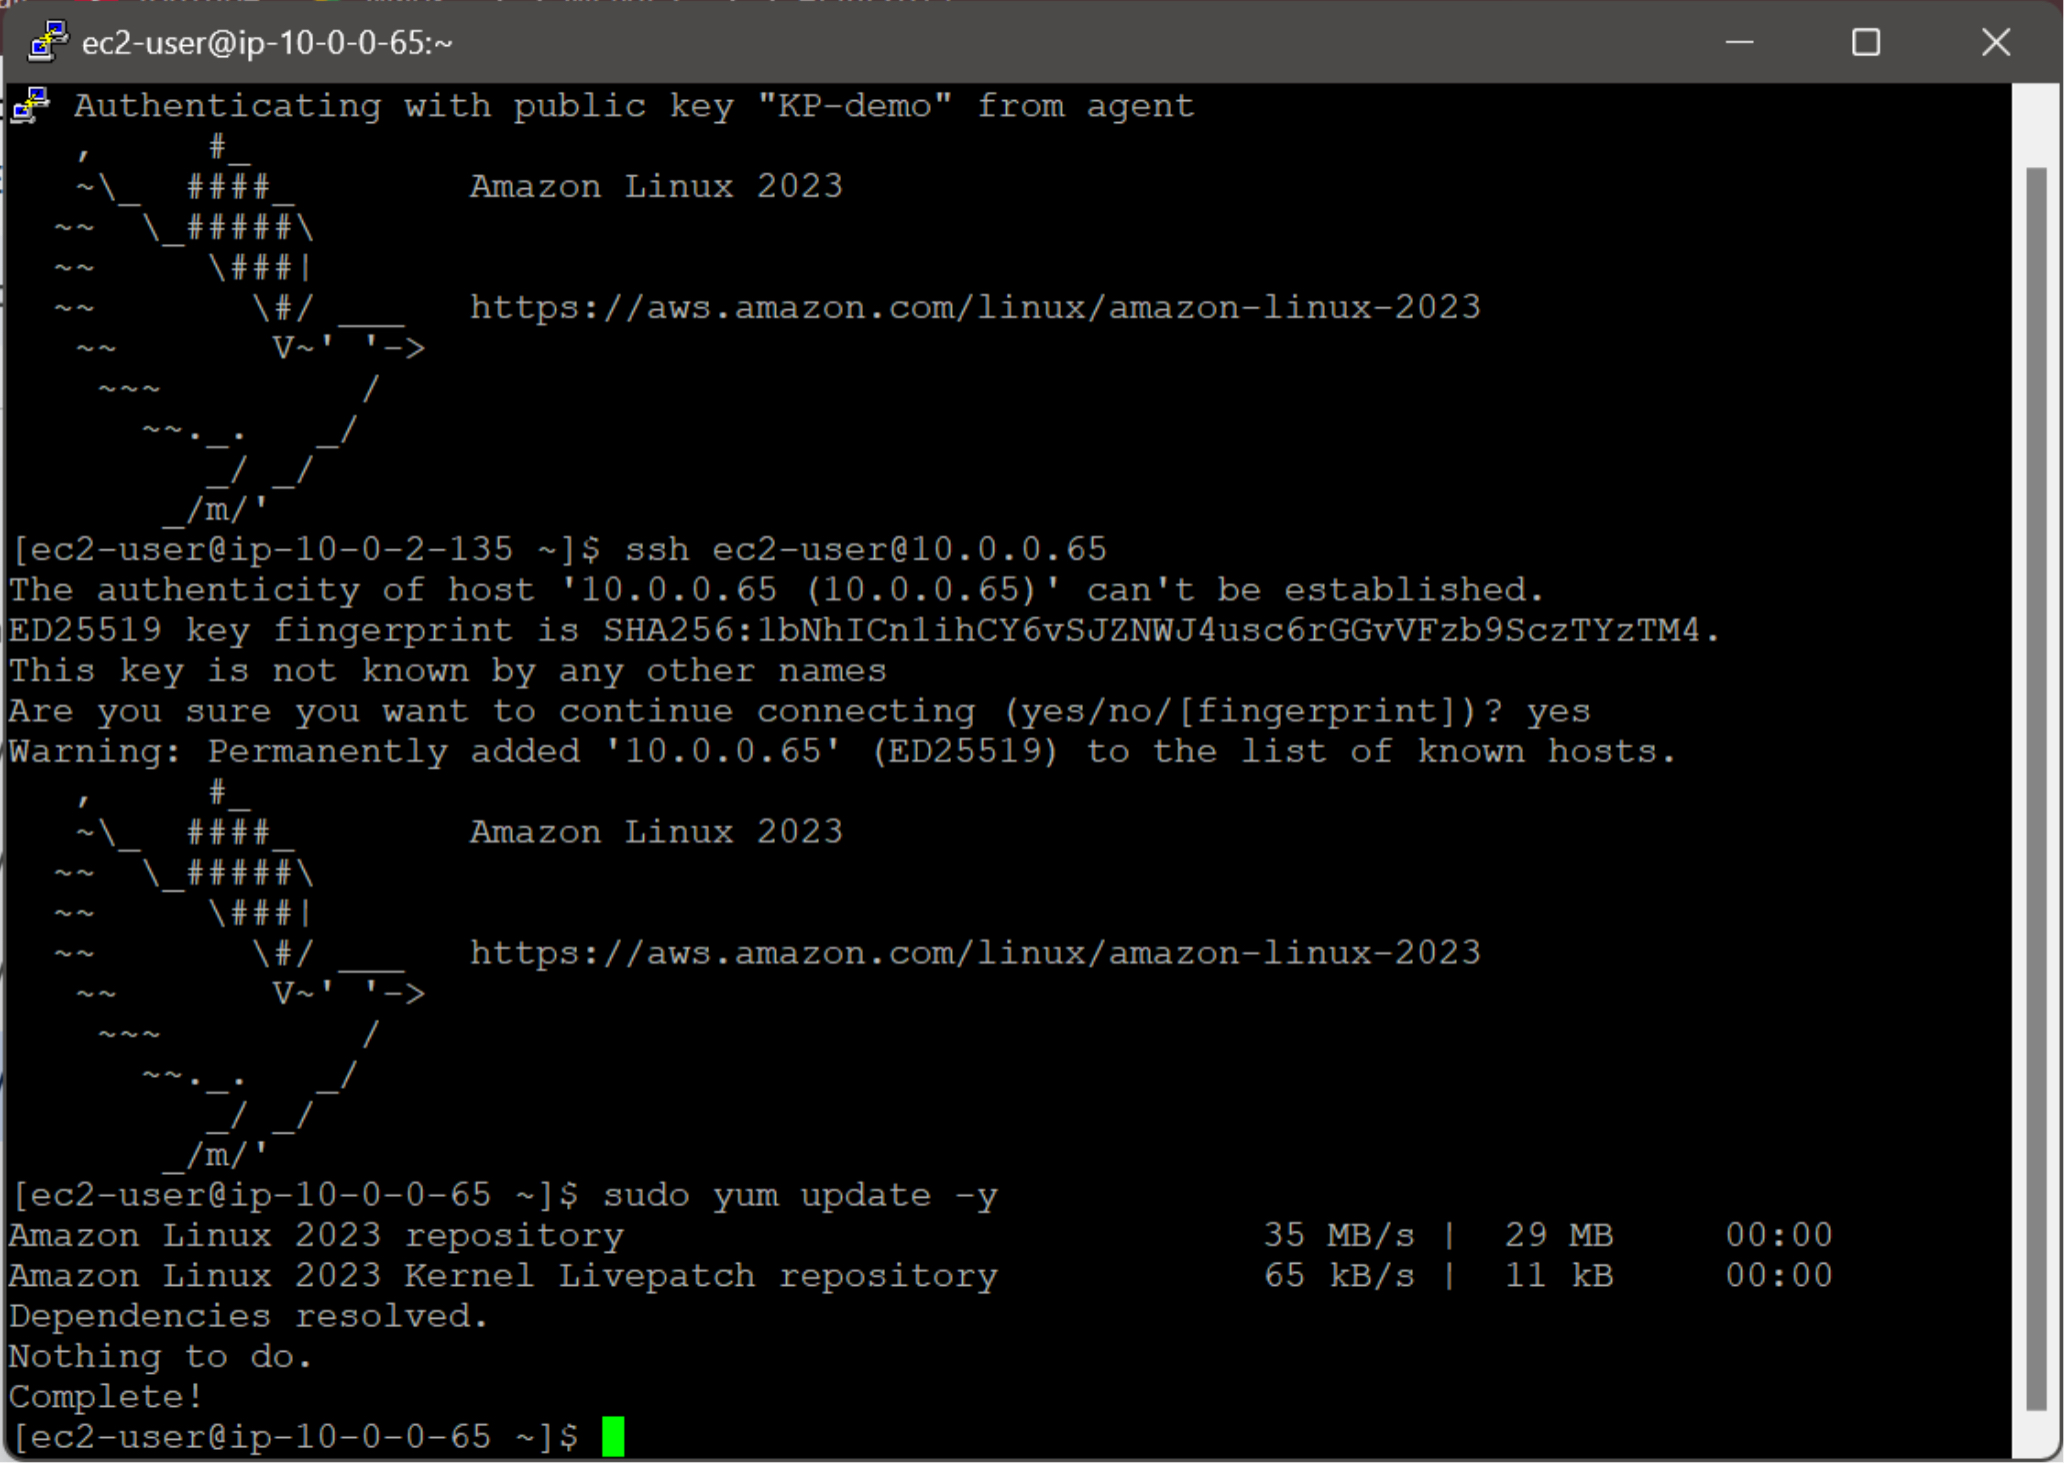
3-b. To ensure the application server is up-to-date, execute the following command to update all packages:
sudo yum update -y
To acquire the necessary updates, the application server will initiate a connection to the internet. This successful connection indicates that the NAT Gateway has been configured correctly, enabling outbound internet traffic.
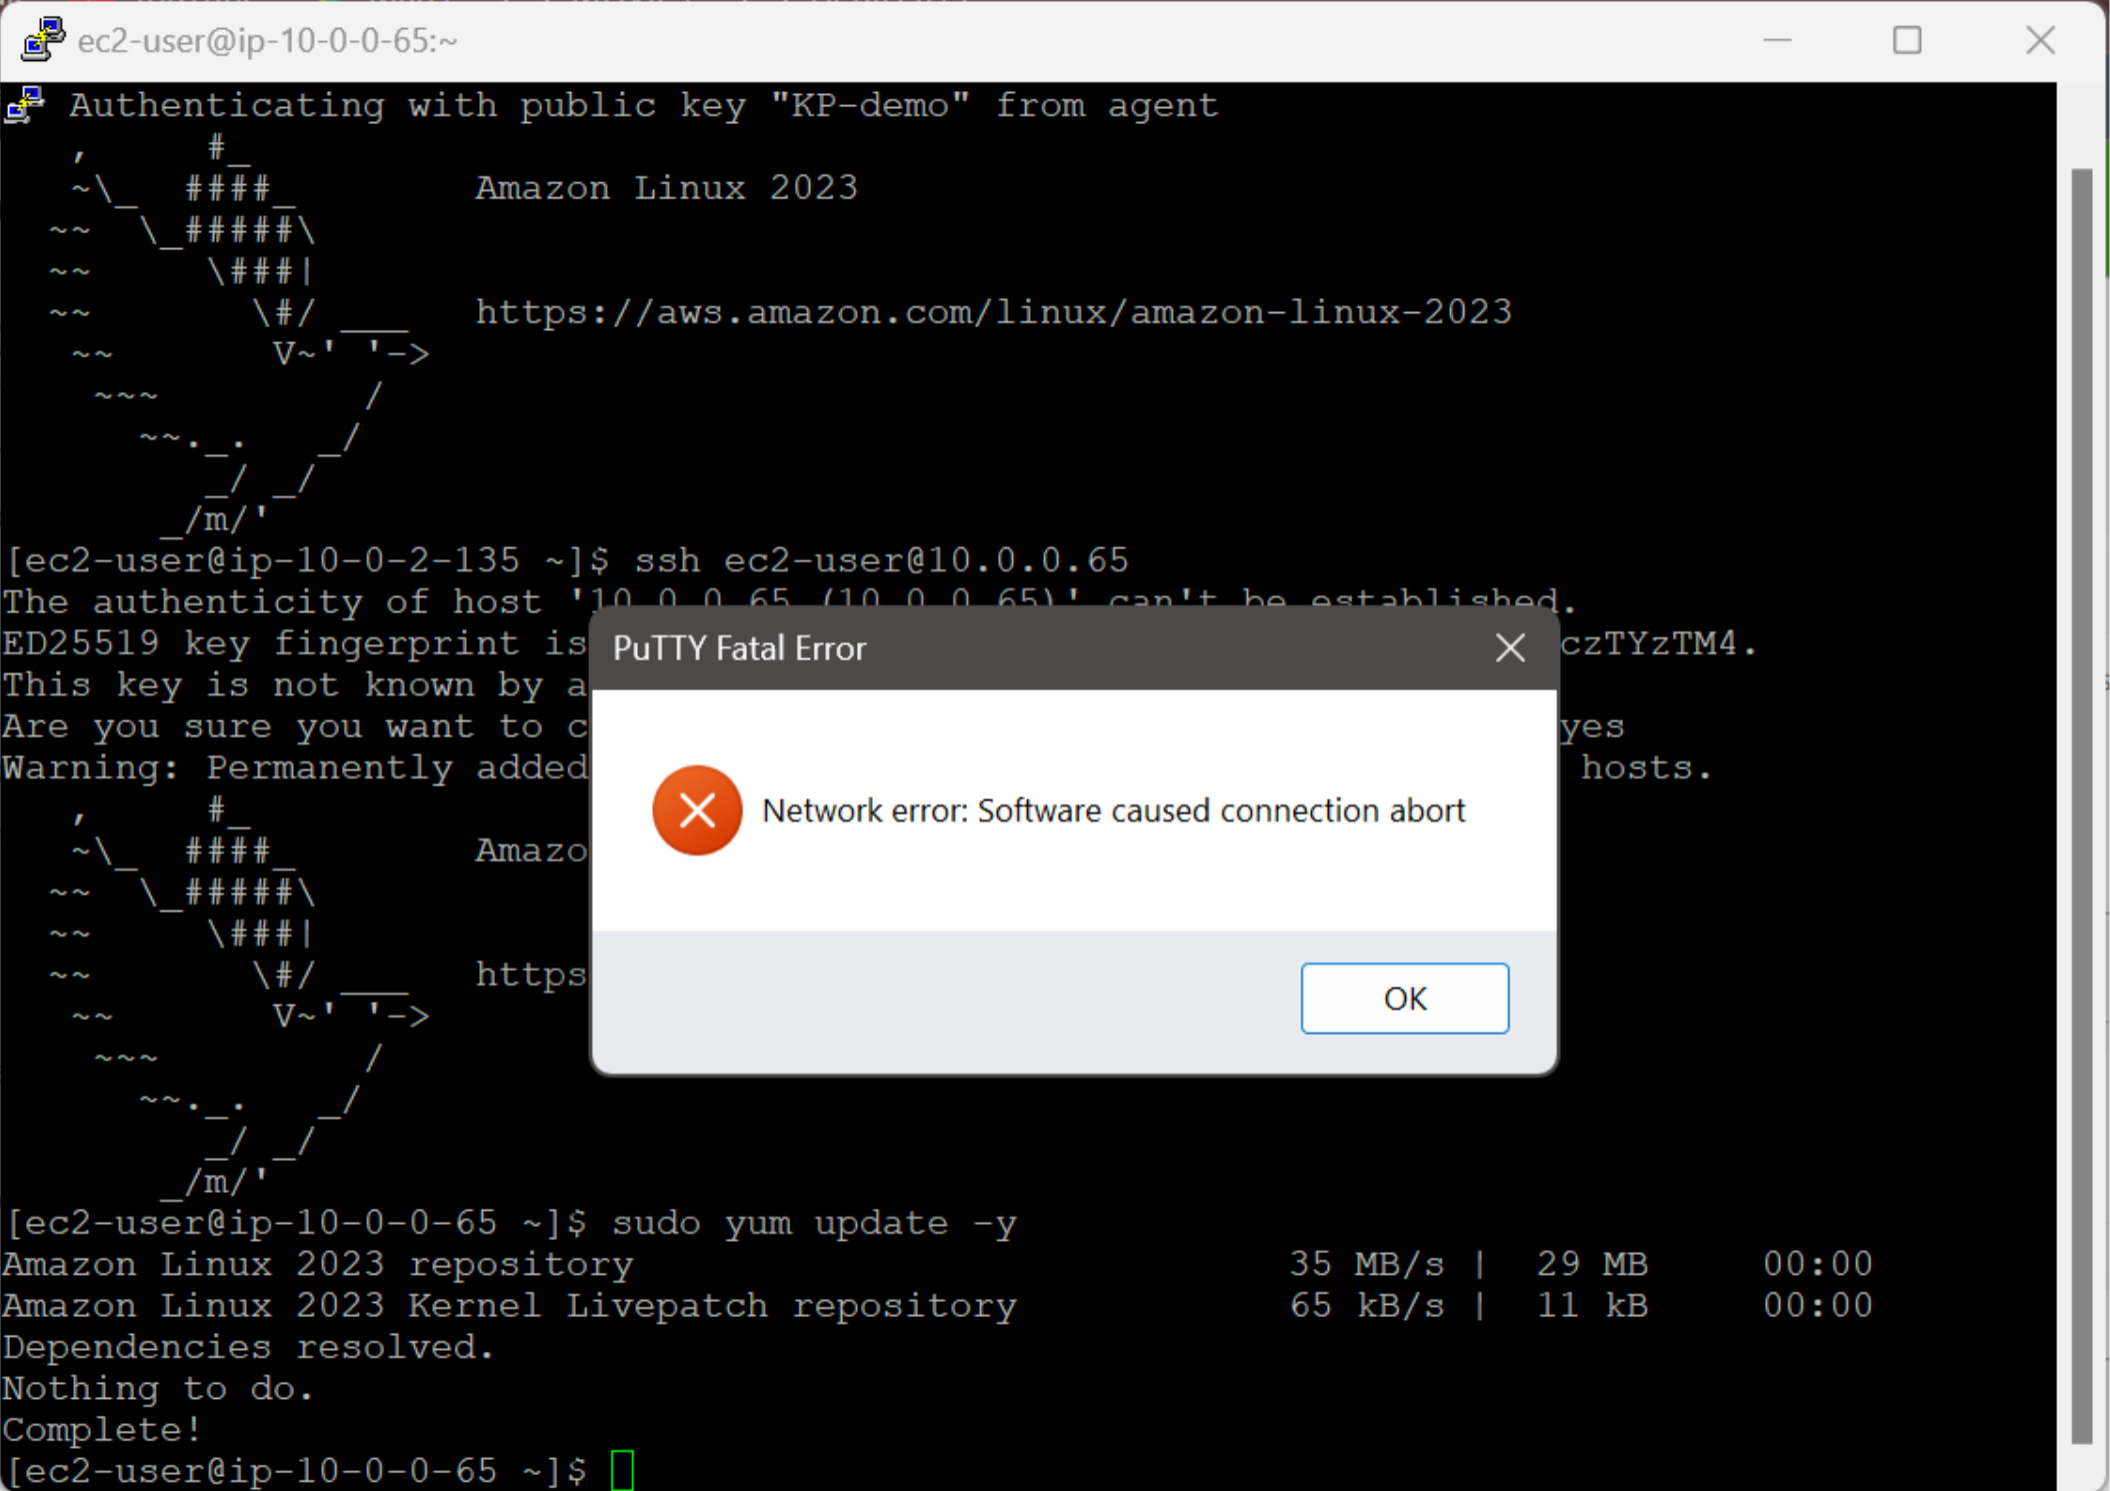
3-c. To assess the impact of removing the NAT Gateway route, modify the private route table and delete the route that directs traffic to the NAT Gateway. Monitor the behavior of instances in the private subnet to determine if they can still access the internet.

3-d. To attempt another update, execute the following command on the application server: sudo yum update -y
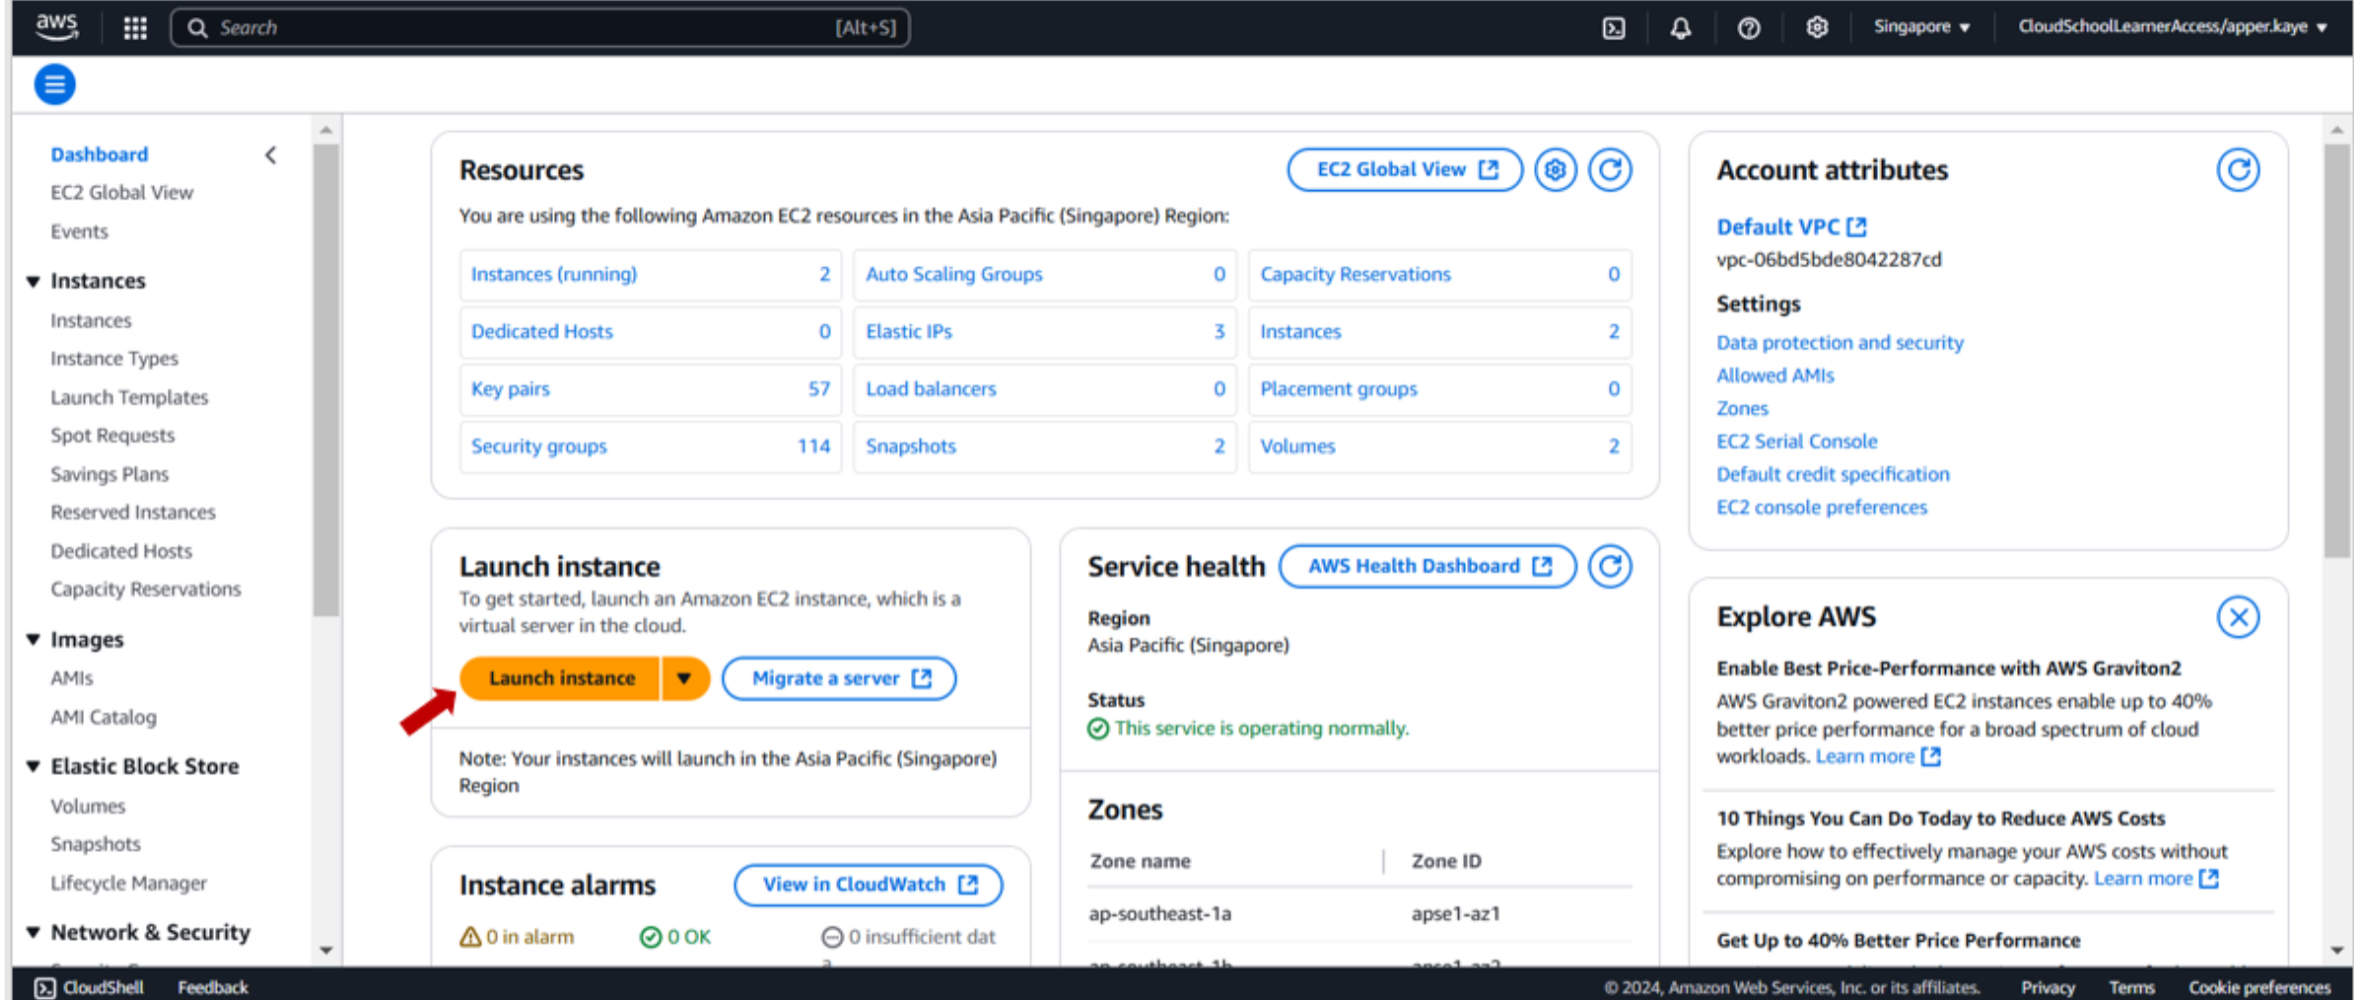
4-a. To demonstrate the functionality of a NAT Instance, navigate to the EC2 dashboard and launch a new EC2 instance. This instance will serve as a NAT Instance.
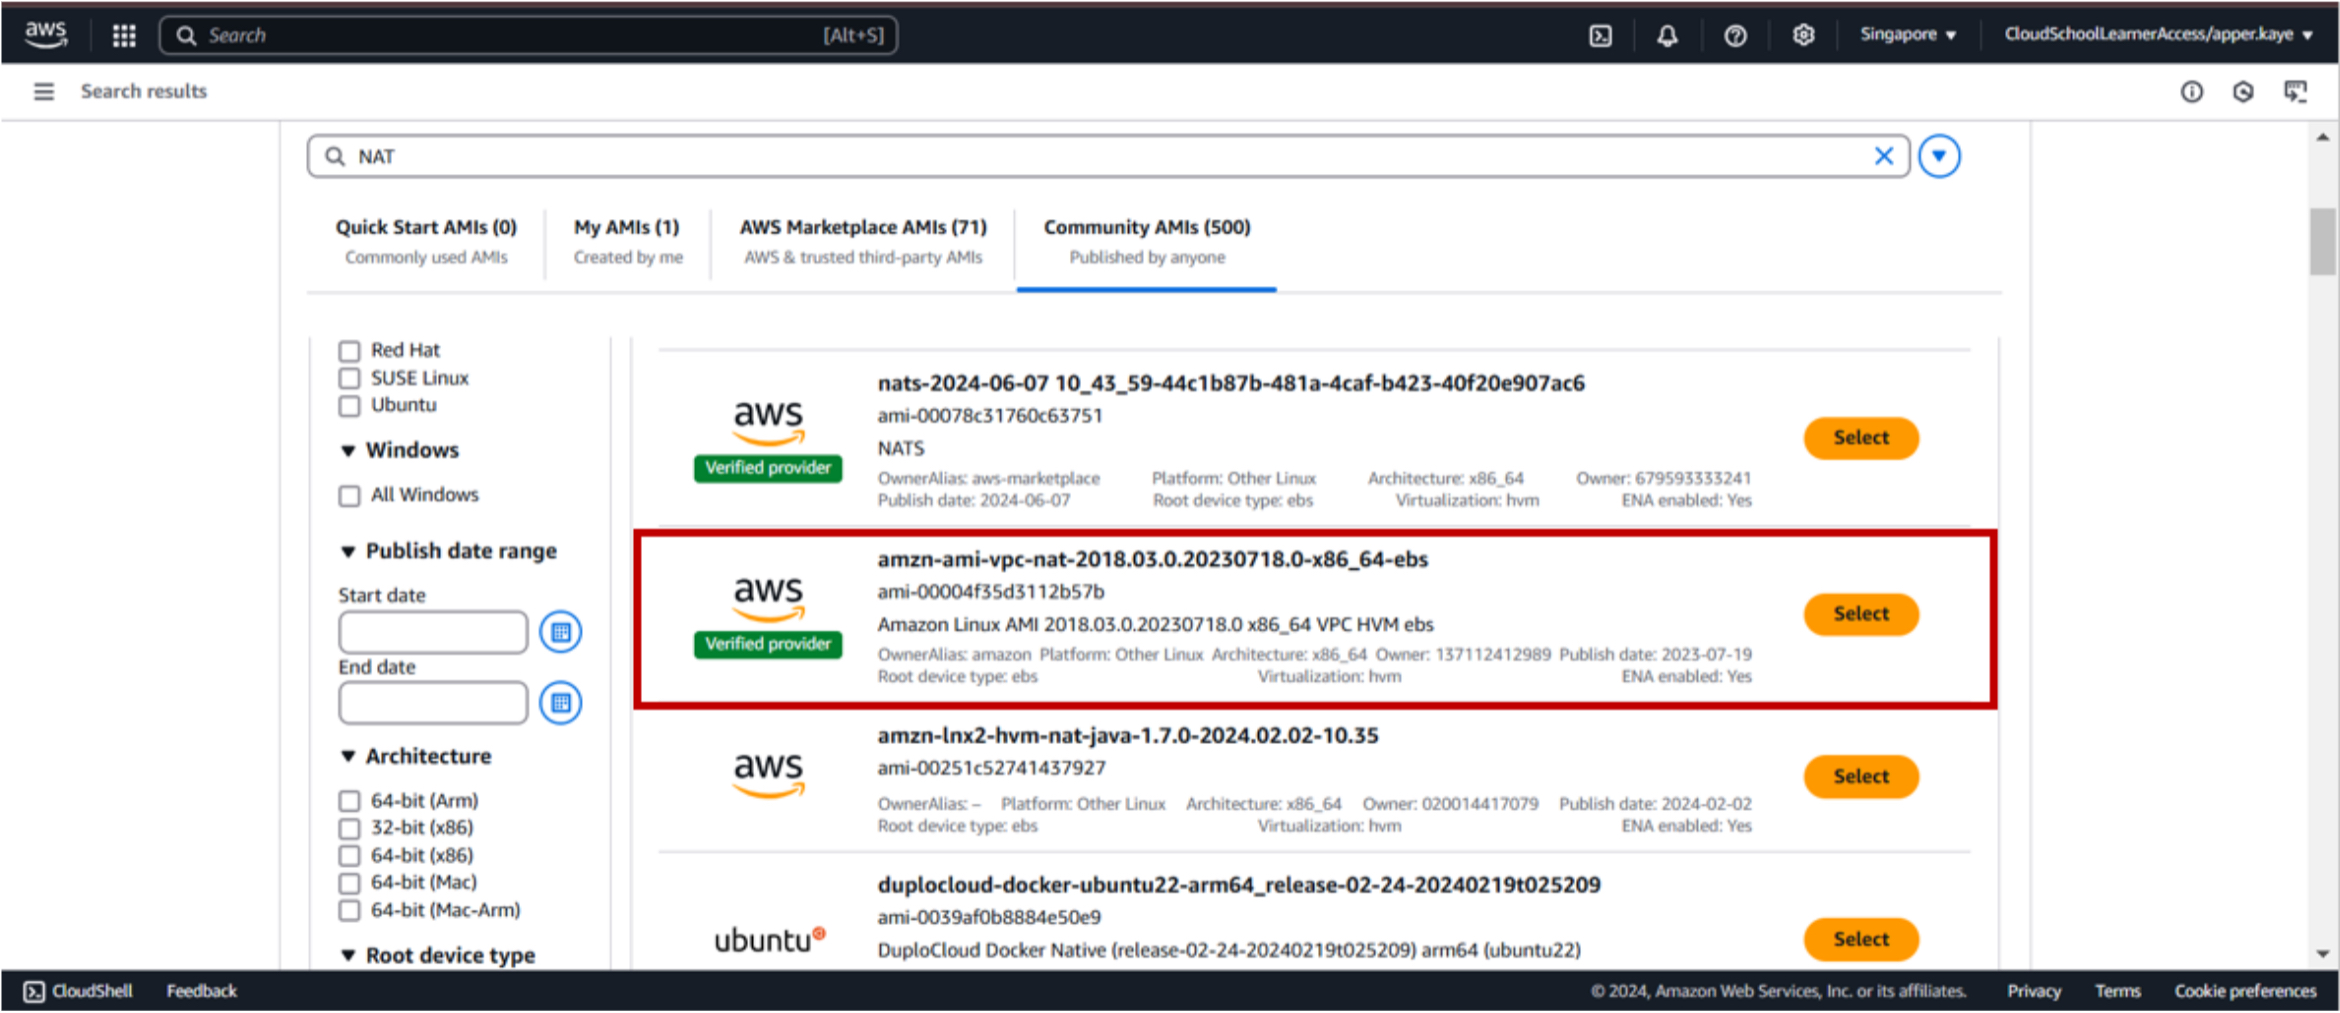
4-b. Select NAT AMI from Community AMIs.

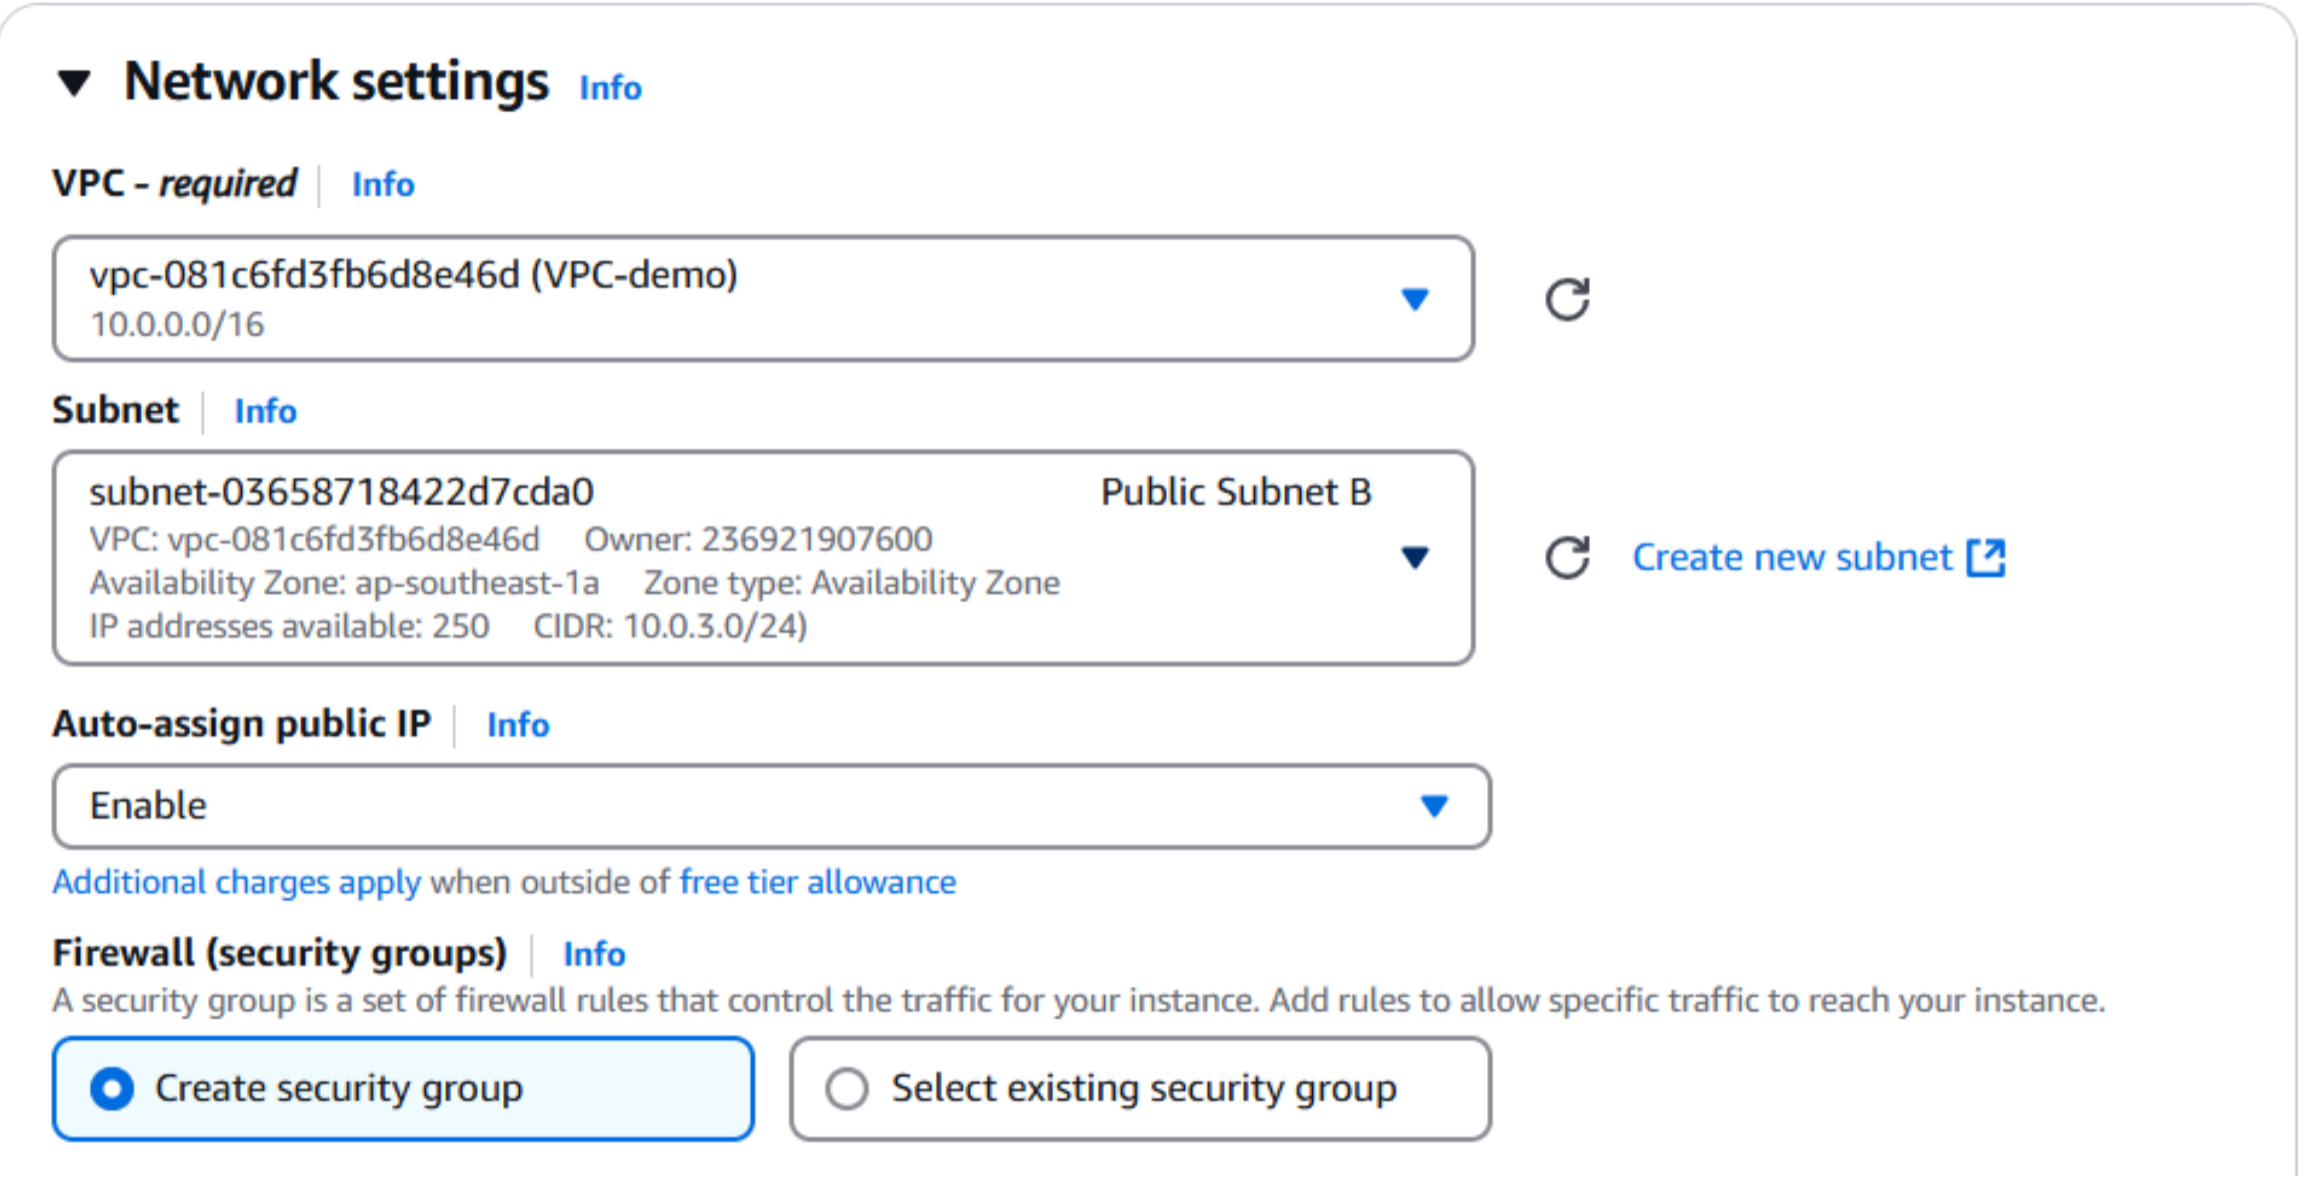
4-c. To ensure proper internet connectivity, place the NAT Instance in a public subnet within your VPC. Additionally, enable the Auto-assign Public IP option to assign a public IP address to the instance.
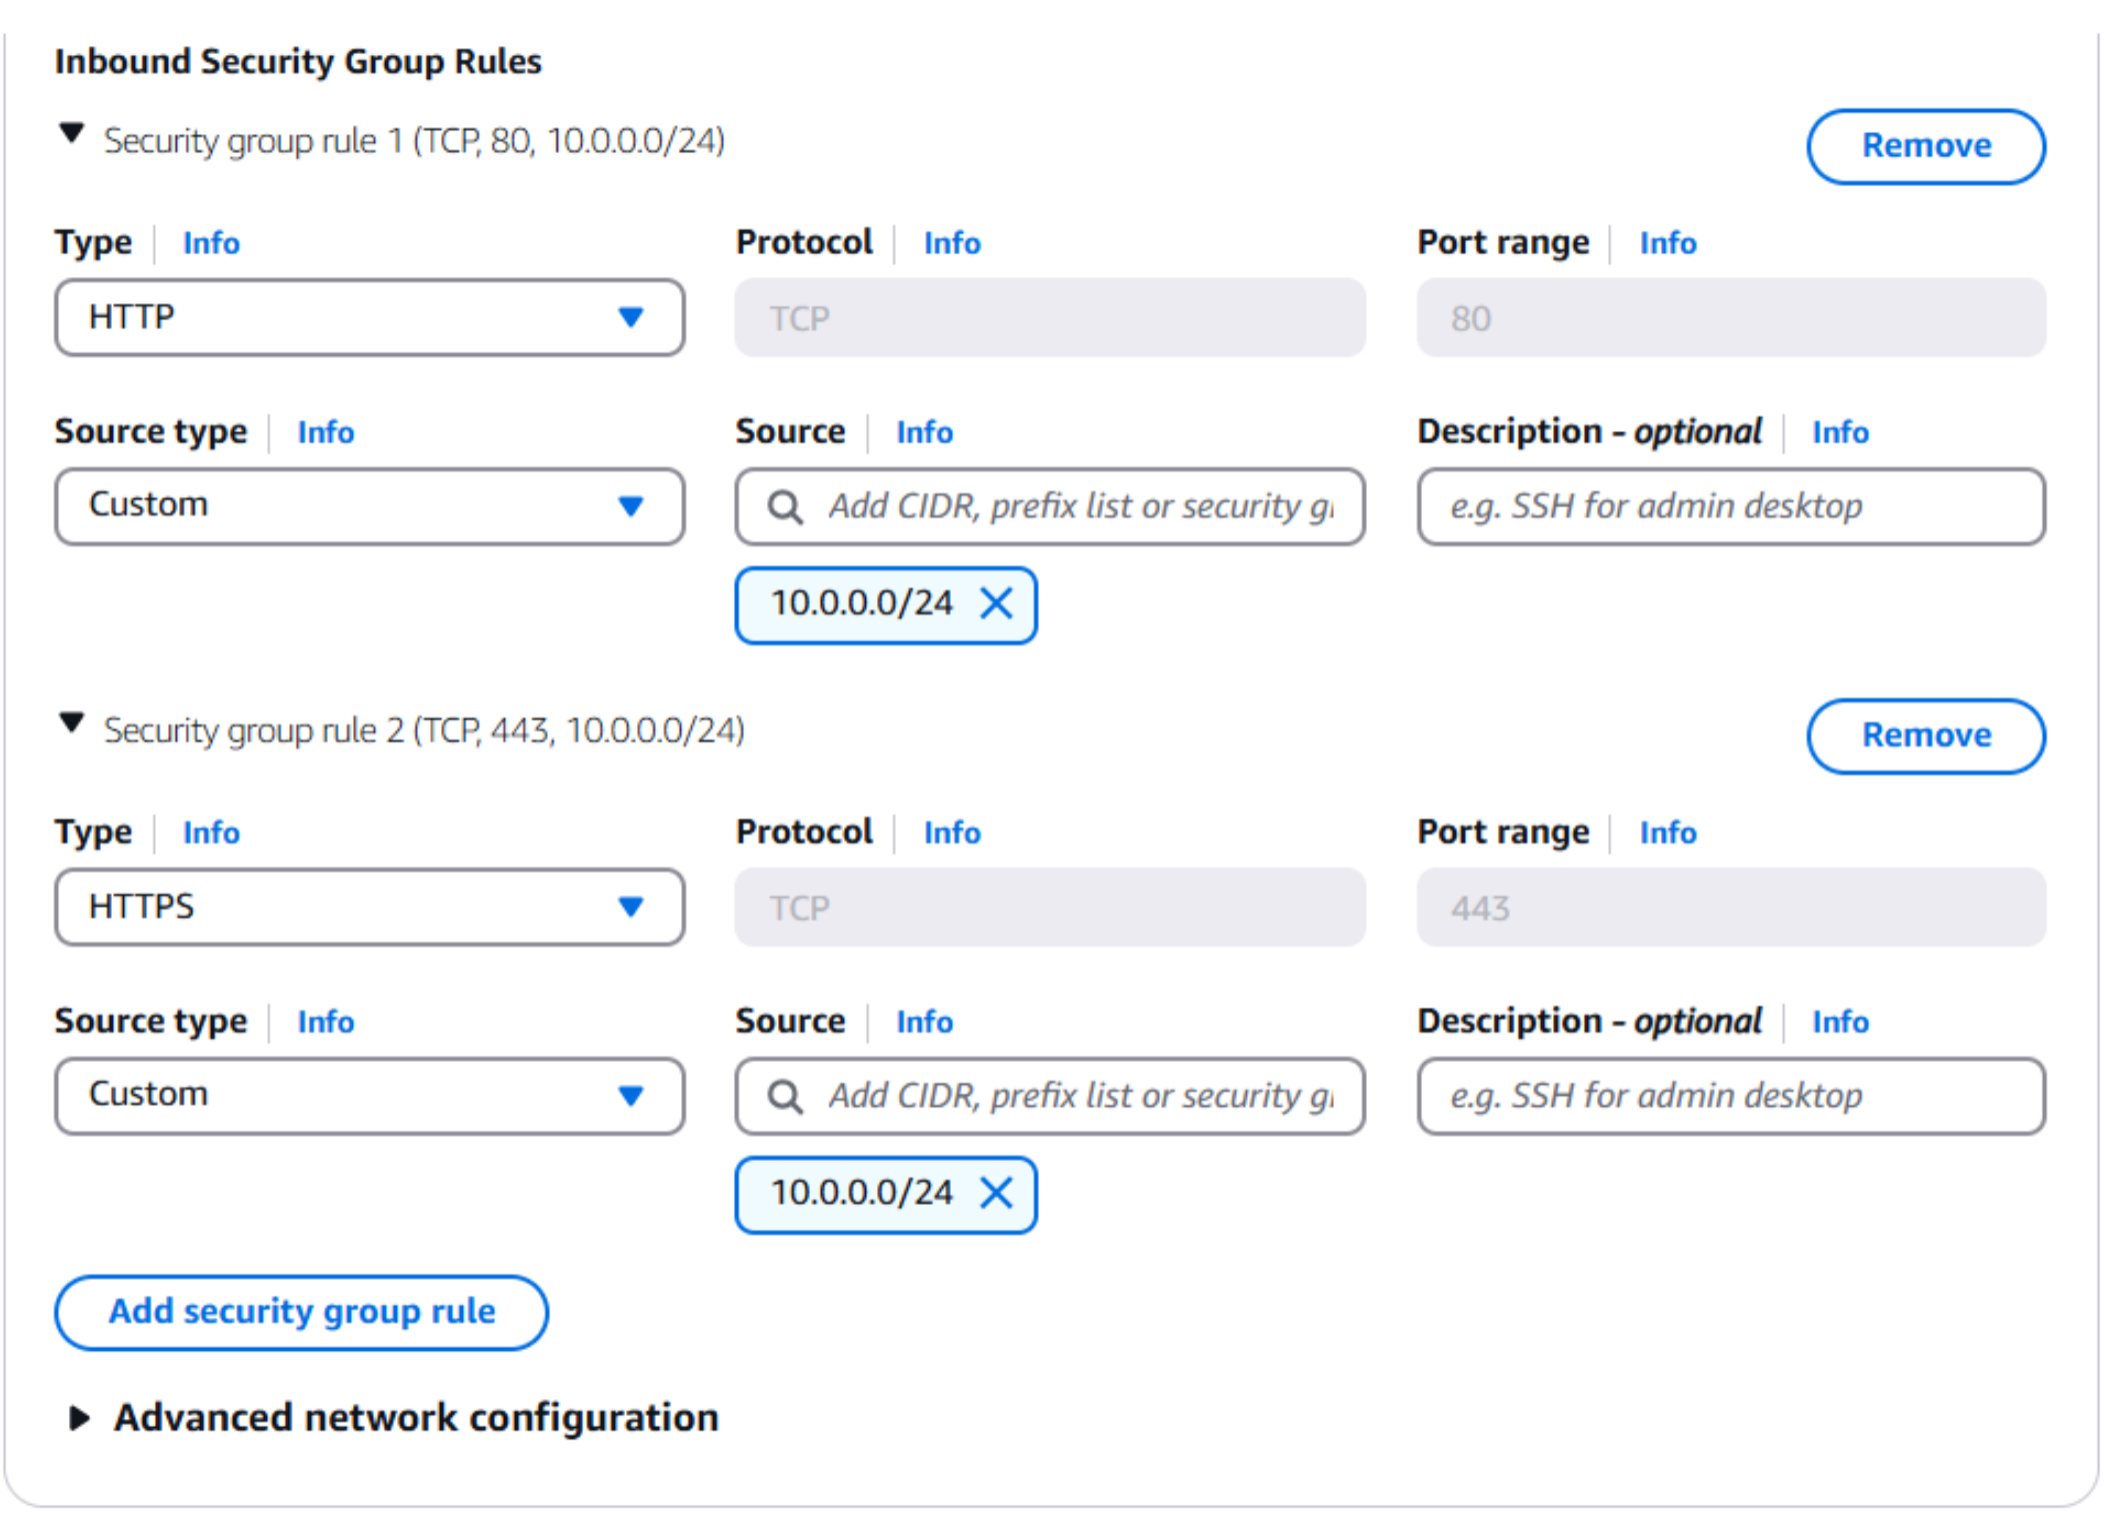
4-d. To enable inbound traffic to the NAT Instance, configure the security group to allow HTTP (port 80) and HTTPS (port 443) traffic. To enhance security, specify the source CIDR block of the private subnet that will utilize the NAT Instance.
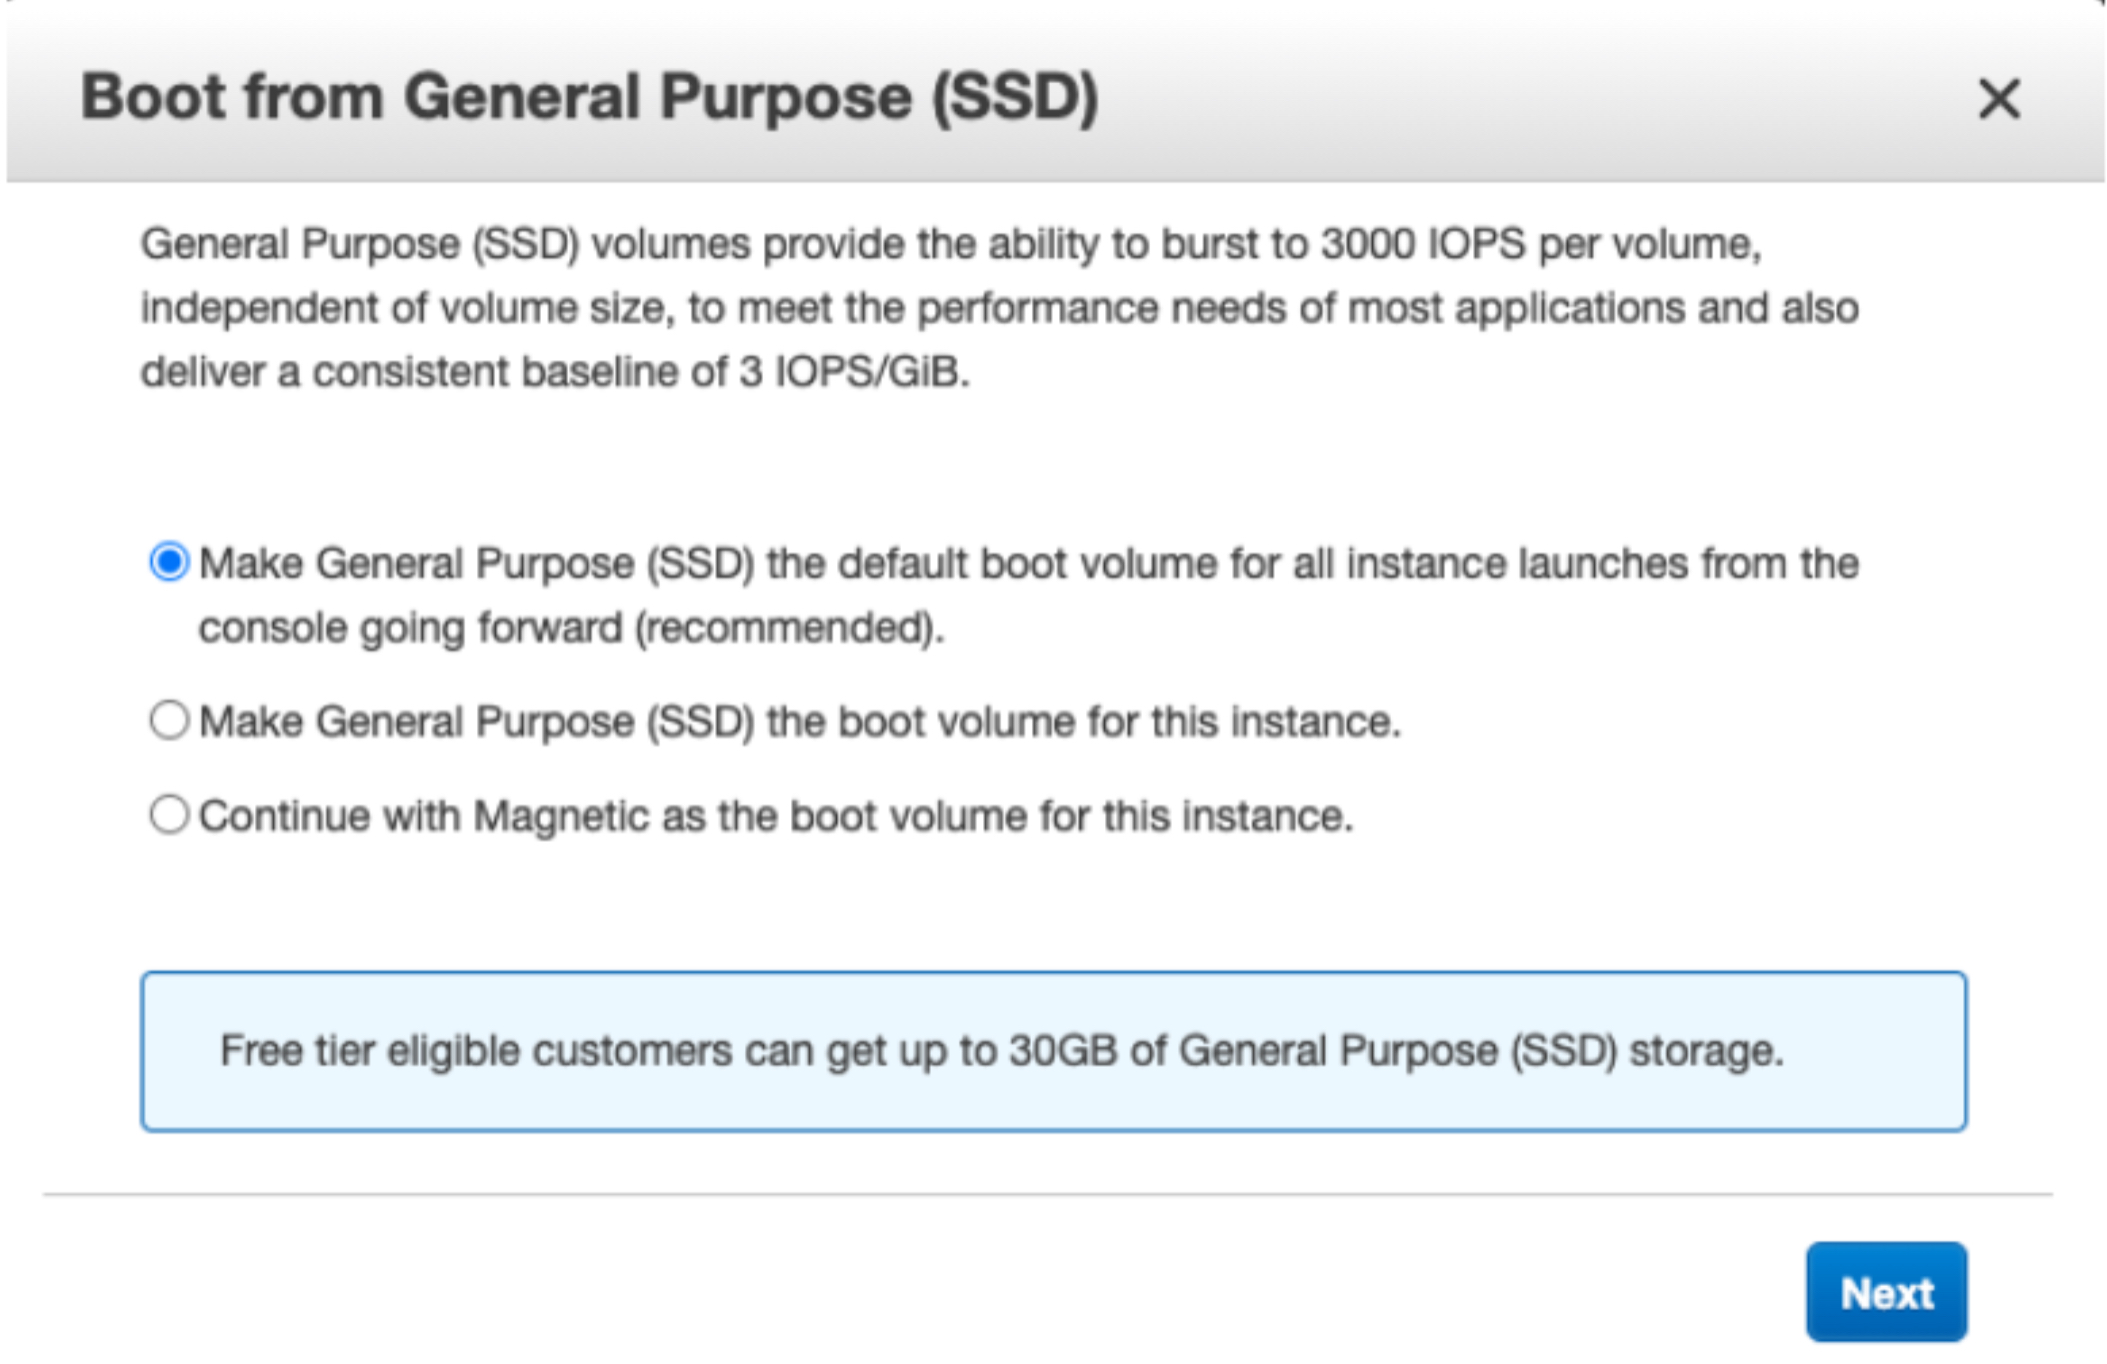
4-e. For the remaining configuration steps, accept the default settings and proceed with launching the instance. If you encounter any prompts, select the recommended settings and click Next.
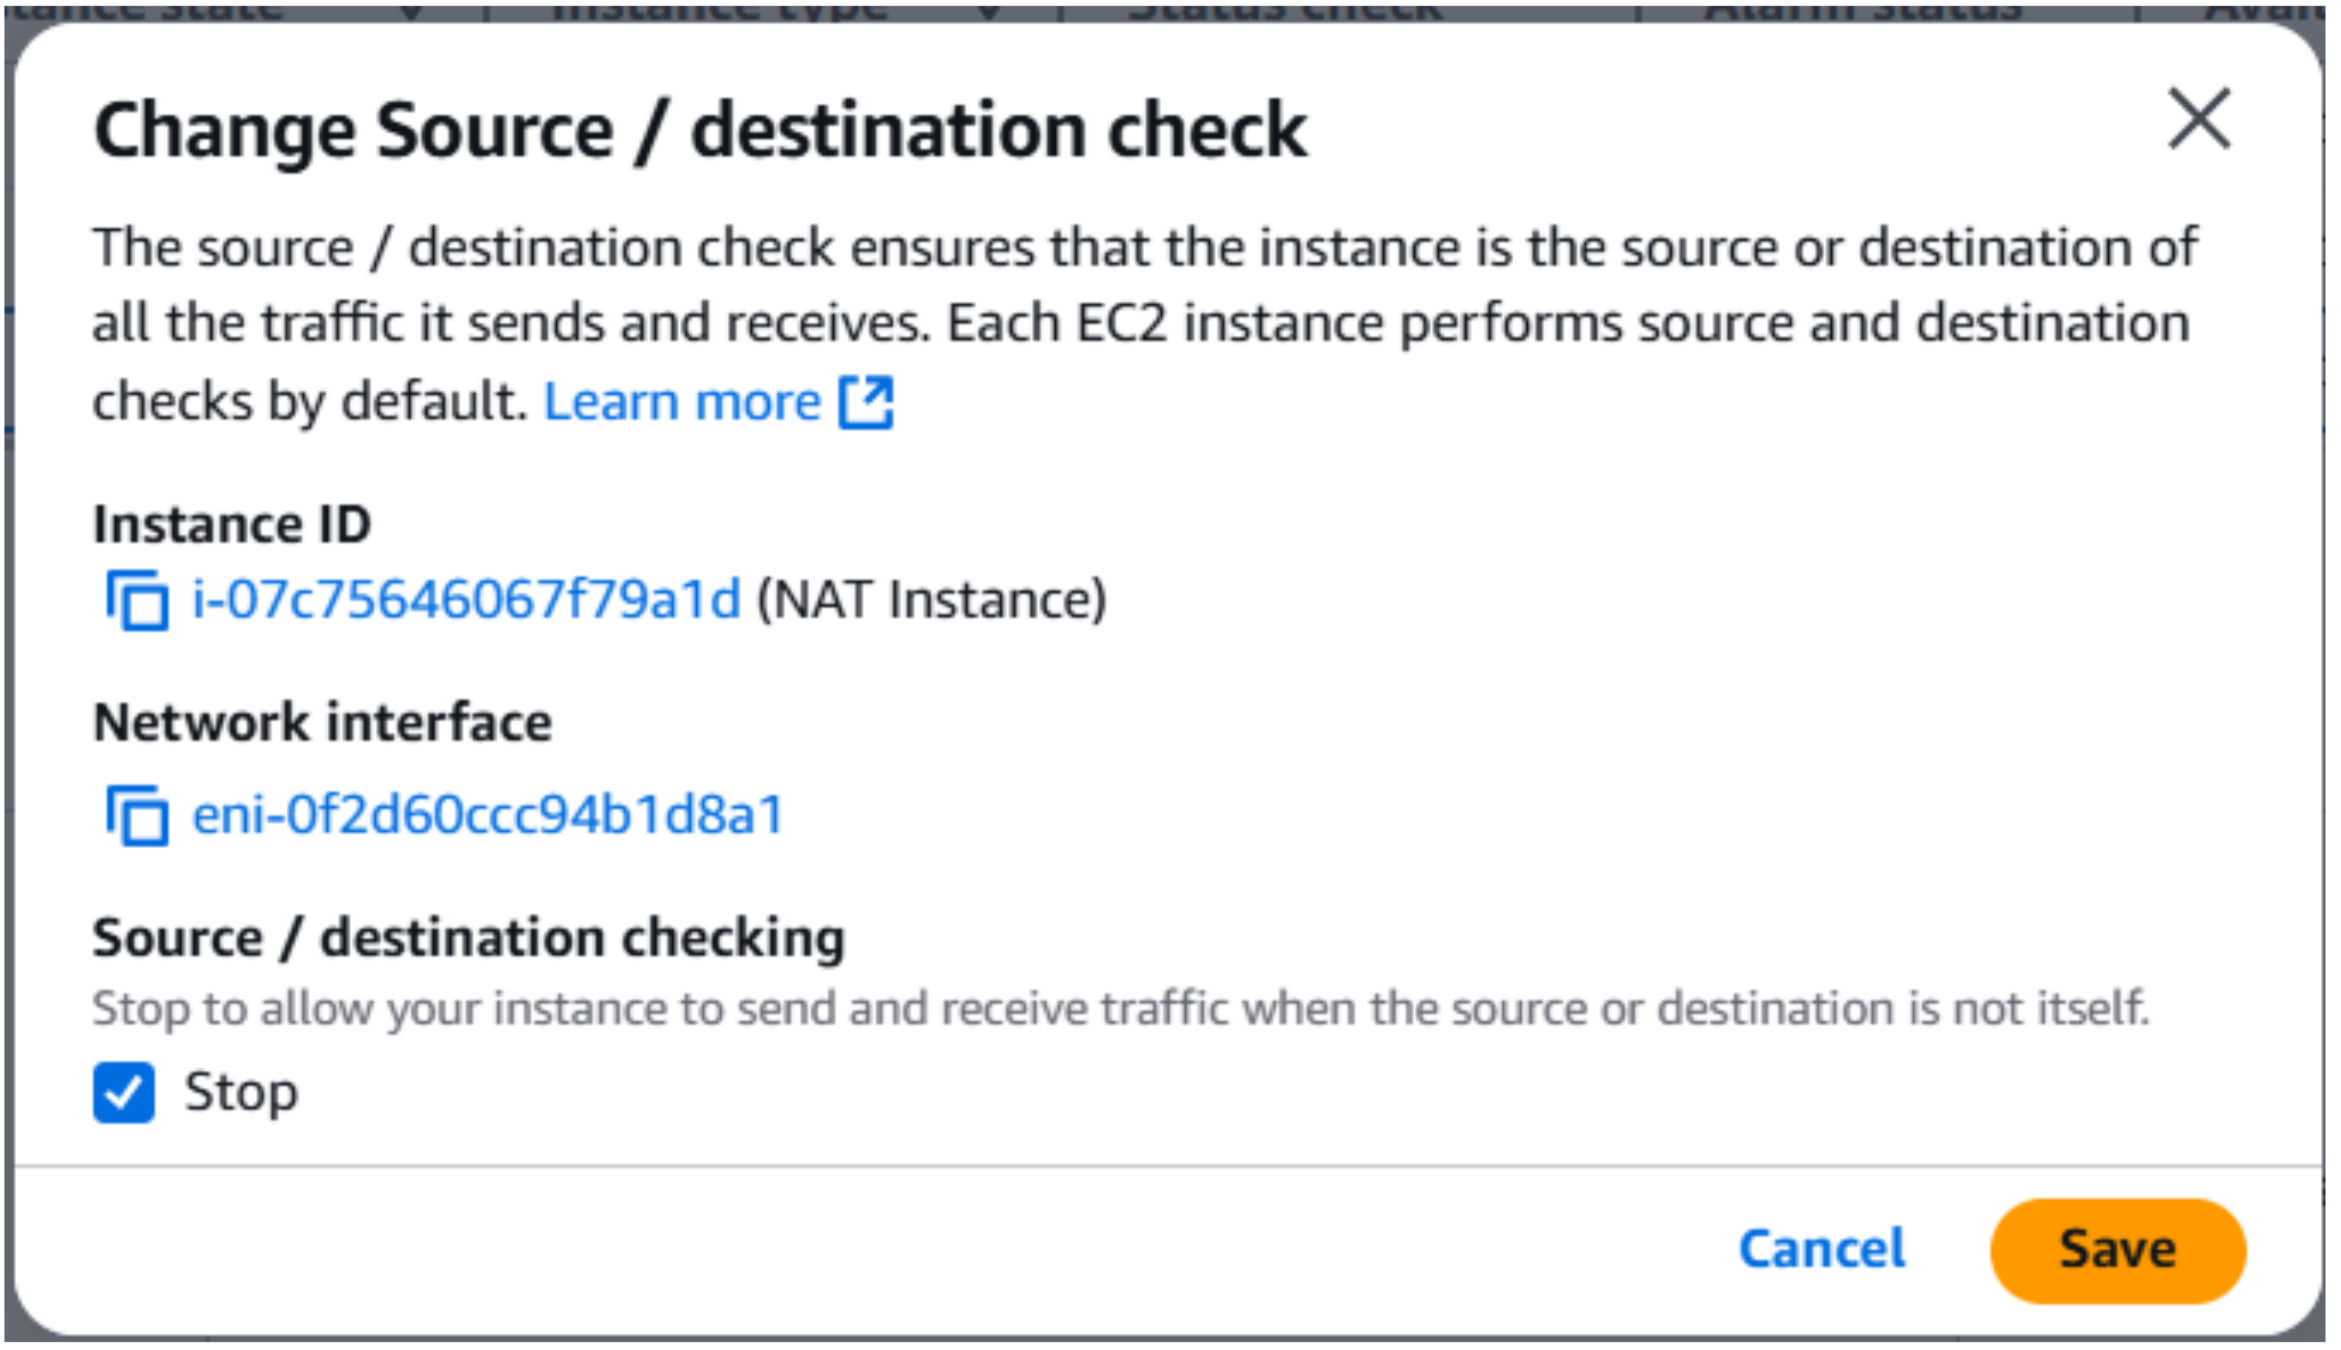
To ensure that the NAT Instance can function correctly, it is necessary to disable source/destination checks. This setting prevents the instance from enforcing restrictions on the source and destination IP addresses of traffic it processes.
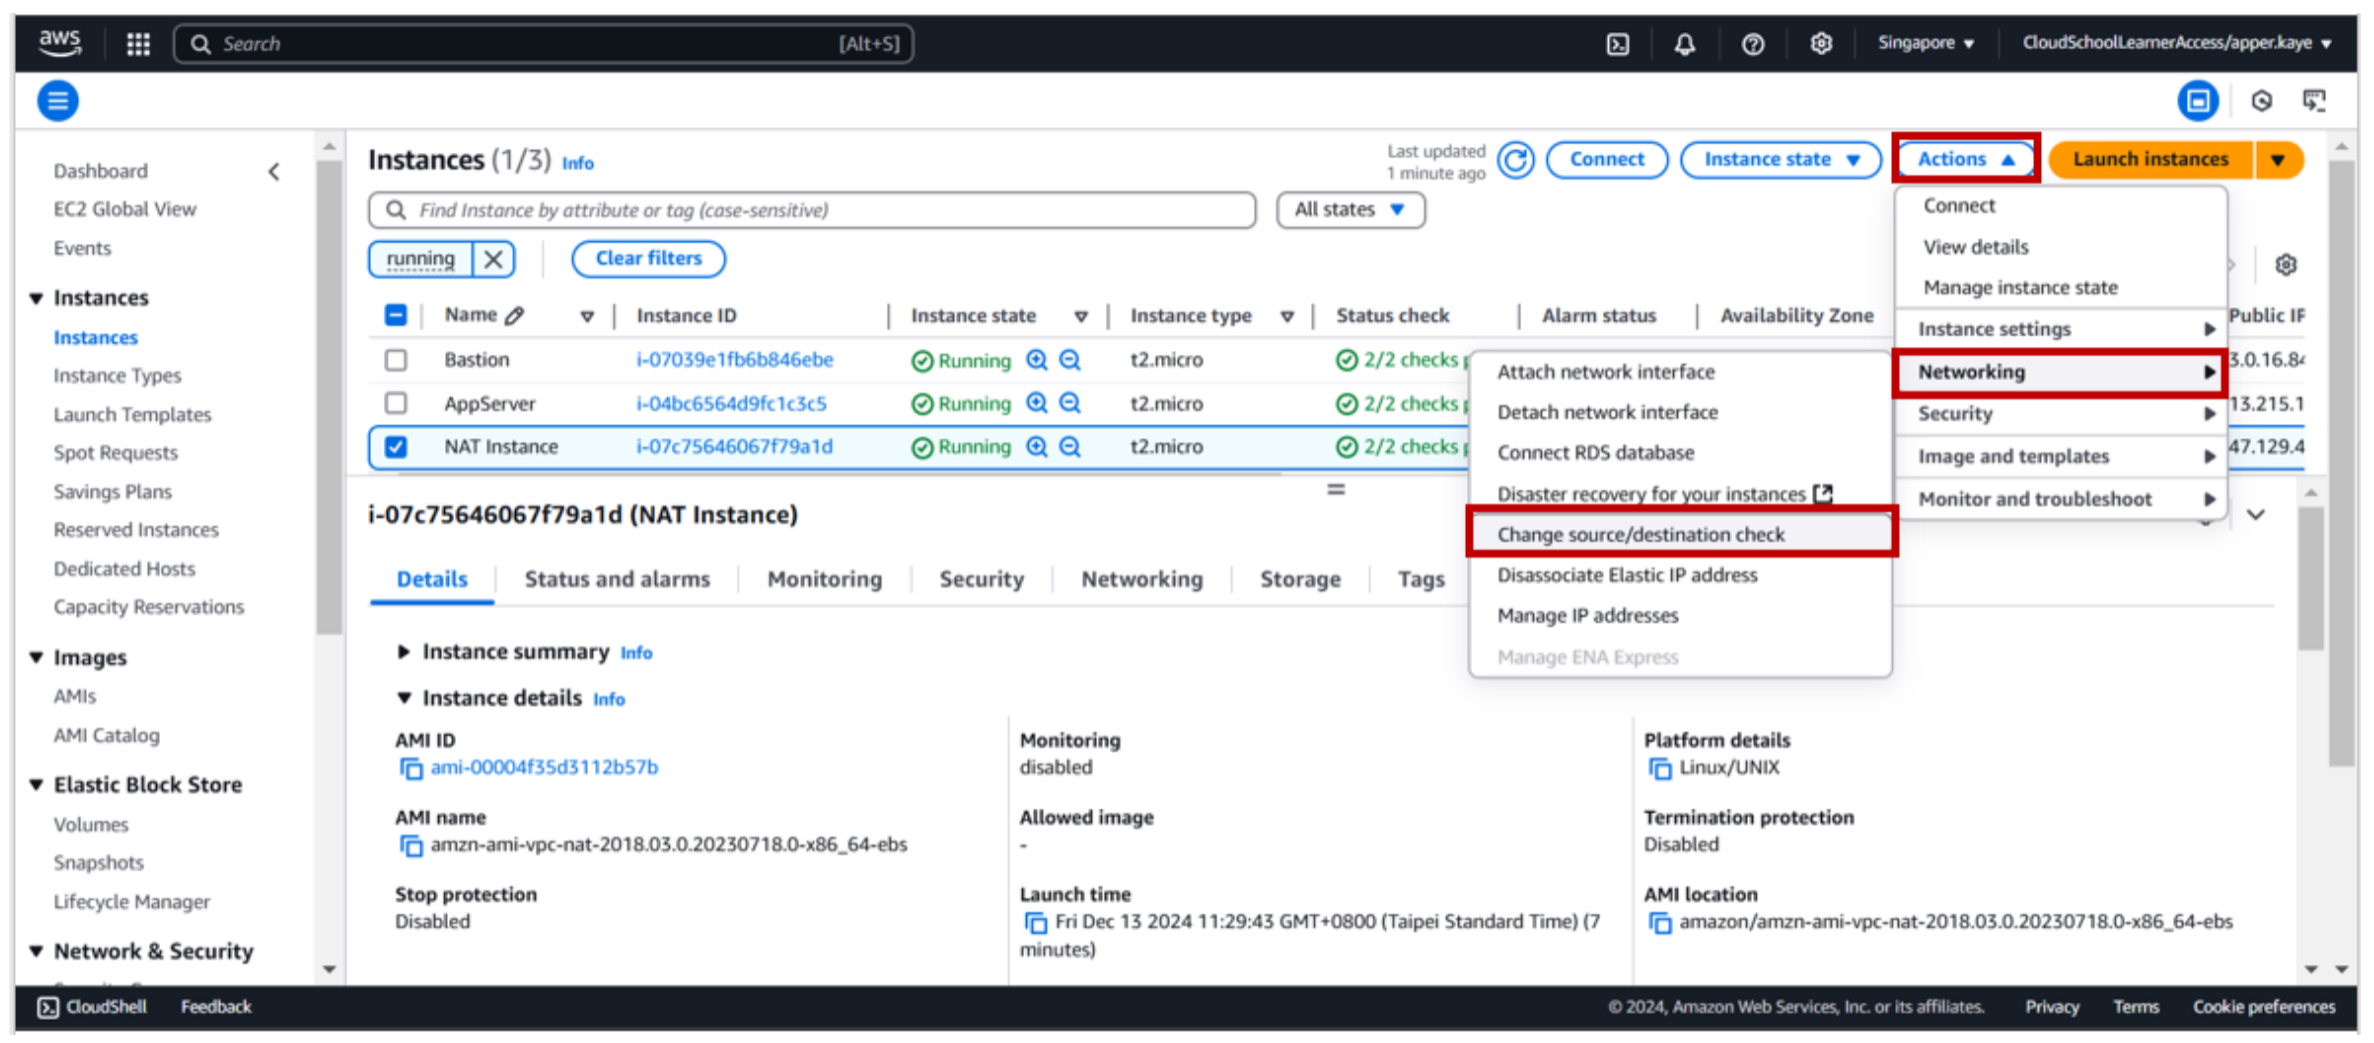
5-a. To modify the source/destination check setting for the NAT Instance, navigate to the EC2 console and select the instance. From the Actions menu, choose Networking and then Change Source/Destination Check.
5-b. To apply the changes, check the Stop box and click the Save button.
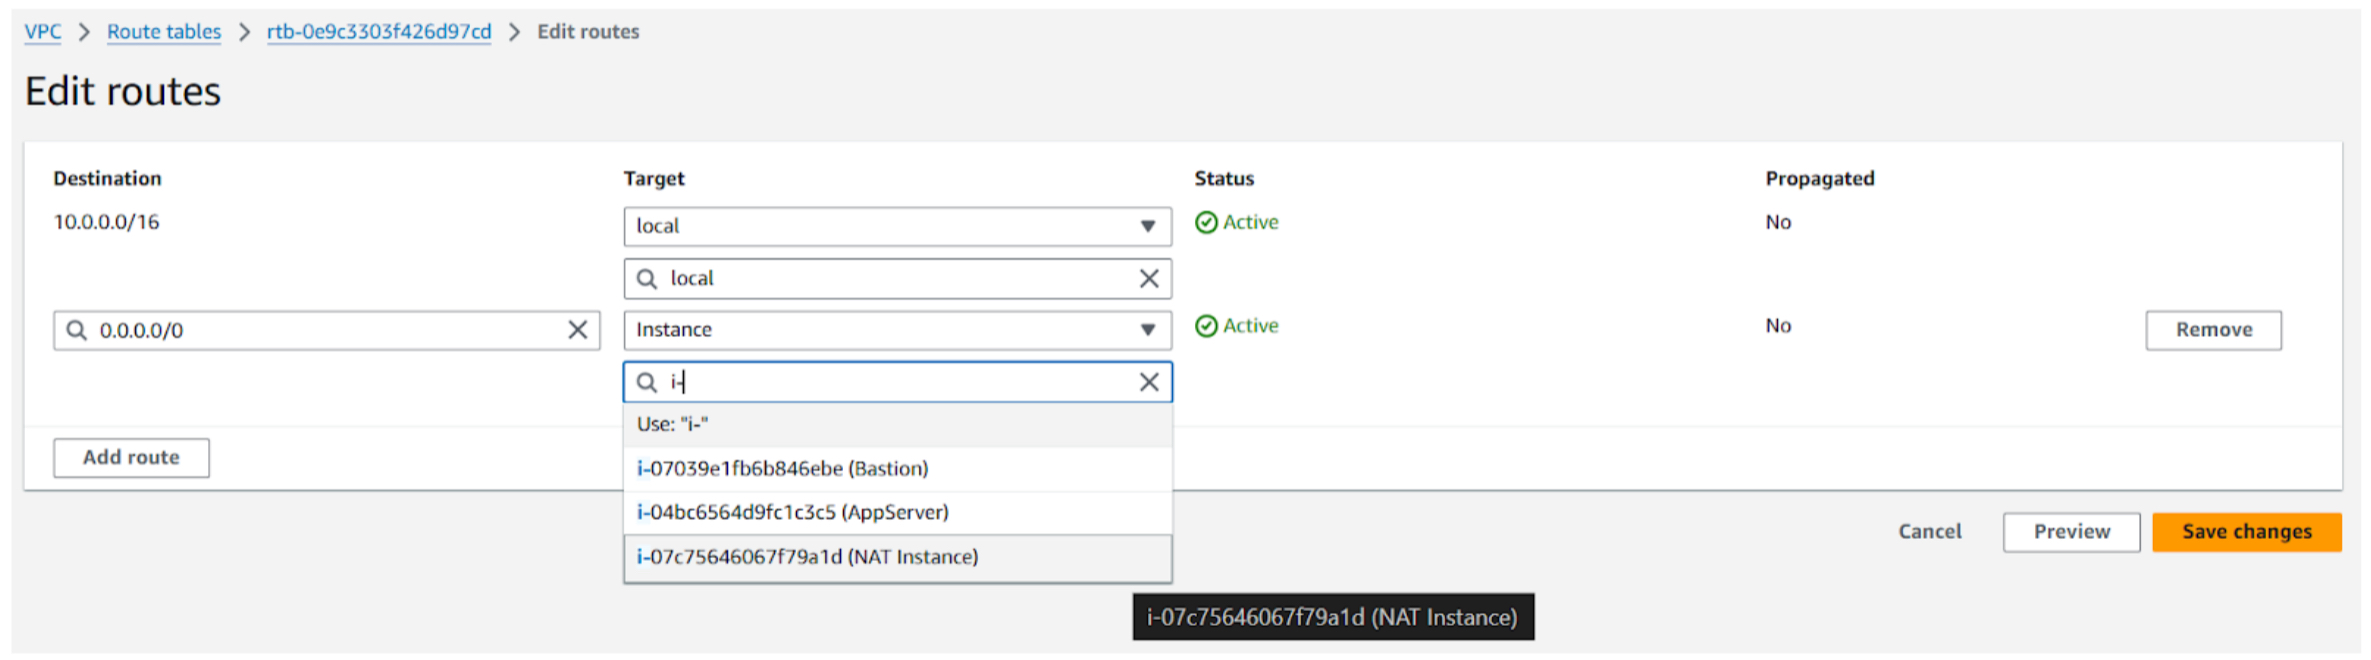
6-a. To route internet traffic through the NAT Instance, modify the private route table. Add a new route with a destination CIDR block of 0.0.0.0/0 and select the NAT Instance as the target.
7-a. To update the application server, execute the following command:
sudo yum update -y
The application server can now access the internet through the NAT Instance. However, as the server was recently updated using the NAT Gateway, no further updates are currently required.
Both NAT Gateways and NAT Instances allow private instances to access the internet.
NAT Gateways:
- Managed service
- High bandwidth
- Cost-effective for high traffic
NAT Instances:
- More control
- Lower cost for low traffic
- Requires management
Choose based on traffic volume, management overhead, and cost.
To know more about the difference between a NAT gateway and NAT instance, you can refer to this document: https://docs.aws.amazon.com/vpc/latest/userguide/vpc-nat-comparison.html
Well done!
JSON
Please copy the following JSON template into the textbox on the left and replace the placeholders with the actual IDs of your AWS resources:
{
   "bastion_instance_id": "",
   "appserver_instance_id": "",
   "key_pair_name": "",
   "nat_instance_id": "",
   "nat_gateway_id": "",
   "public_route_table": "",
   "private_route_table": ""
}
To find these IDs:
- Go to the AWS Management Console.
- Navigate to the EC2 service.
- Locate your instances (Bastion, App Server, and NAT Instance).
- Copy their respective Instance IDs.
- Navigate to the VPC service.
- Find your NAT Gateway and Route Tables.
- Copy their IDs.
- Once you've filled in the correct IDs, you can proceed with the next step of the lab.
Resource Cleanup
After completing the lab, you can safely delete the resources you created to avoid unnecessary costs.