Maintenance & Cloning of Map SD Card
Maintaining Map SD card is important and necessary with age. SD cards have limited cycles of Read&Write, and after 10 years it is recommended to make a clone with fresh SD card. In this guide will be documented the process of making a clone of your SD with LeafSDTools.
Table of contents:
- 1 Prerequisites
- 2 Entering software update mode
- 3 Unlocking the SD
- 4 Making a backup image
- 5 Restoring backup image on new SD
- 6 Re-locking the SD
- 7 Exiting update mode
This guide covers CARWINGS navigation units with two SD Card slots, this guide is not compatible with newer NissanConnect navigation units. Separate guide will be posted later.
If your SD card is not functioning or missing, please follow this guide: Booting LeafSDTools without working SD Card
To get original SD card unlocked, you will need a SD card for running the tool with minimum capacity of 10 GB. It will be necessary only for running the utility and doesn't need to be left in the car.
It is also recommended to backup the card and use a spare SD card as new Map SD-card, while keeping the original safe as a backup. For new Map SD, it is highly recommended to choose a reputable brand, like Lexar, Verbatim and some of Kingston models. If available, preferably full-size SD Card without microSD conversion. Performance issues with lower quality cards can occur in extreme heat or cold.
- Use disk image writer utility like Rufus, balenaEtcher, Win32DiskImager, etc. For ease of use and compatibility, balenaEtcher is way to go with support on Windows, Linux and macOS.
- Download latest image from here.
- Uncompress the archive and select .img file from archive as disk image to be flashed.
- Once flashed on to the SD card, no further steps are required.
To enter software update mode, follow the steps:
- Start your car. With the navigator fully booted, enter the map view by pressing button MAP
- Turn off audio by pressing small, black power button under volume rocker, on the left button panel. This button will be referred as media on/off.
- In quick succession, press three times "MAP" button, then press media on/off button two times and finally press "MAP" button once again. If successful, you will see this screen:
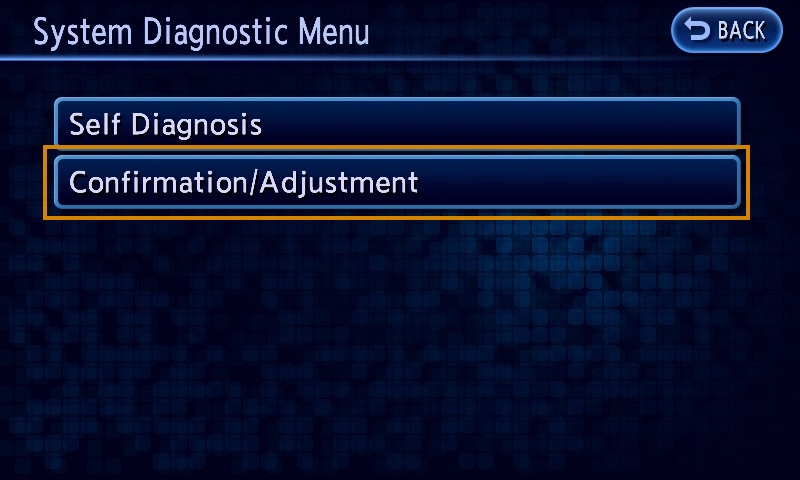
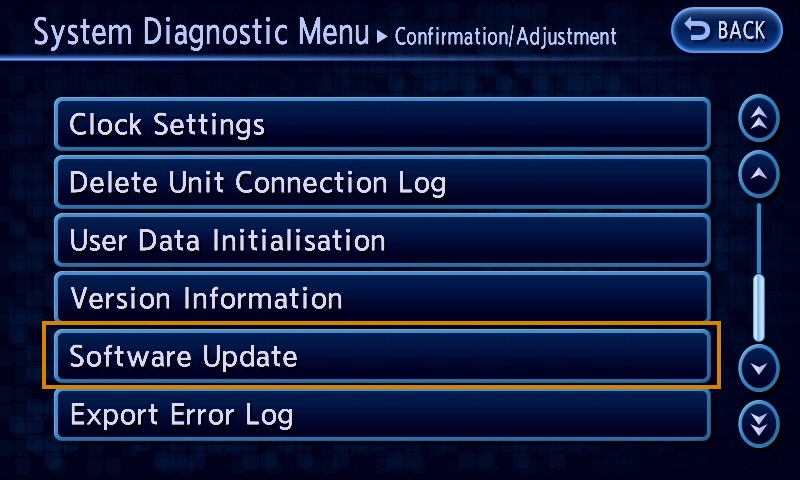
- Continue by pressing
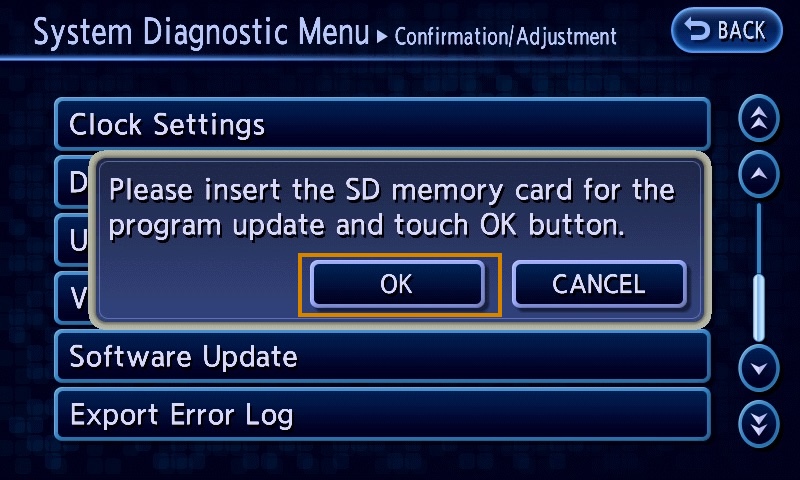
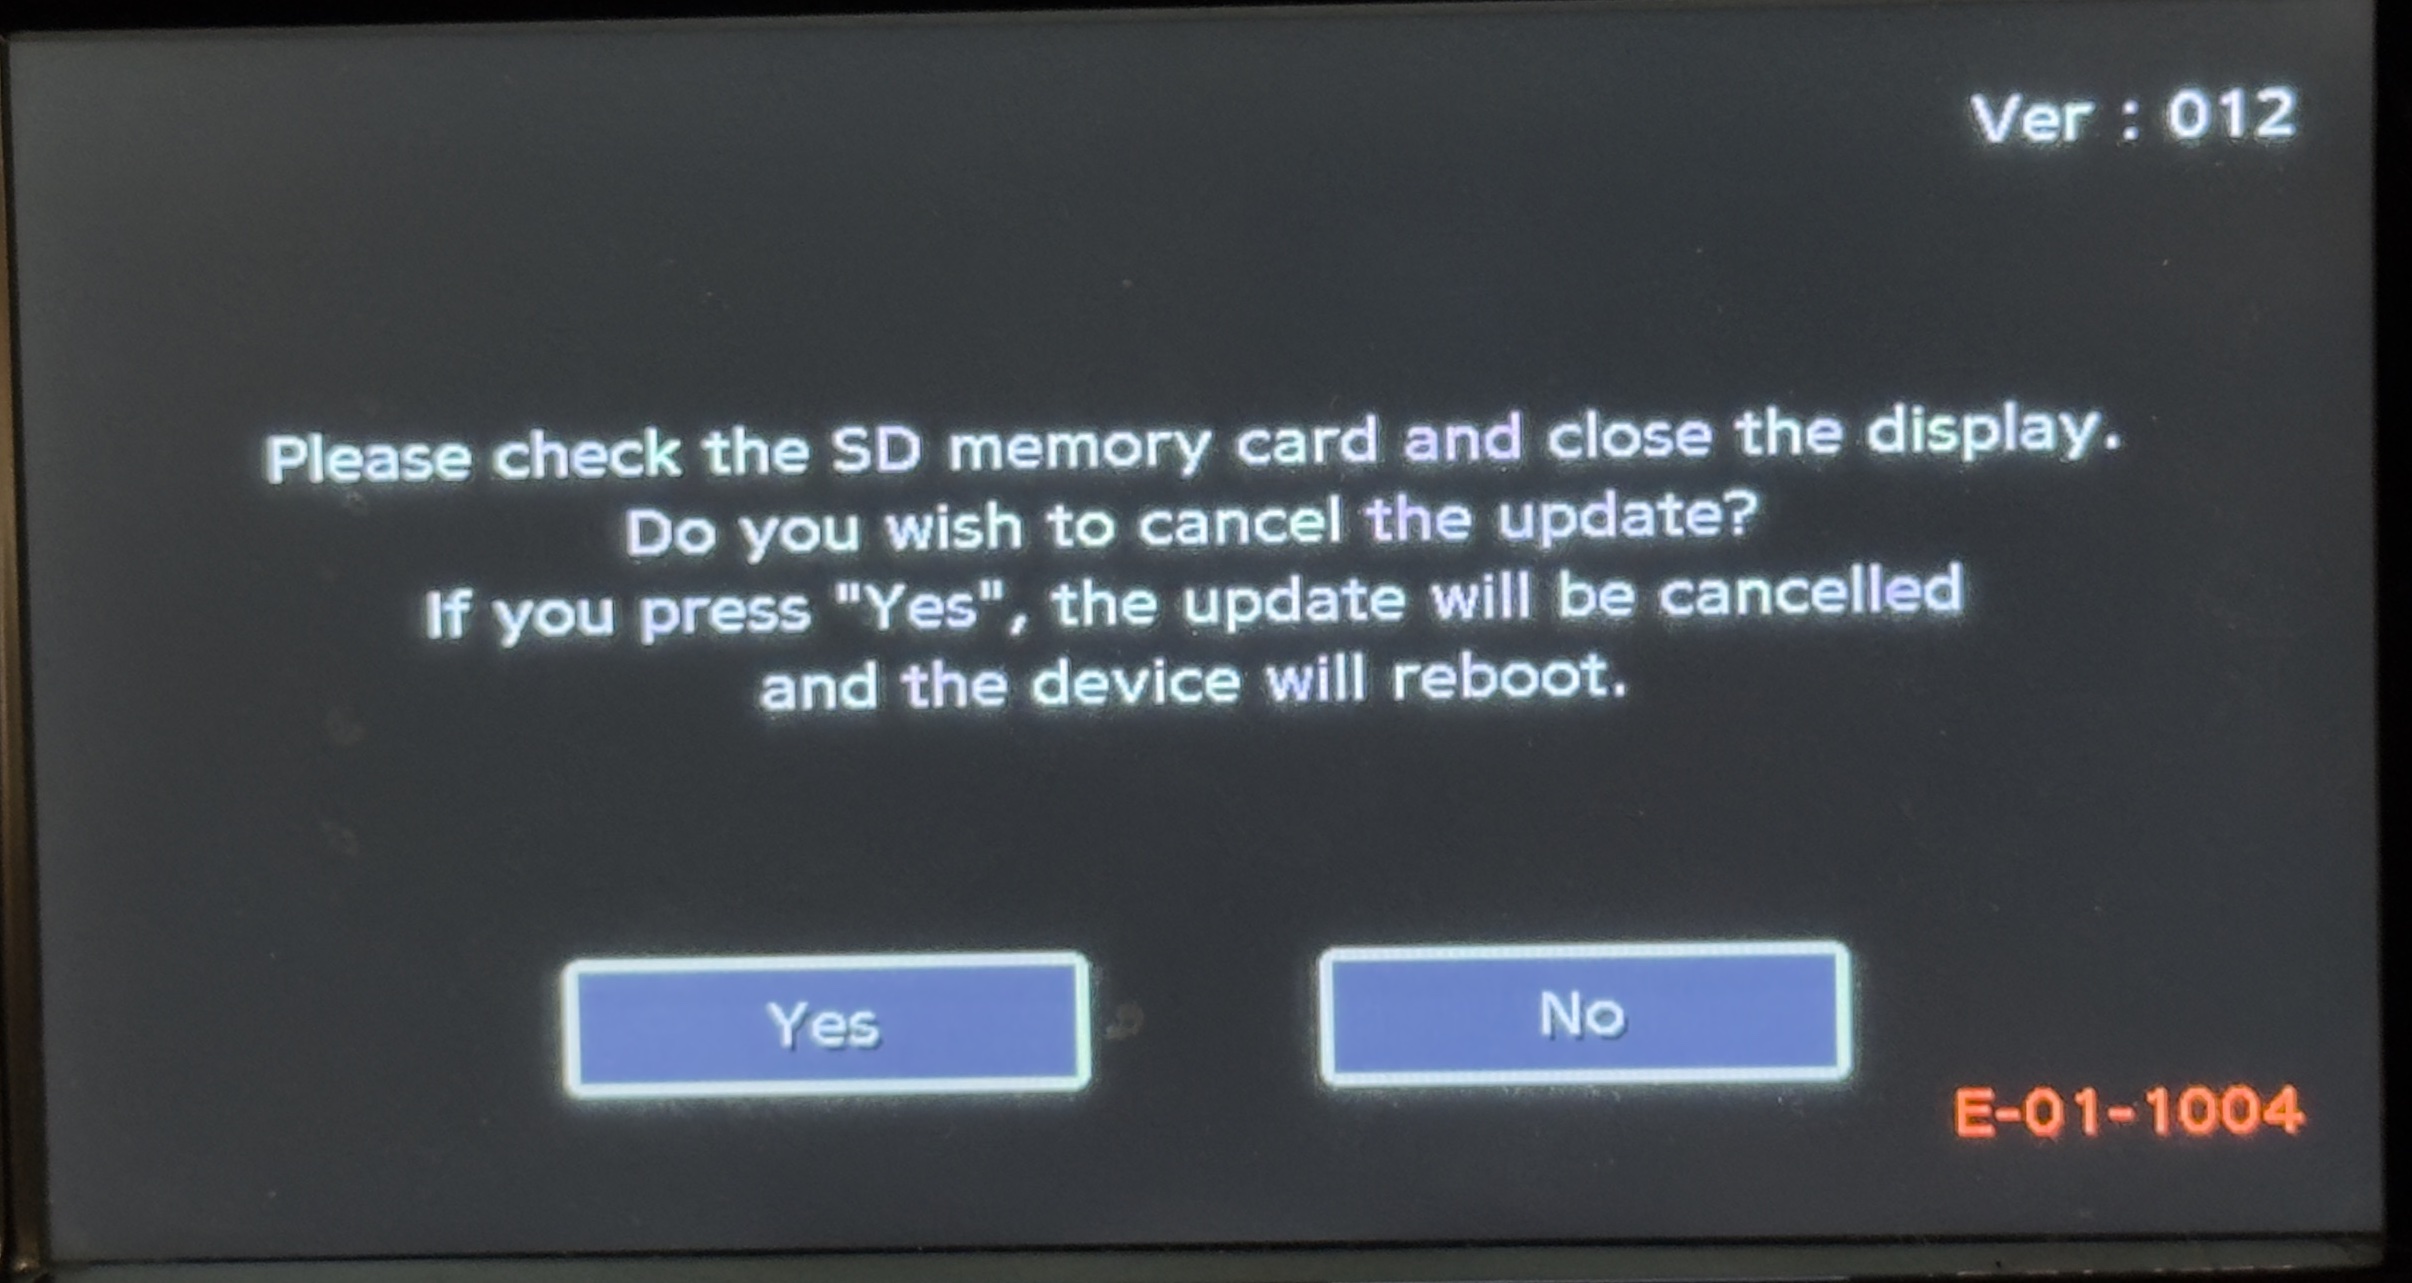
Confirmation/Adjustmentand scroll down to optionSoftware Update: - Confirm dialog shown below and wait for head unit to reboot to update mode:
If everything is done correctly, you should see a blue screen with Leaf SD Tools written on top left corner. This is the interface of LeafSDTools.
Start the unlock process by clicking SD unlock button and clicking once anywhere on the screen to continue with the process.

When prompted to insert your original Map SD into slot A, tilt the screen and insert to slot A. Tilt back and click anywhere on the screen to run the unlock process on the SD.
After successful unlock, the SD card will be recognised by a computer. Map files are visible in file manager, but SD card has hidden system partitions that need to be backed up. To make a full backup image, use program ImageUSB from osforensics for Windows.
For Linux and Mac, use DD command sudo dd if=<sd device> of=myfilename.img bs=10M status=progress
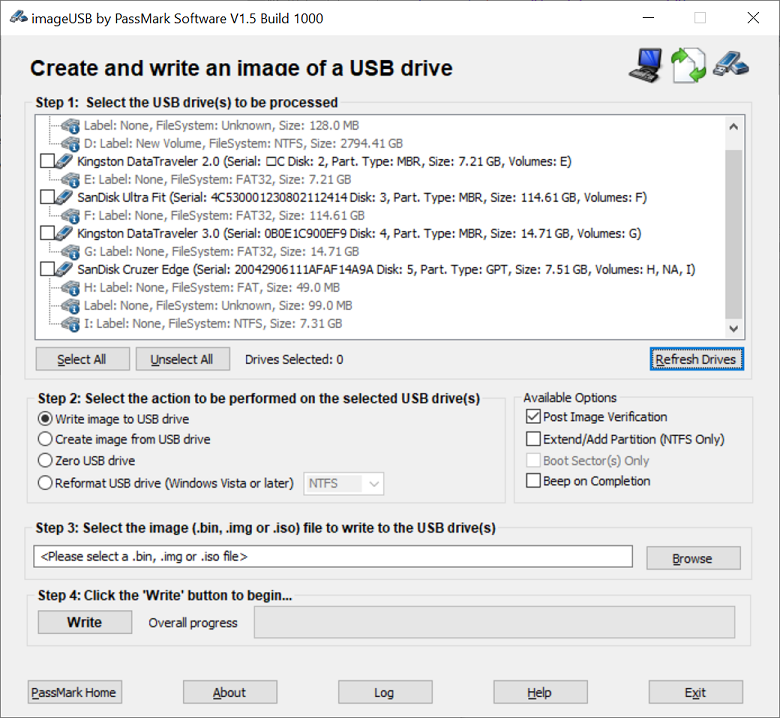
In the program:
- Select your SD card reader with original Nissan SD
- Select "Create image from USB drive"
- Choose your desired output file location
- Press button Create.
Once finished, you now have full image backup of your Map SD.
Restoring a backup image is reversal of step 4.
For Linux and Mac, use DD command sudo dd if=myfilename.img of=<sd device> bs=10M status=progress
- Select your SD card reader with new Map SD card (not the original!)
- Choose "Write image to USB Drive"
- Pick your backup file
- Press Write
After successful write, you may proceed to update the maps with latest available data, by following this guide: Updating Map Data. Follow to step 6 to re-lock both SD cards, after which they become usable on the navi unit.
This step needs to be done with both SD cards, your new Map SD and original Nissan SD! So follow this step two times, with both SD cards.
Start the locking process by clicking SD lock button and clicking once anywhere on the screen to continue with the process.
When prompted to insert the SD into slot A, tilt the screen and insert to slot A. Tilt back and click anywhere on the screen to run the lock process on the SD. After successful lock process, remove the SD from Slot A.
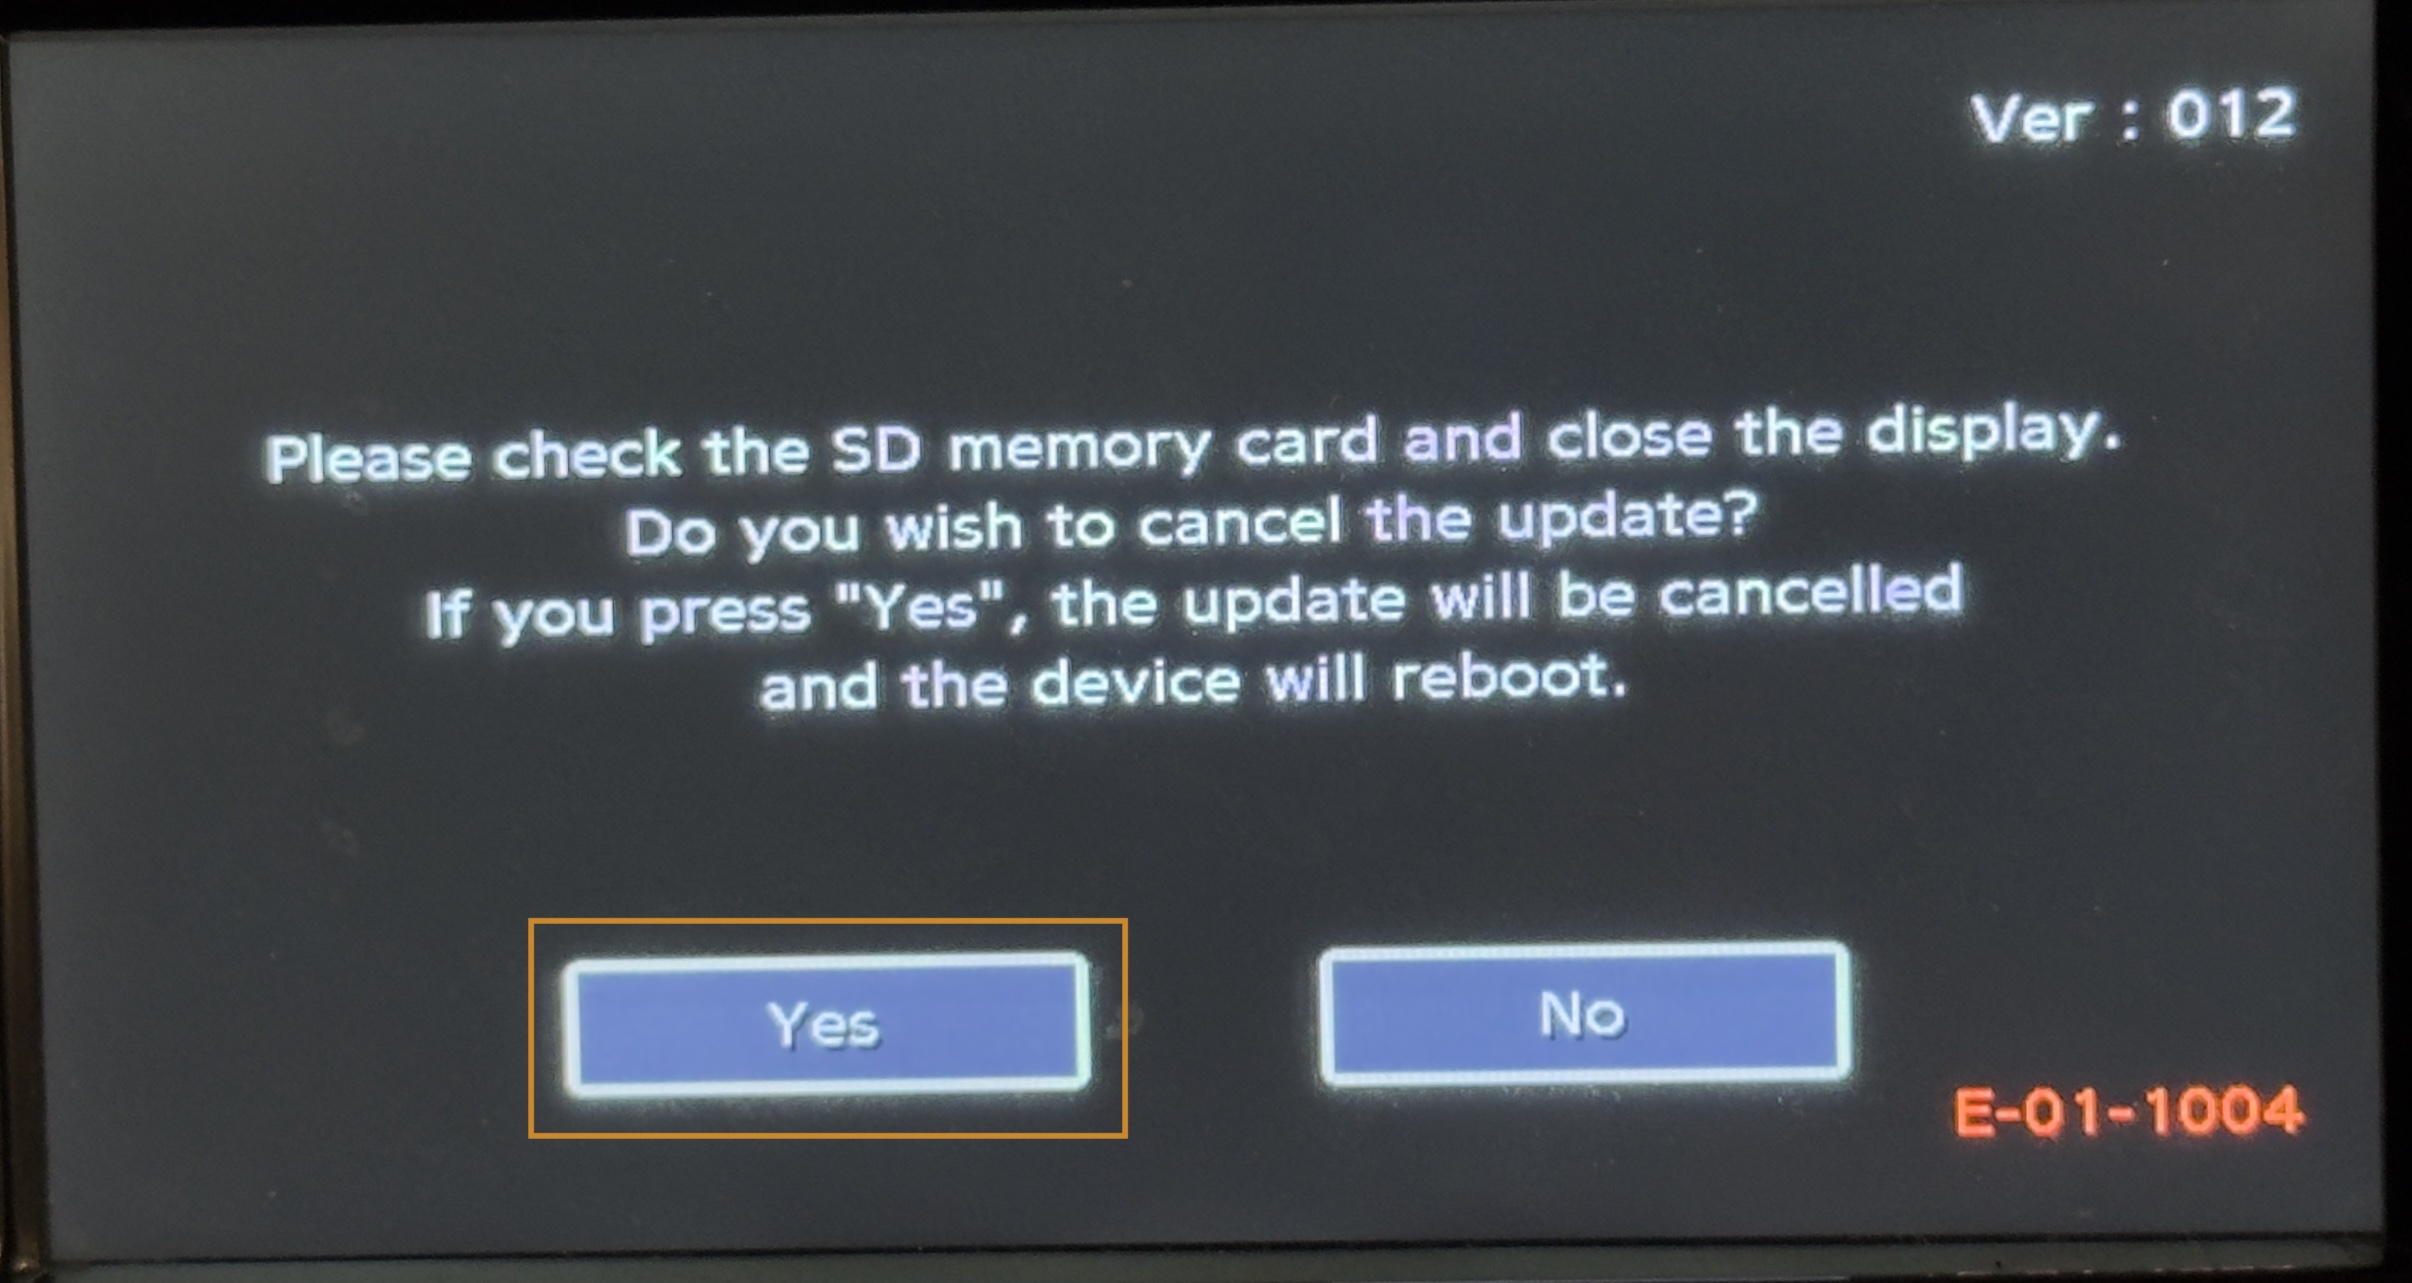
When all SD cards are locked and you're ready to quit the update mode, turn off the car. Remove LeafSDTools SD card from MAP slot B and insert your new Map SD card into slot B.
Start the car and you will be prompted again with this dialog, click Yes and you will be rebooted back to normal operation mode: