| title | Monitors Configuration |
|---|---|
| sidebarTitle | Monitors configuration |
import AllAnomaliesConfiguration from '/snippets/cloud/features/anomaly-detection/all-anomalies-configuration.mdx'; import VolumeConfiguration from '/snippets/cloud/features/anomaly-detection/volume-configuration.mdx'; import FreshnessConfiguration from '/snippets/cloud/features/anomaly-detection/freshness-configuration.mdx';
Automated anomaly detection monitors are configured on all of your sources by default. Elementary also allows you to add aditional monitors, and to edit or remove existing ones.
Automated anomaly detection monitors (Cloud tests) can be added directly through the UI, just like other data tests. Unlike dbt-based tests, these monitors are not part of your dbt project code, so they’re added immediately — with no need to create or approve a pull request.
To easily add a new automated monitor, follow these steps:
- Navigate to the Test Configuration page, or select your relevant assets in the Catalog
- Click 'Add Test', and choose a 'Table Test'
- If not selected earlier, choose one or more tables you would like to test
- Filter on Elementary Cloud, and choose your preferred test - Volume or freshness.
- Set up the test configurations, and add metadata if needed. Learn more about all supported settings here.
- Review and submit your test. No PR needed - the test is set up.
You can change the default settings and finetune the monitors to your needs using the Anomaly settings on each test.
In general, users will rely on the automated machine learning model anomaly settings. However, in some cases, an anomaly in the data is not relevant to your business. For this cases, the custom settings are useful.
For some supported settings, Elementary offers a simulation of the change impact on latest results.
You can use the Simulate Configuration button after the change and before saving.
Training periods for volume tests sometimes include one-time anomalies. For example, when one of the engineers executes a manual script, or during an incident.
These anomalies might prevent our learning models from detecting a pattern in the data, resulting in NO_DATA status.
This can be overcome by excluding specific sections of the training period from the monitor. With the one-time anomaly excluded, the regular data pattern will be detected, resulting in a meaningful anomaly detection.
How to Exclude?
- Click on the
EXCLUDEbutton on the top-right of the chat, or go to theTest Configurationstab.
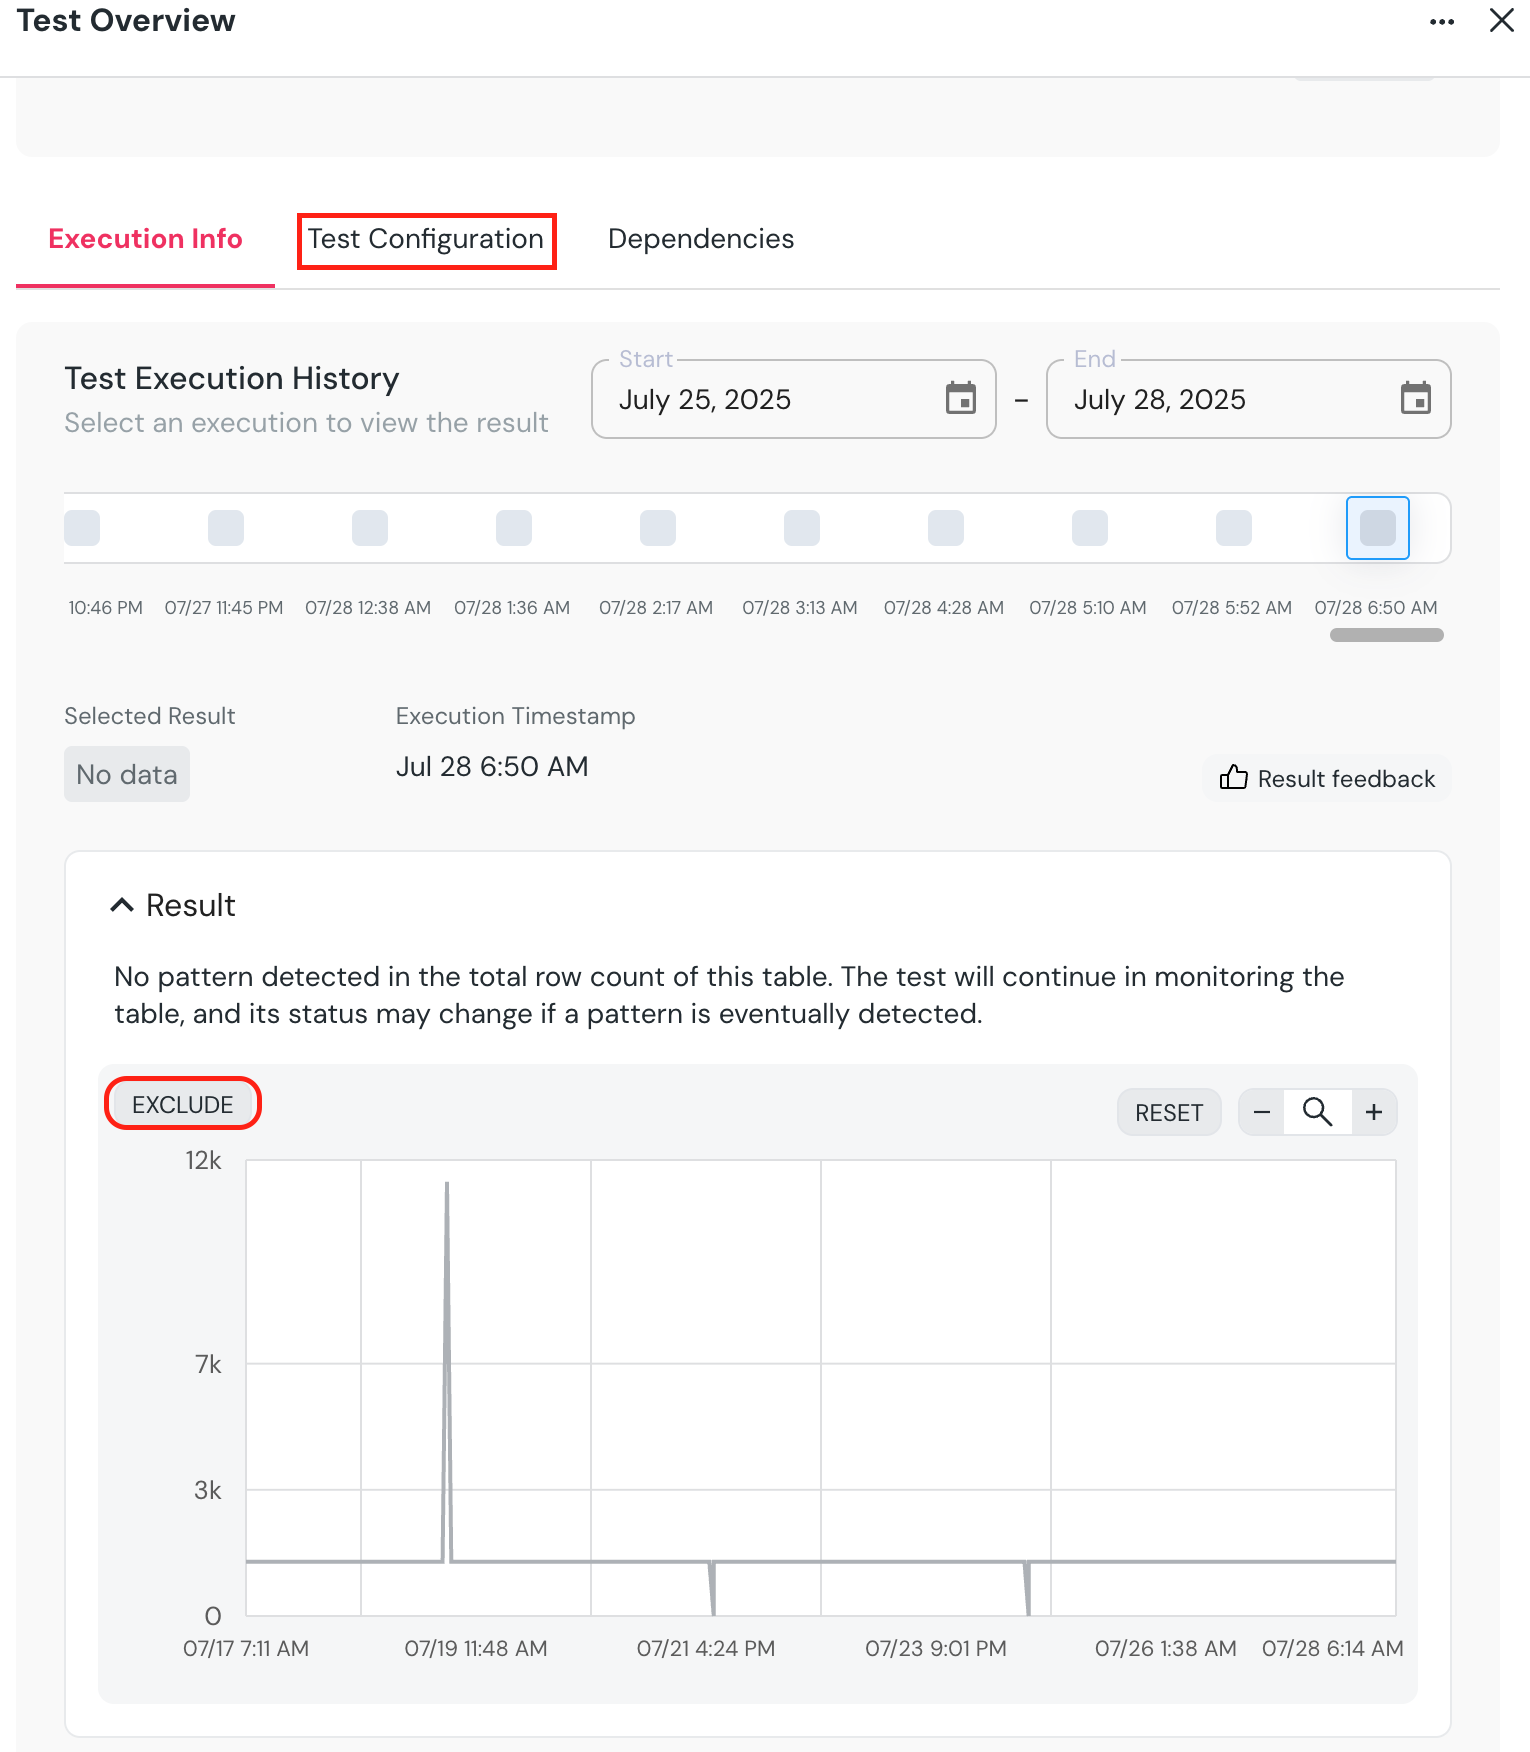
- Go down the chart, click
EXCLUDE, and mark the section you want to exclude.- A confirmation dialog will appear, showing the exact samples which will be excluded.
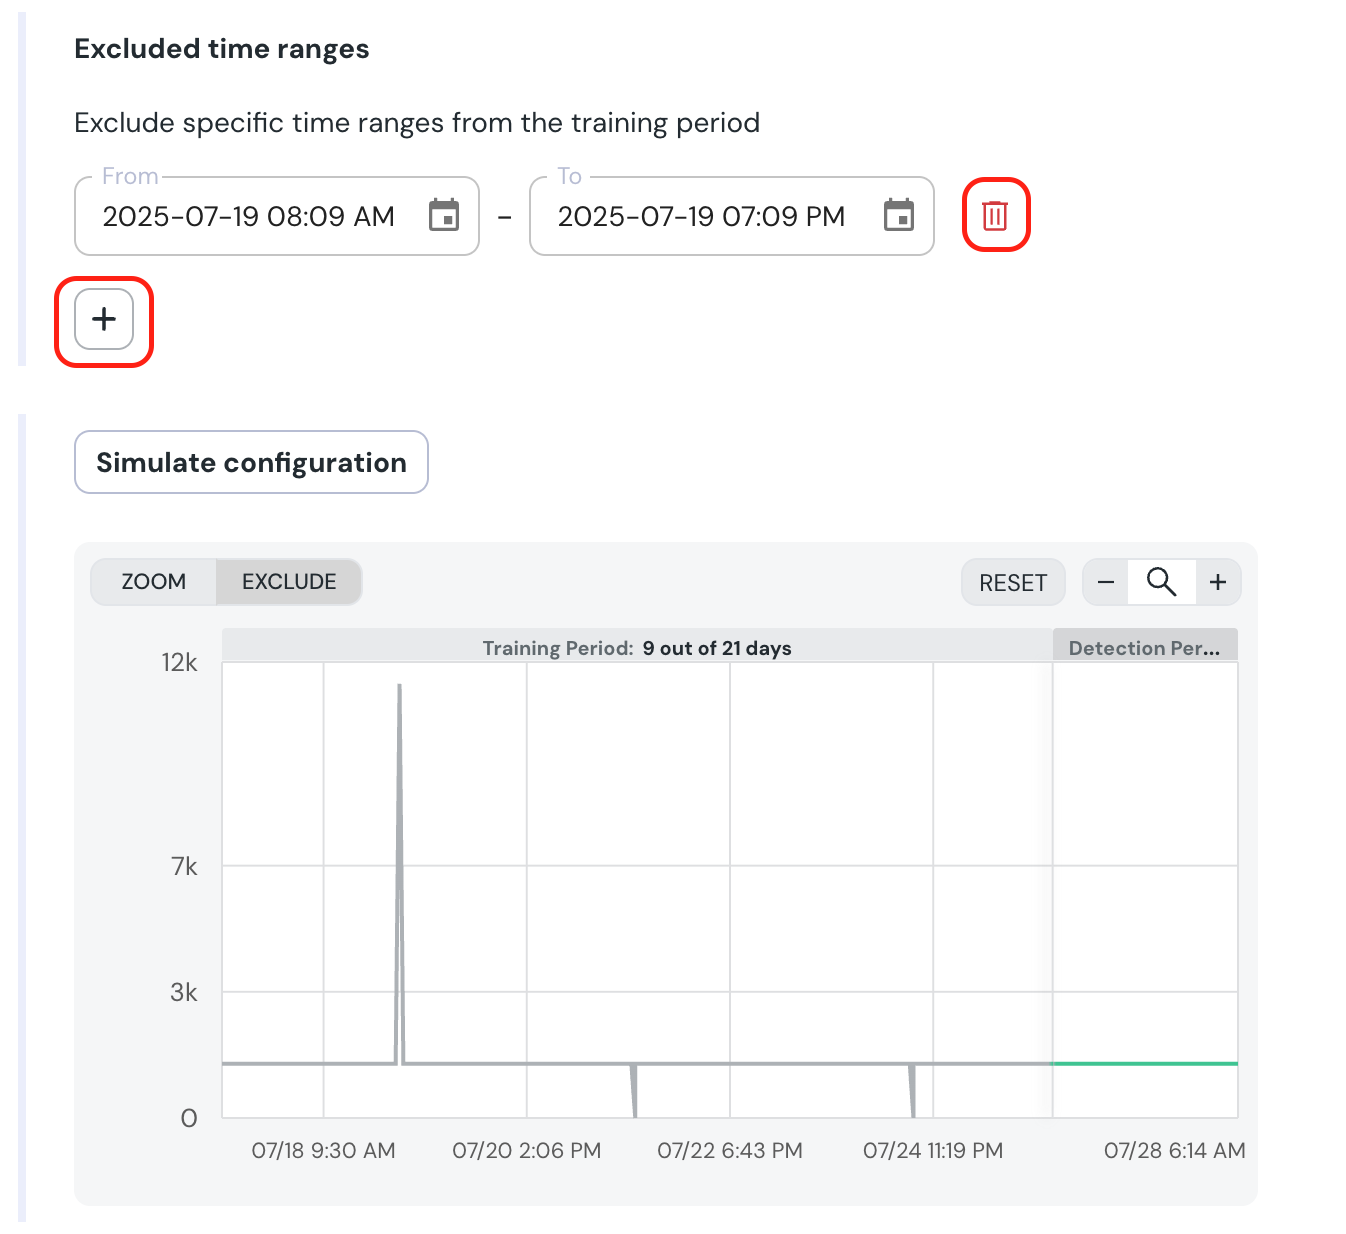
- On confirmation, the new excluded time range will appear under
Excluded time ranges. You can modify or remove it, and you can also add new ranges using the + sign if you prefer. - To test the configuration, click “Simulate configuration”.
There are two ways to delete monitors from the UI.
- Test configuration page - Choose one or more tests, and an option to delete them will be available at the bottom of the page.
- Test results page - Press the
...button on the top right of the test result and thenDelete test.