2.0. CustomActiveScan Main Panel
The CustomActiveScan Main Panel can select something other new scanner rules. Currently, this provides two rule types below:
-
"SQL" rule type
The "SQL" rule is the default CustomActiveScan rule. this provides blind SQL injection test by using true/false SQL injection patterns.
SQL injection pattern consists of below patterns:
TrueName pattern: (optionnal) A pattern value that is the parameter name pattern of the trueValuePattern.
TrueValue pattern: (required) A pattern value that is equivalent to the original parameter value.
FalseName pattern: (optionnal) A pattern value that is the parameter name pattern of the falseValuePattern.
FalseValue pattern: (required) A pattern value that evaluates the SQL conditional clause to zero.
ErrorName pattern: (optionnal) A pattern value that is the parameter name pattern of the errorValuePattern
ErrorValue pattern: (optional) A pattern value that evaluates as SQL error.
you can change these pattern anytime, but if you change these pattern, then save dialog appears, so you must save these pattern to json file by using it. -
"PenTest" rule type
The "PenTest" rule is a simply add attack patterns in request and detecting specified keyword from response.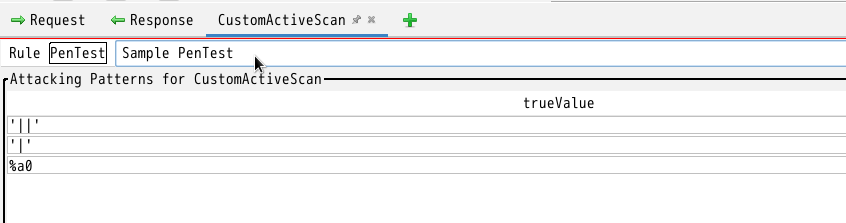
PenTest pattern consists of below patterns:
TrueValue pattern: a pattern value which add to insertion point in request
you can add/change/delete detecting keyword by "Regexes for detecting keywords in response results" pane below.
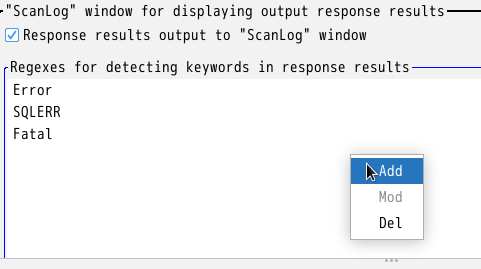
To add detecting keyword, select Add item in popup menu. input keyword using regular expression.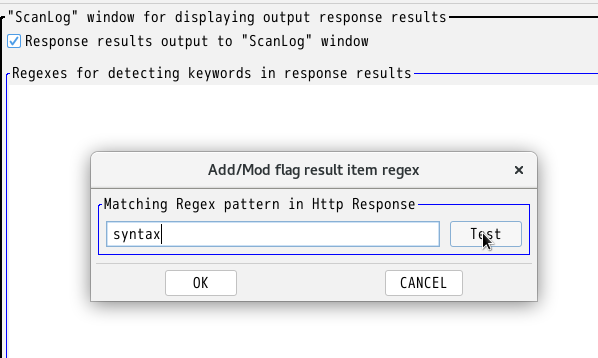
If you check keyword is valid regular expression, then press test button. regex test dialog opens. Paste response text which you want to search, and press test button.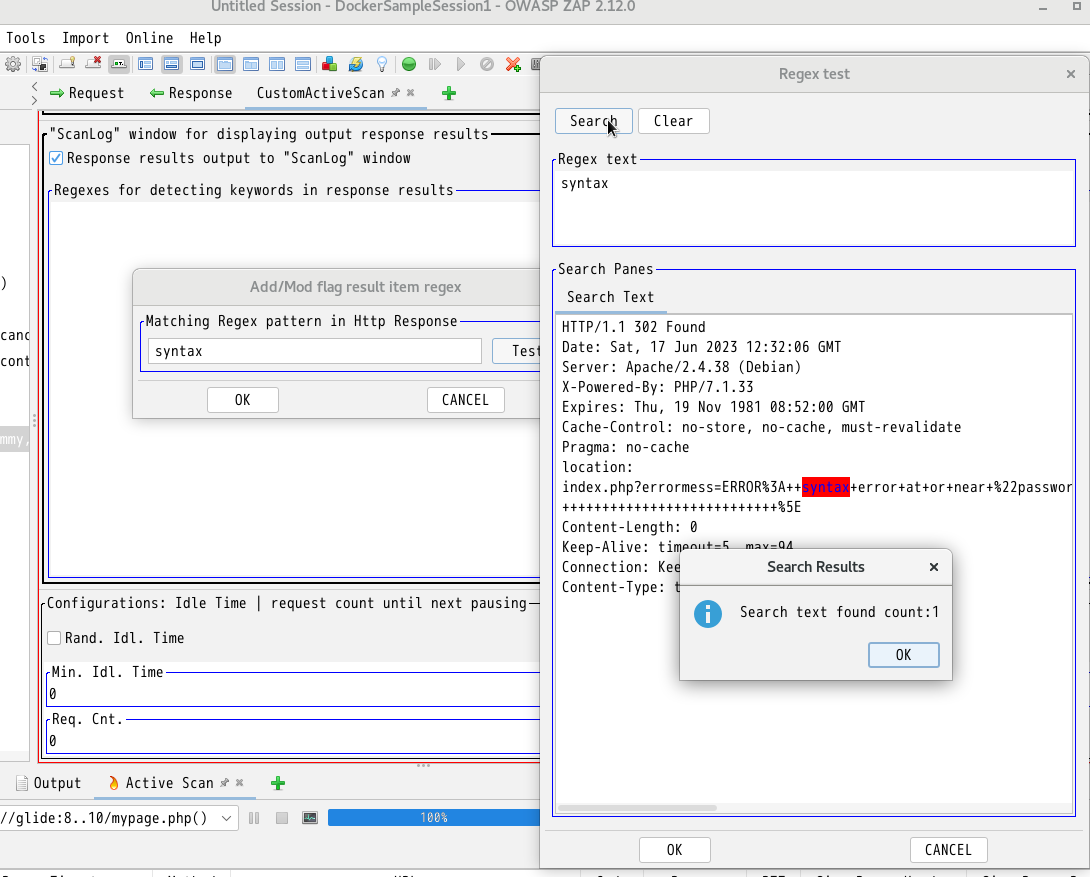
press OK button to add keyword. -
add/copy/save/load/select Rule
you can add(new)/copy/save/load rule by following menu.
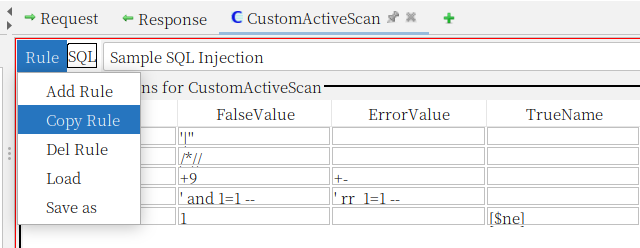
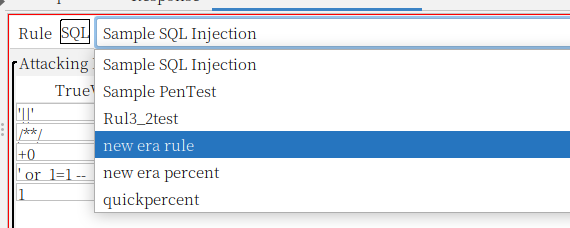
and you can select existing Rule by following menu.
-
configure scan idle time and pause counter
You can set the scan idle time, which is the wait time between each sending request.
Min.idl.Time: Minimum wait time (ms)
Max.idl.Time: Maximum waiting time (ms)
Rand.Idl.TIME: If checked, it will randomly set the wait time between Min.Idl.Time and Max.idl.Time. If this is not checked, the wait time value will be the maximum value of Min.Idl.Time and Max.idl.Time.
Req.Cnt: if you set this value greater than 0 and checked ScanLogPanel check box, scan temporarily will stop after sending request count reached this value. (described detail below next section)
-
ScanLogPanel popup check box
if you check "response results output to "ScanLog" window", The ScanLog Panel appears when starting activescan.
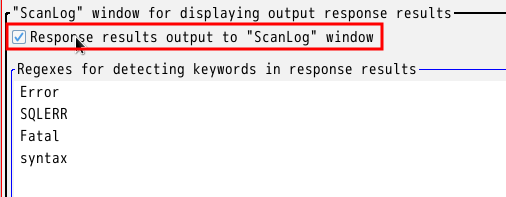
The ScanLog Panel has similar functionality like History panel. one difference is The scanLog Panel has columns for count of keyword detected in response

-
pause (temporalily stop) scanning
if you set Req.Cnt value to be greater than 0 and checked ScanLogPanel check box in CustomScan Main Panel, scan temporarily will stop after sending request count reached this value. The following shows the scan paused after sending two requests.

you can continue scanning until next pausing by click ▶pause button. if you want to cancel pause action, set Req.Cnt value 0. -
ScanLogPanel popup menu
following shows ScanLogPanel popup menus.
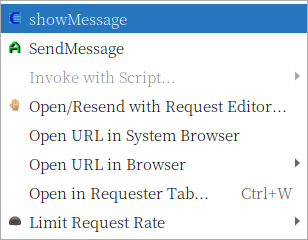
showMessage: display the Result Dialog which shows selected scan result in ScanLogPanel. it shows Request/Response/Alert details.
sendMessage: send request of selected scan result in AutoMacroBuilder.
other menus shows zaproxy standard menus. -
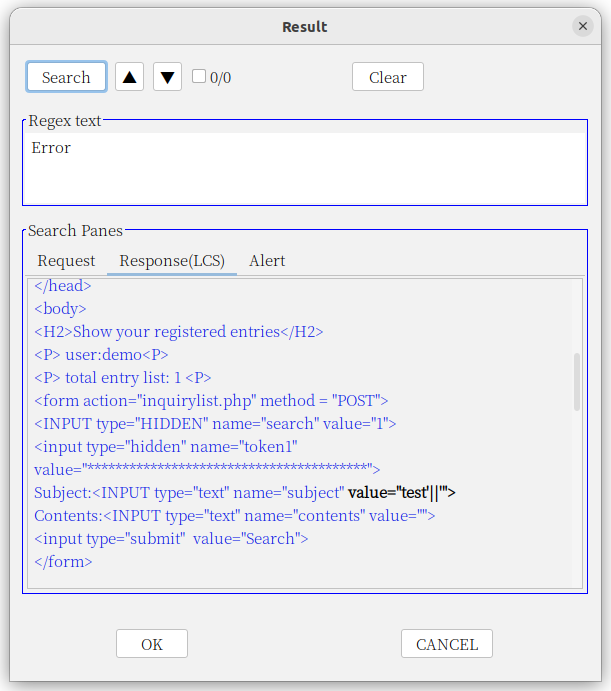
Result Dialog
following shows the Result Dialog. this shows request/respose/Alert details in selected scan result.
in Response(LCS) TextPane, the response text with blue color indicates that text is the same as the original response text.
text with bold black color indicates that text is different from the original.