| title | Setting up Testsigma Agent on your local machine | ||||||||||||||||||||||||||||||||||||||||||||||||||||||
|---|---|---|---|---|---|---|---|---|---|---|---|---|---|---|---|---|---|---|---|---|---|---|---|---|---|---|---|---|---|---|---|---|---|---|---|---|---|---|---|---|---|---|---|---|---|---|---|---|---|---|---|---|---|---|---|
| metadesc | Learn how to install Testsigma Agent on your local machine and register it to your Testsigma Account for local inspection and test runs. | ||||||||||||||||||||||||||||||||||||||||||||||||||||||
| noindex | false | ||||||||||||||||||||||||||||||||||||||||||||||||||||||
| order | 11.3 | ||||||||||||||||||||||||||||||||||||||||||||||||||||||
| page_id | Setting up Testsigma Agent on your local machine | ||||||||||||||||||||||||||||||||||||||||||||||||||||||
| warning | false | ||||||||||||||||||||||||||||||||||||||||||||||||||||||
| contextual_links |
|
With Testsigma Agent you can run tests on local machines/devices in addition to Testsigma Cloud. This article discusses how to set up the Testsigma agent on your local machine.
The Testsigma Agents are available in the following forms:
- ZIP files
- Executable files
- DMG files
- Docker image
-
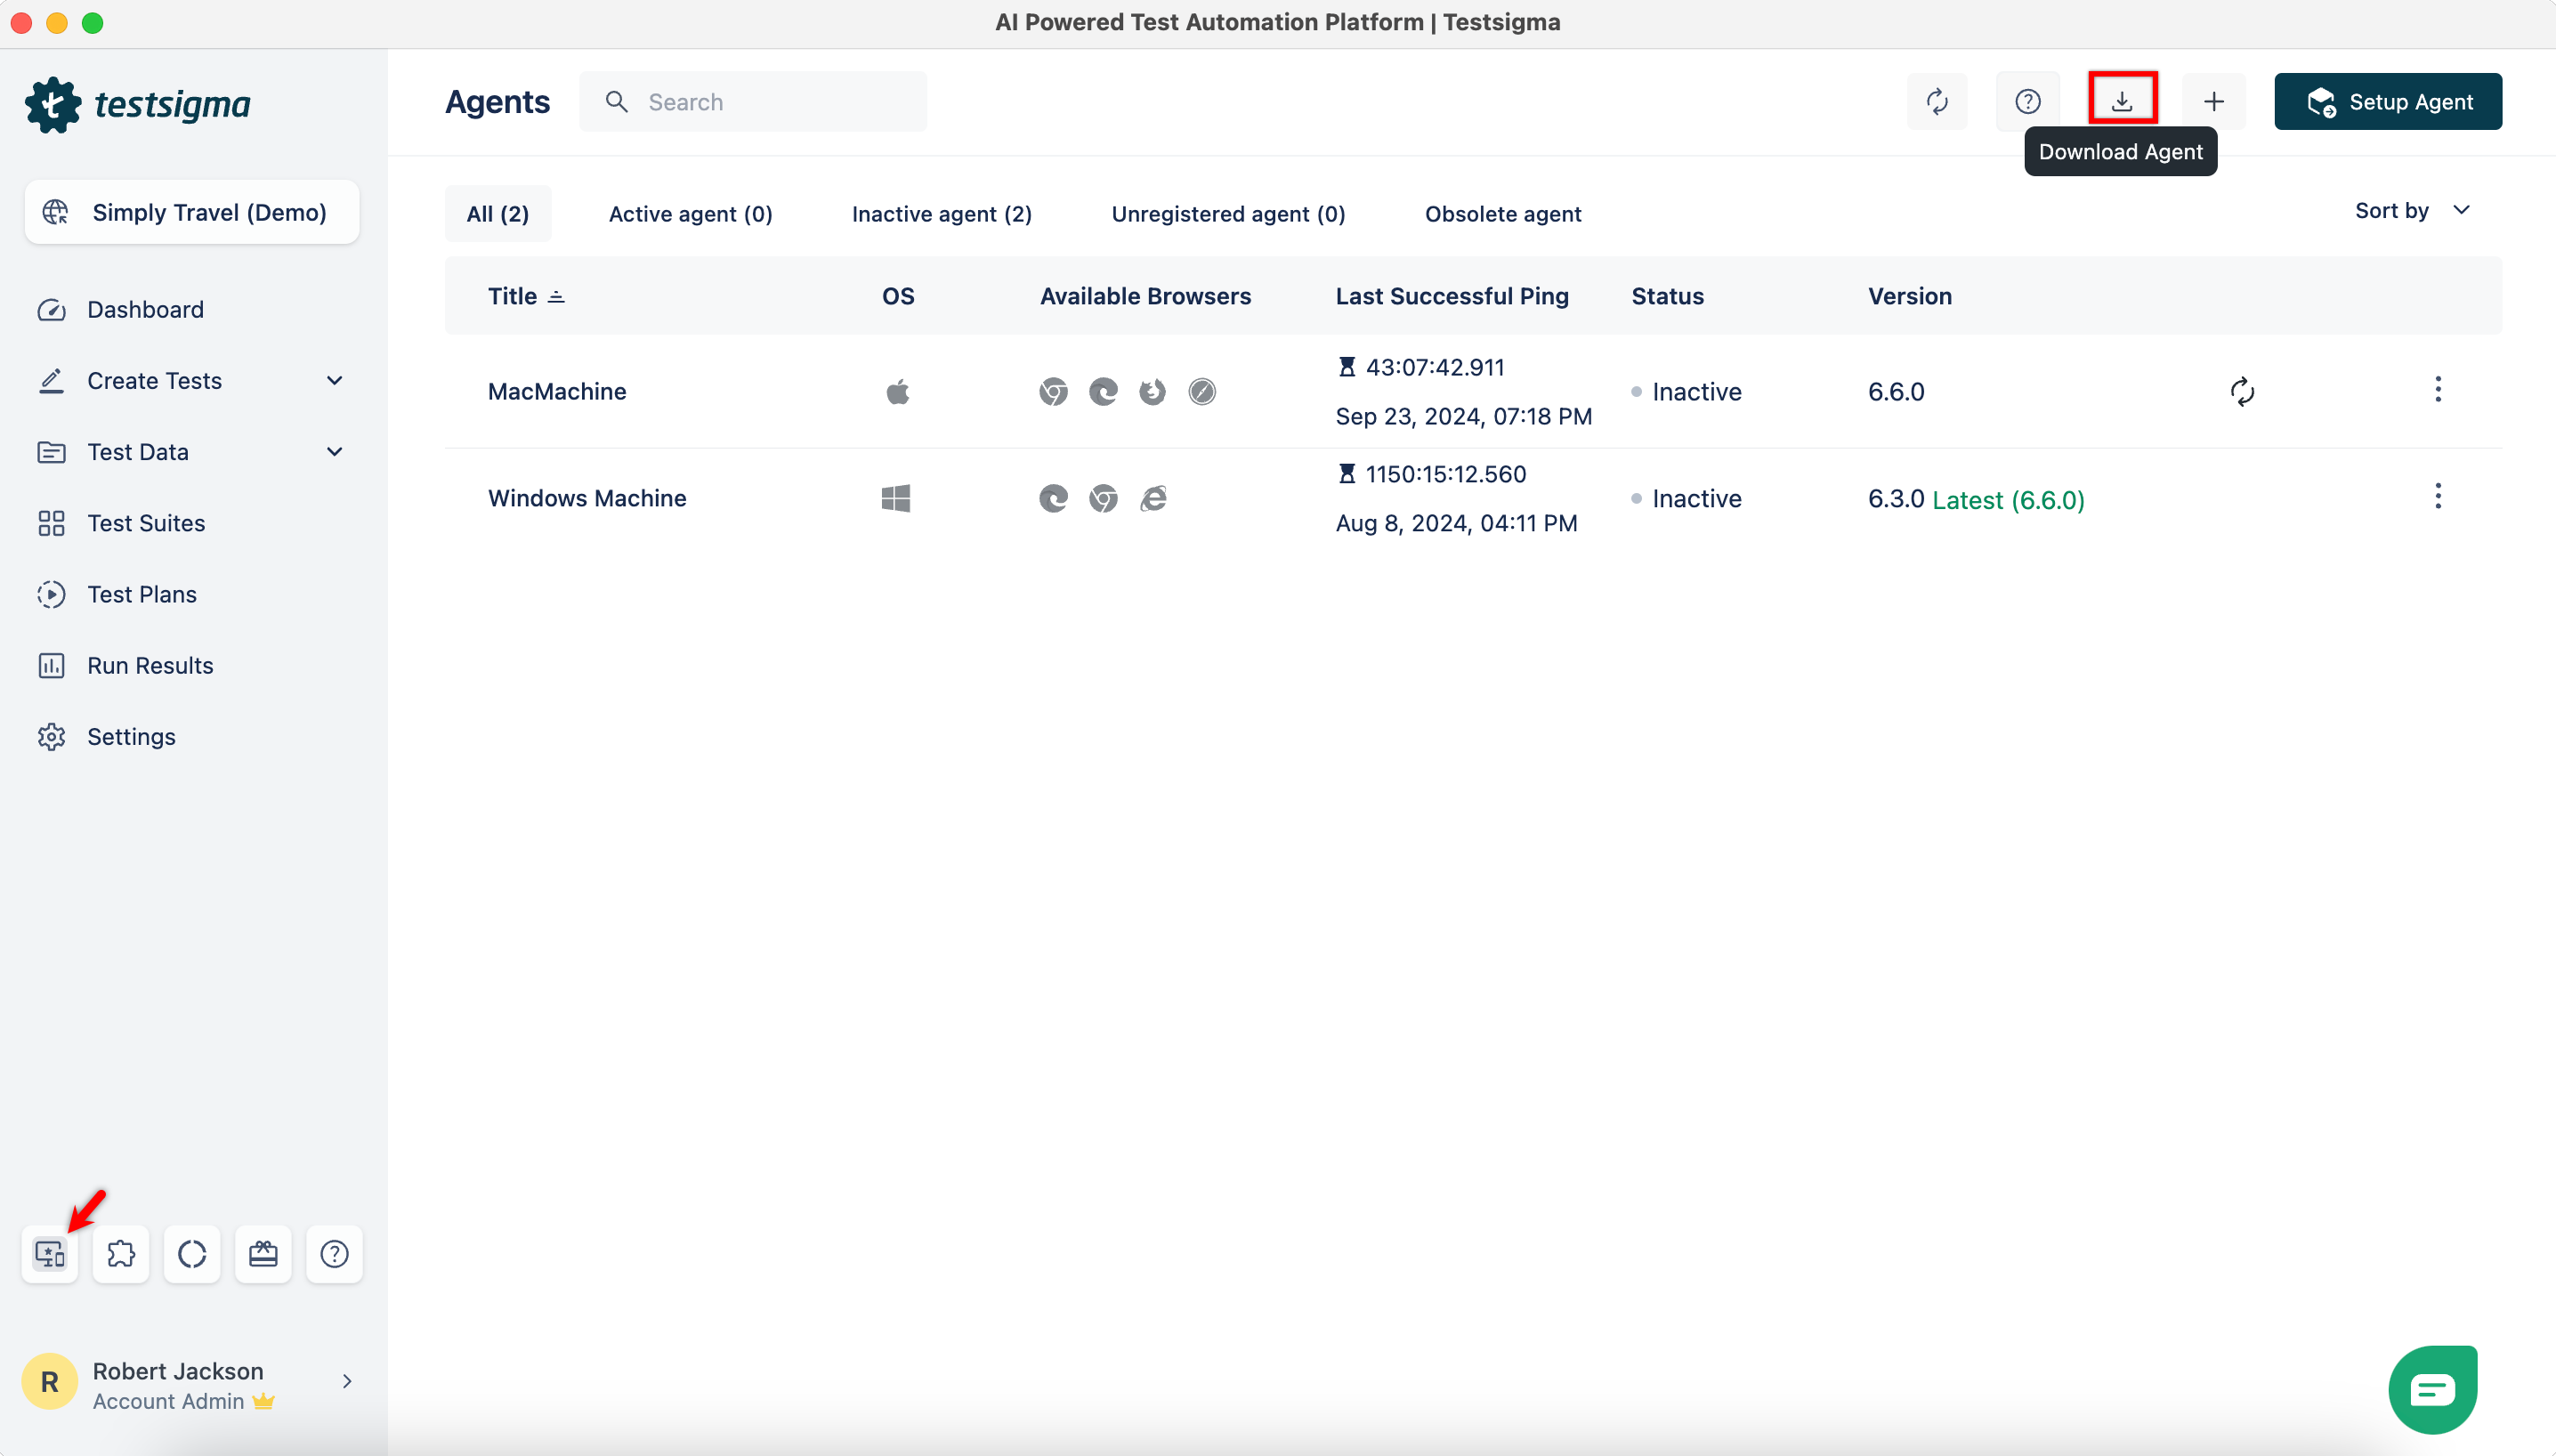
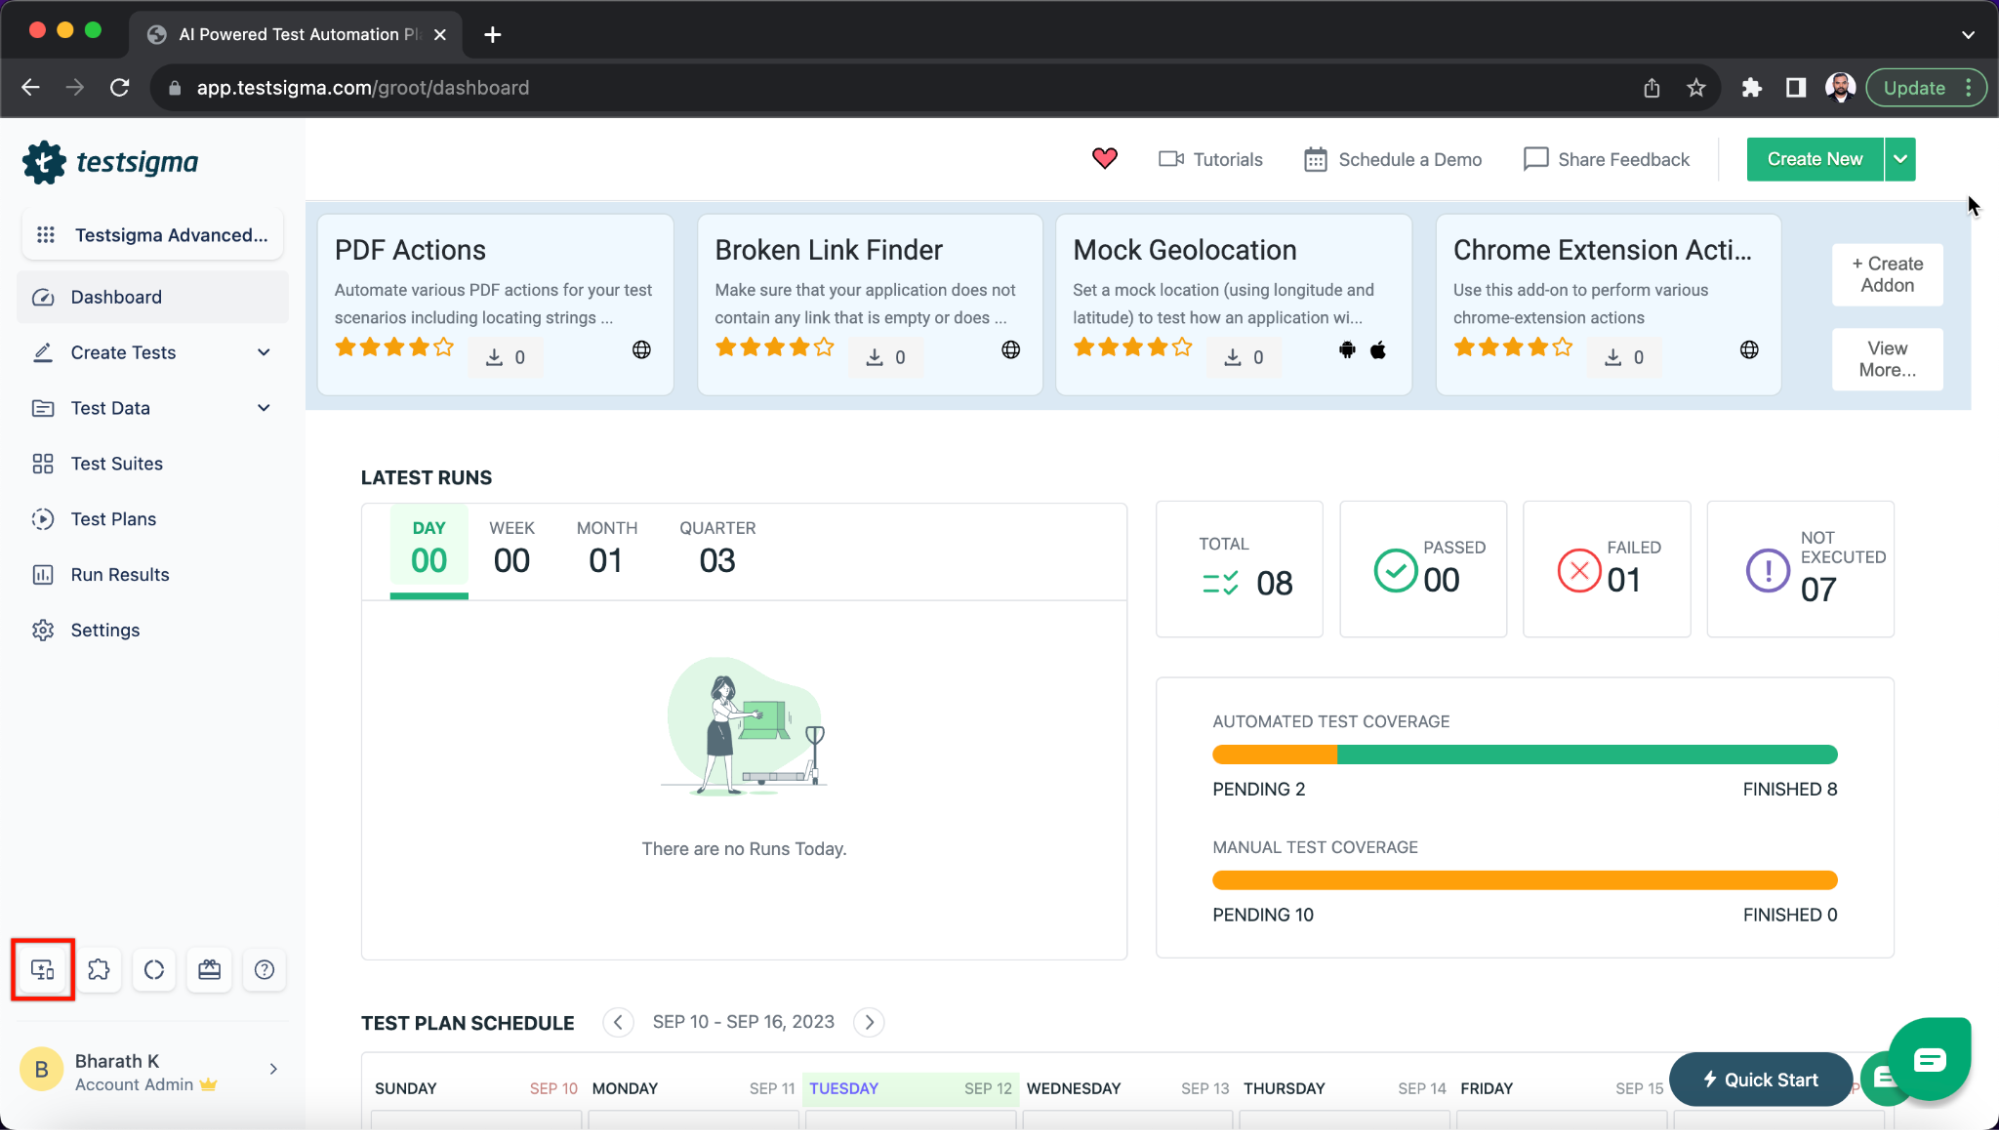
Navigate to Agents and click on Download Agent.
-
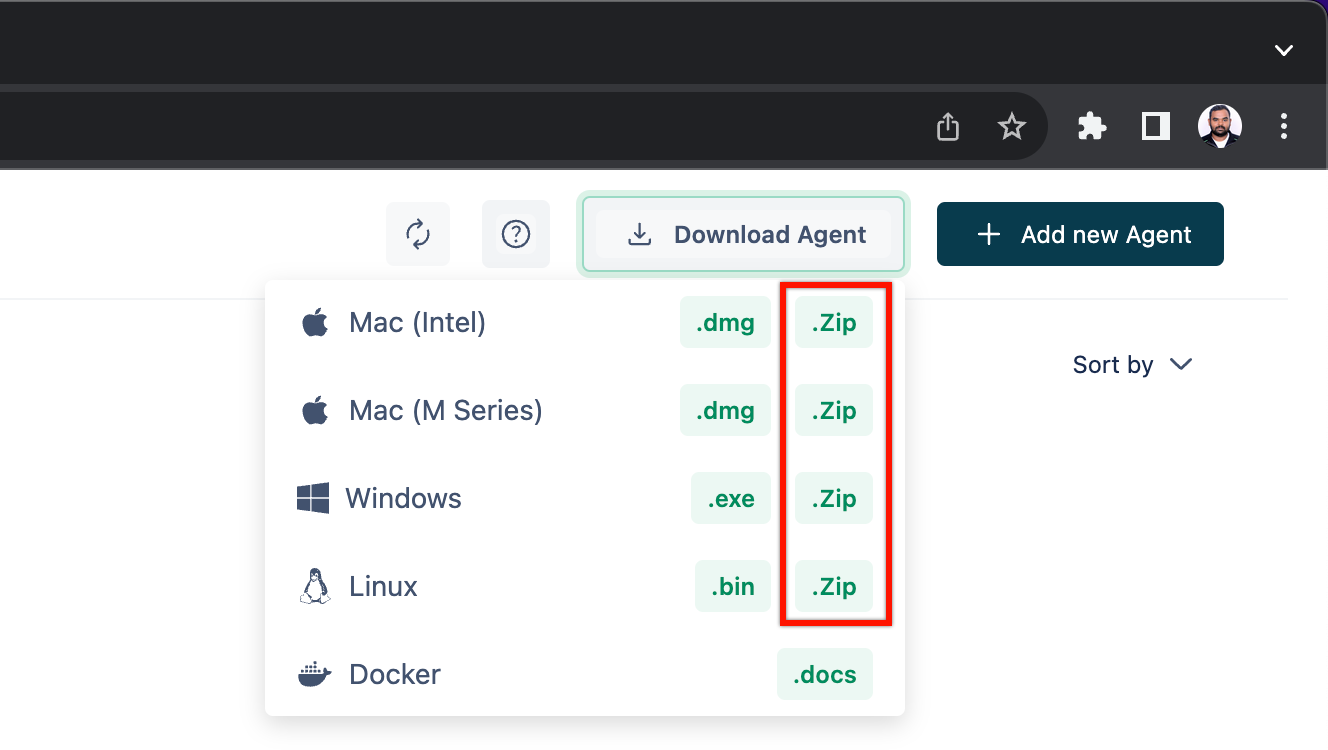
From the dropdown that appears, download the ZIP file as per your machine.
-
After downloading the agent ZIP file, extract the Testsigma Agent ZIP file to a location of your choice. Some suggested locations to place the Testsigma agent folder are mentioned in the table below:
Operating System Preferred Agent location Windows C:\Users<your_username>\ Mac /Users/<your_username>/ Linux /Users/<your_username>/ Replace the <your_username> part with your account username.
The home directory is recommended so as to avoid hassles of setting file permissions and ownership and also to avoid file corruption due to syncing with iCloud or Google Drive.
You can either start the Testsigma agent server as a process via the command line or terminal when needed. Or, you can run the Testsigma agent server as a server. For more information, refer to the below sections to see how to start the Testsigma Agent as a process or as a service.
-
Navigate to Agents and click on Download Agent.
-
From the dropdown that appears, select the executable file supported by your machine.
- For Windows, select exe,
- For mac, select dmg,
- For Linux, select bin to download the latest version of Testsigma Agent.
-
Double click on the downloaded file.
-
Choose the path where you would like to install the agent.
-
Let the installer run till completion.
Once the installation is complete, you can either run the Testsigma Agent server as a process via the command line/terminal when needed.
-
Navigate to the Testsigma Agent installation folder and double click the start.bat or run start.bat in the command line file to start the Testsigma Agent.
-
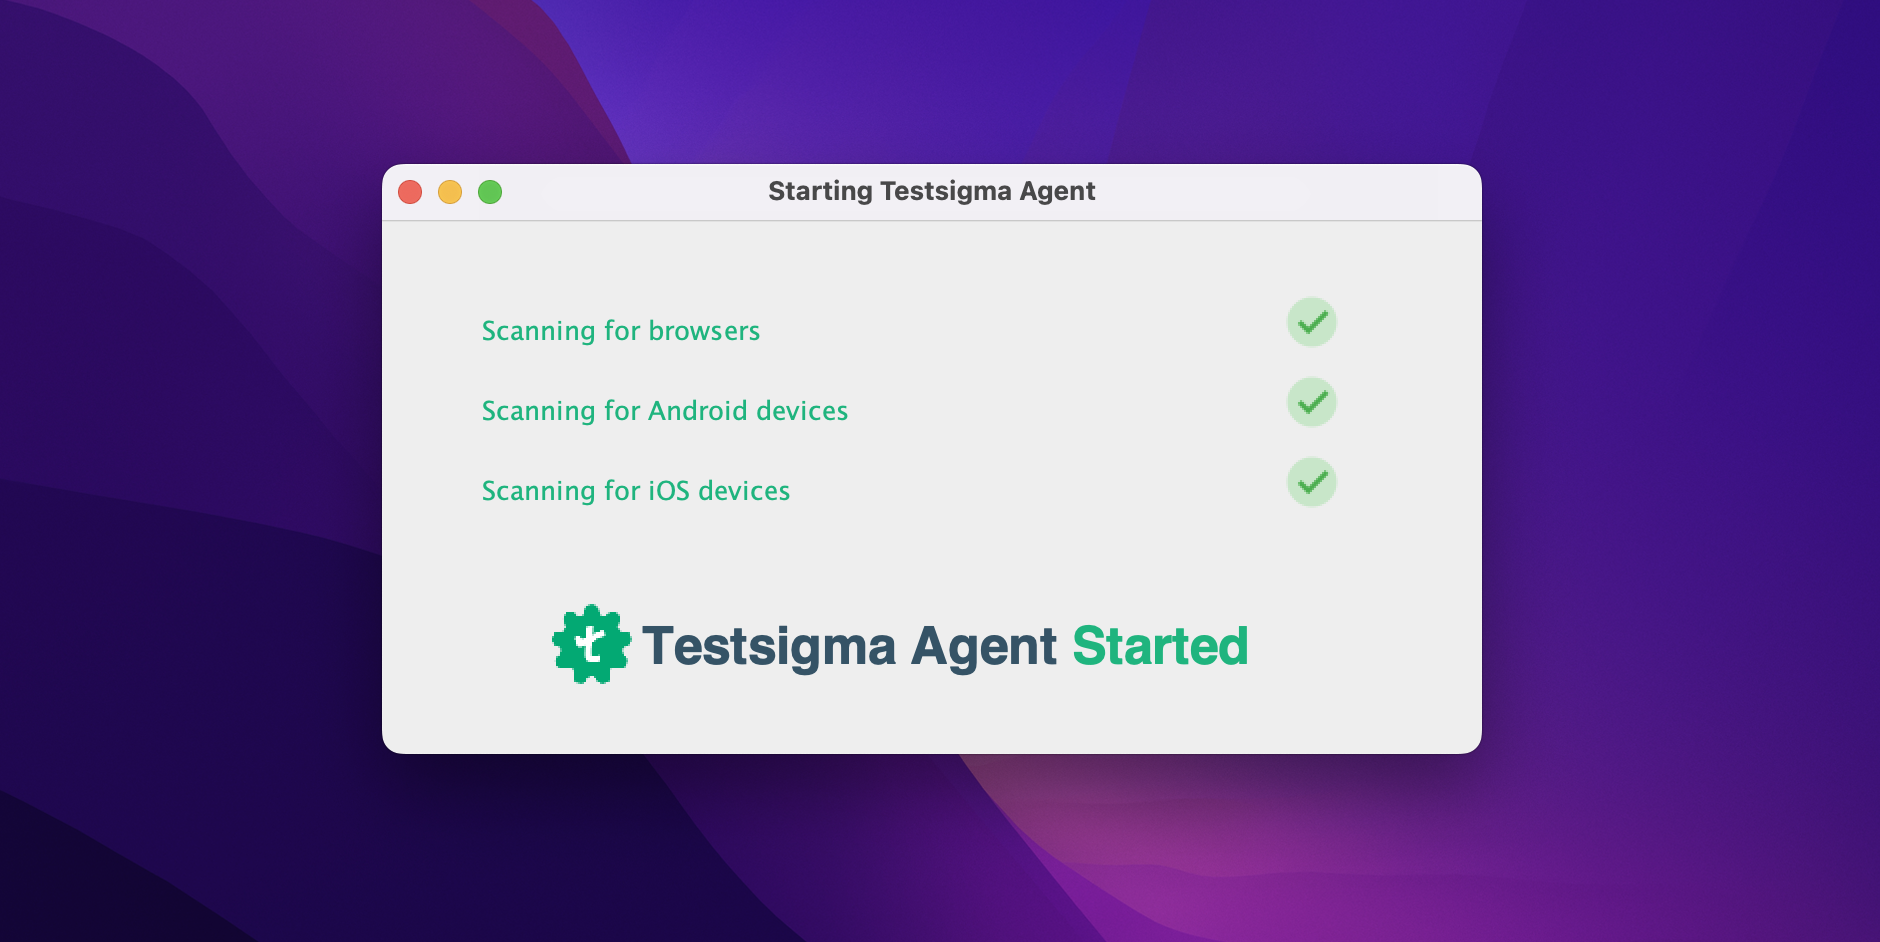
Wait for a few minutes for the Testsigma Agent to start up.
-
After starting up you will be directed to the agent registration page.
For more information on how to register Testsigma Agent, refer to register the Testsigma Agent.
-
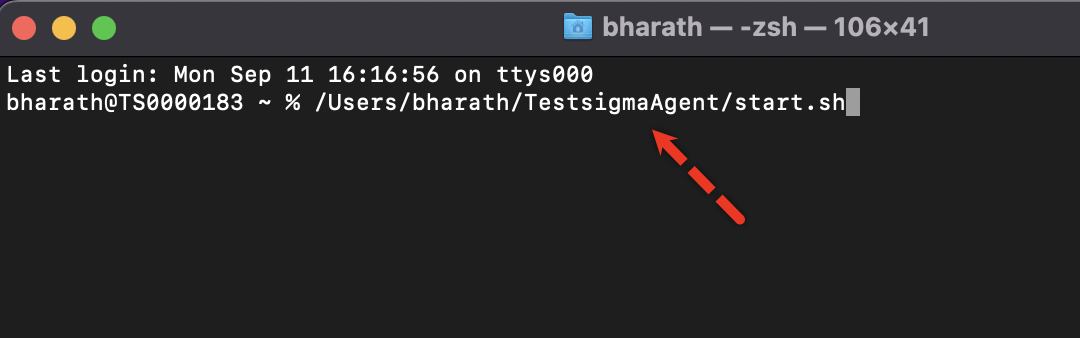
Navigate to the Testsigma Agent installation folder and drag start.sh to a new terminal window and click on Return.
-
Wait for a few minutes for the Testsigma Agent to start up.
-
After starting up you will be directed to the agent registration page.


For more information on how to register Testsigma Agent, refer to register the Testsigma Agent.
-
For Windows: Go to the command line. For Mac/Linux: Go to the terminal.
-
Navigate to the Testsigma Agent installation folder.
-
Inside the Testsigma Agent installation folder, navigate to Wrapper > Bin.
-
For Mac/Linux, if you want to install the agent as a service, use the command TestsigmaAgent start.
-
For Windows, if you want to install the agent as a service, use the command TestsigmaAgent install.
[[info | NOTE:]] | At present, the option to install Testsigma Agent to start automatically when system boots is only supported for windows.
- To stop the service, run the command - TestsigmaAgent stop from the same location.
Commands that work with TestsigmaAgent:
console      Launch in the current console.
start        Start in the background as a daemon process.
stop         Stop if running as a daemon or in another console.
restart      Stop if running and then start.
condrestart  Restart only if already running.
status       Query the current status.
install      Install to start automatically when system boots.
installstart Install and start running as a daemon process.
remove       Uninstall.
dump         Request a Java thread dump if running.
-
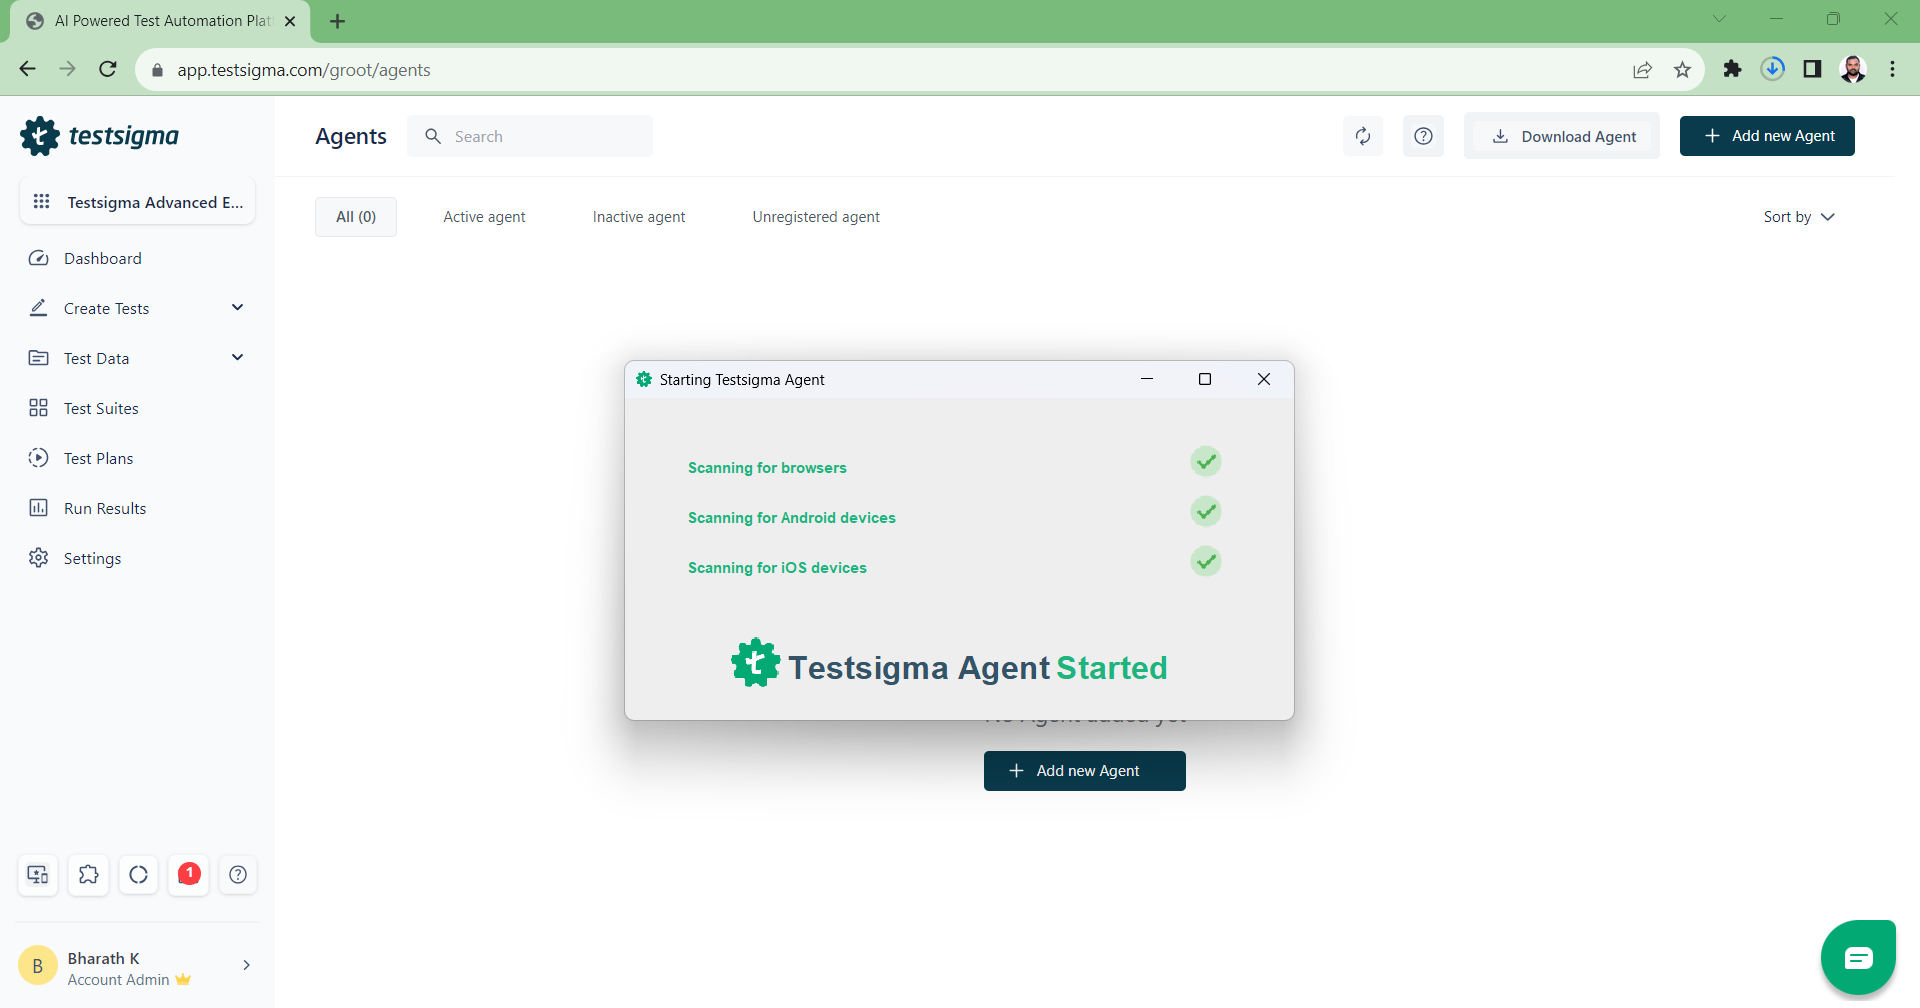
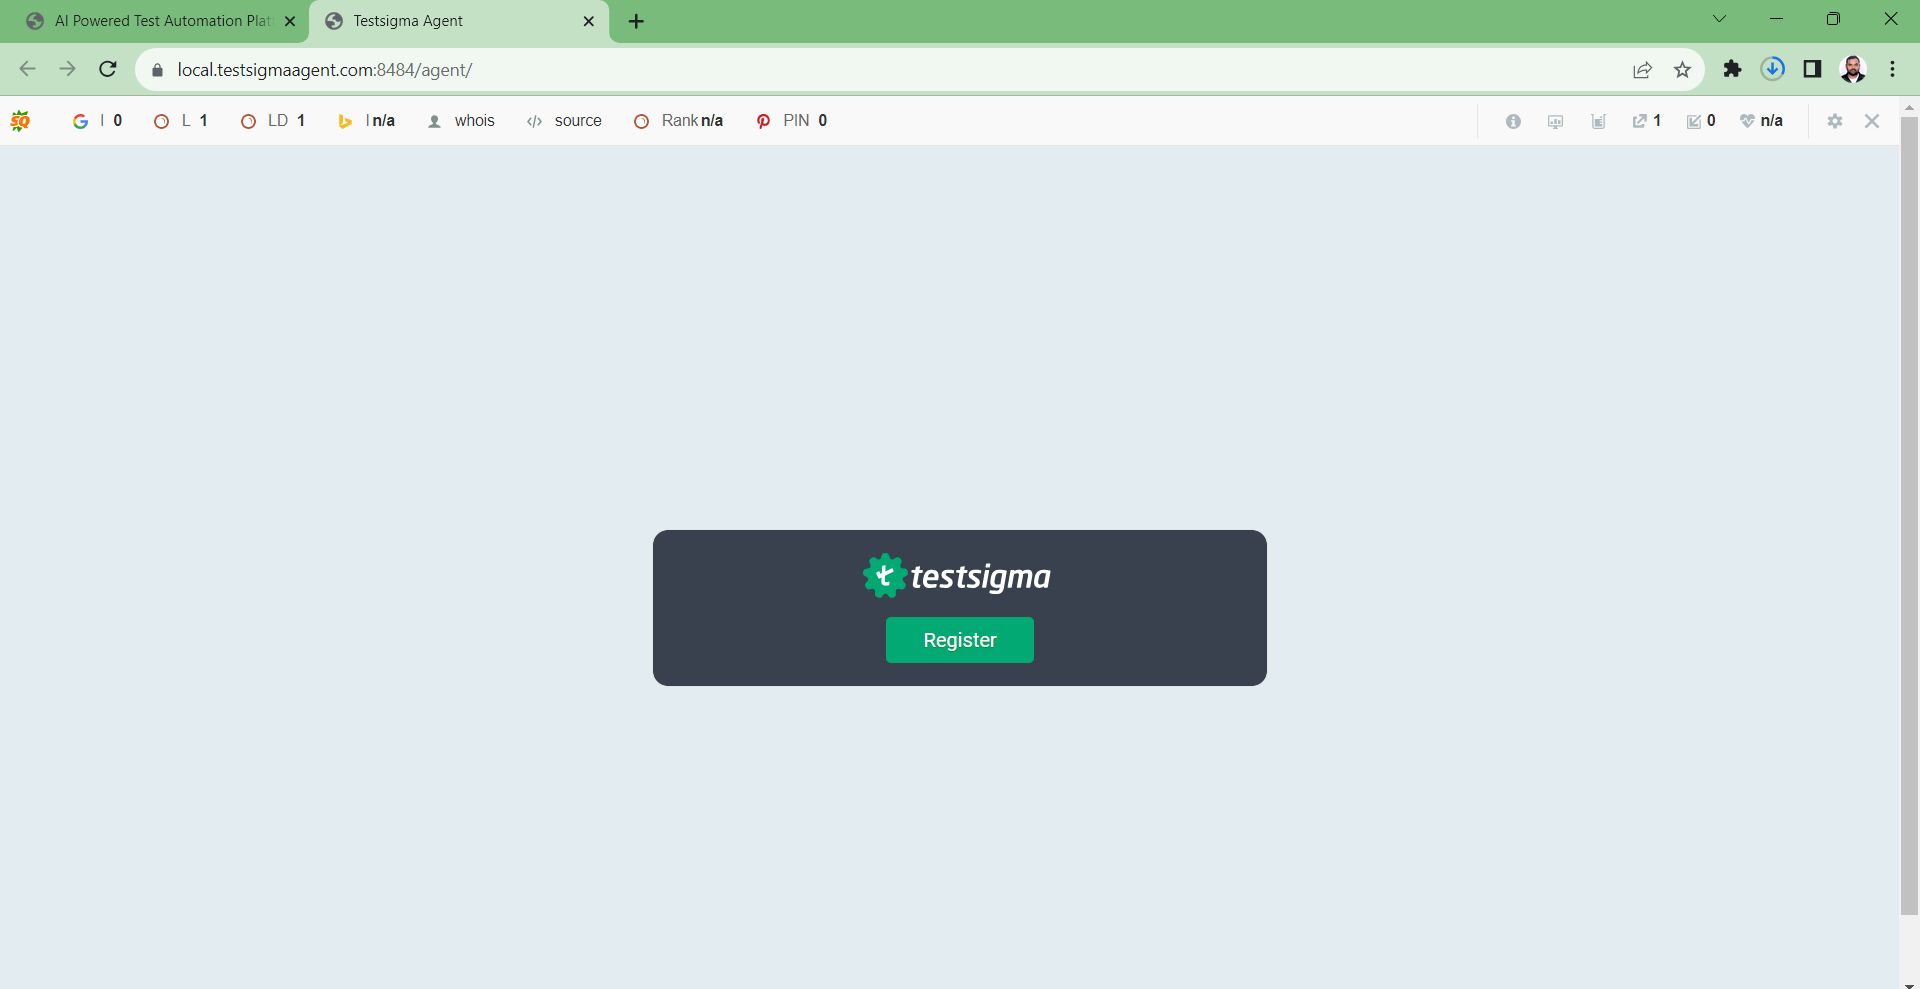
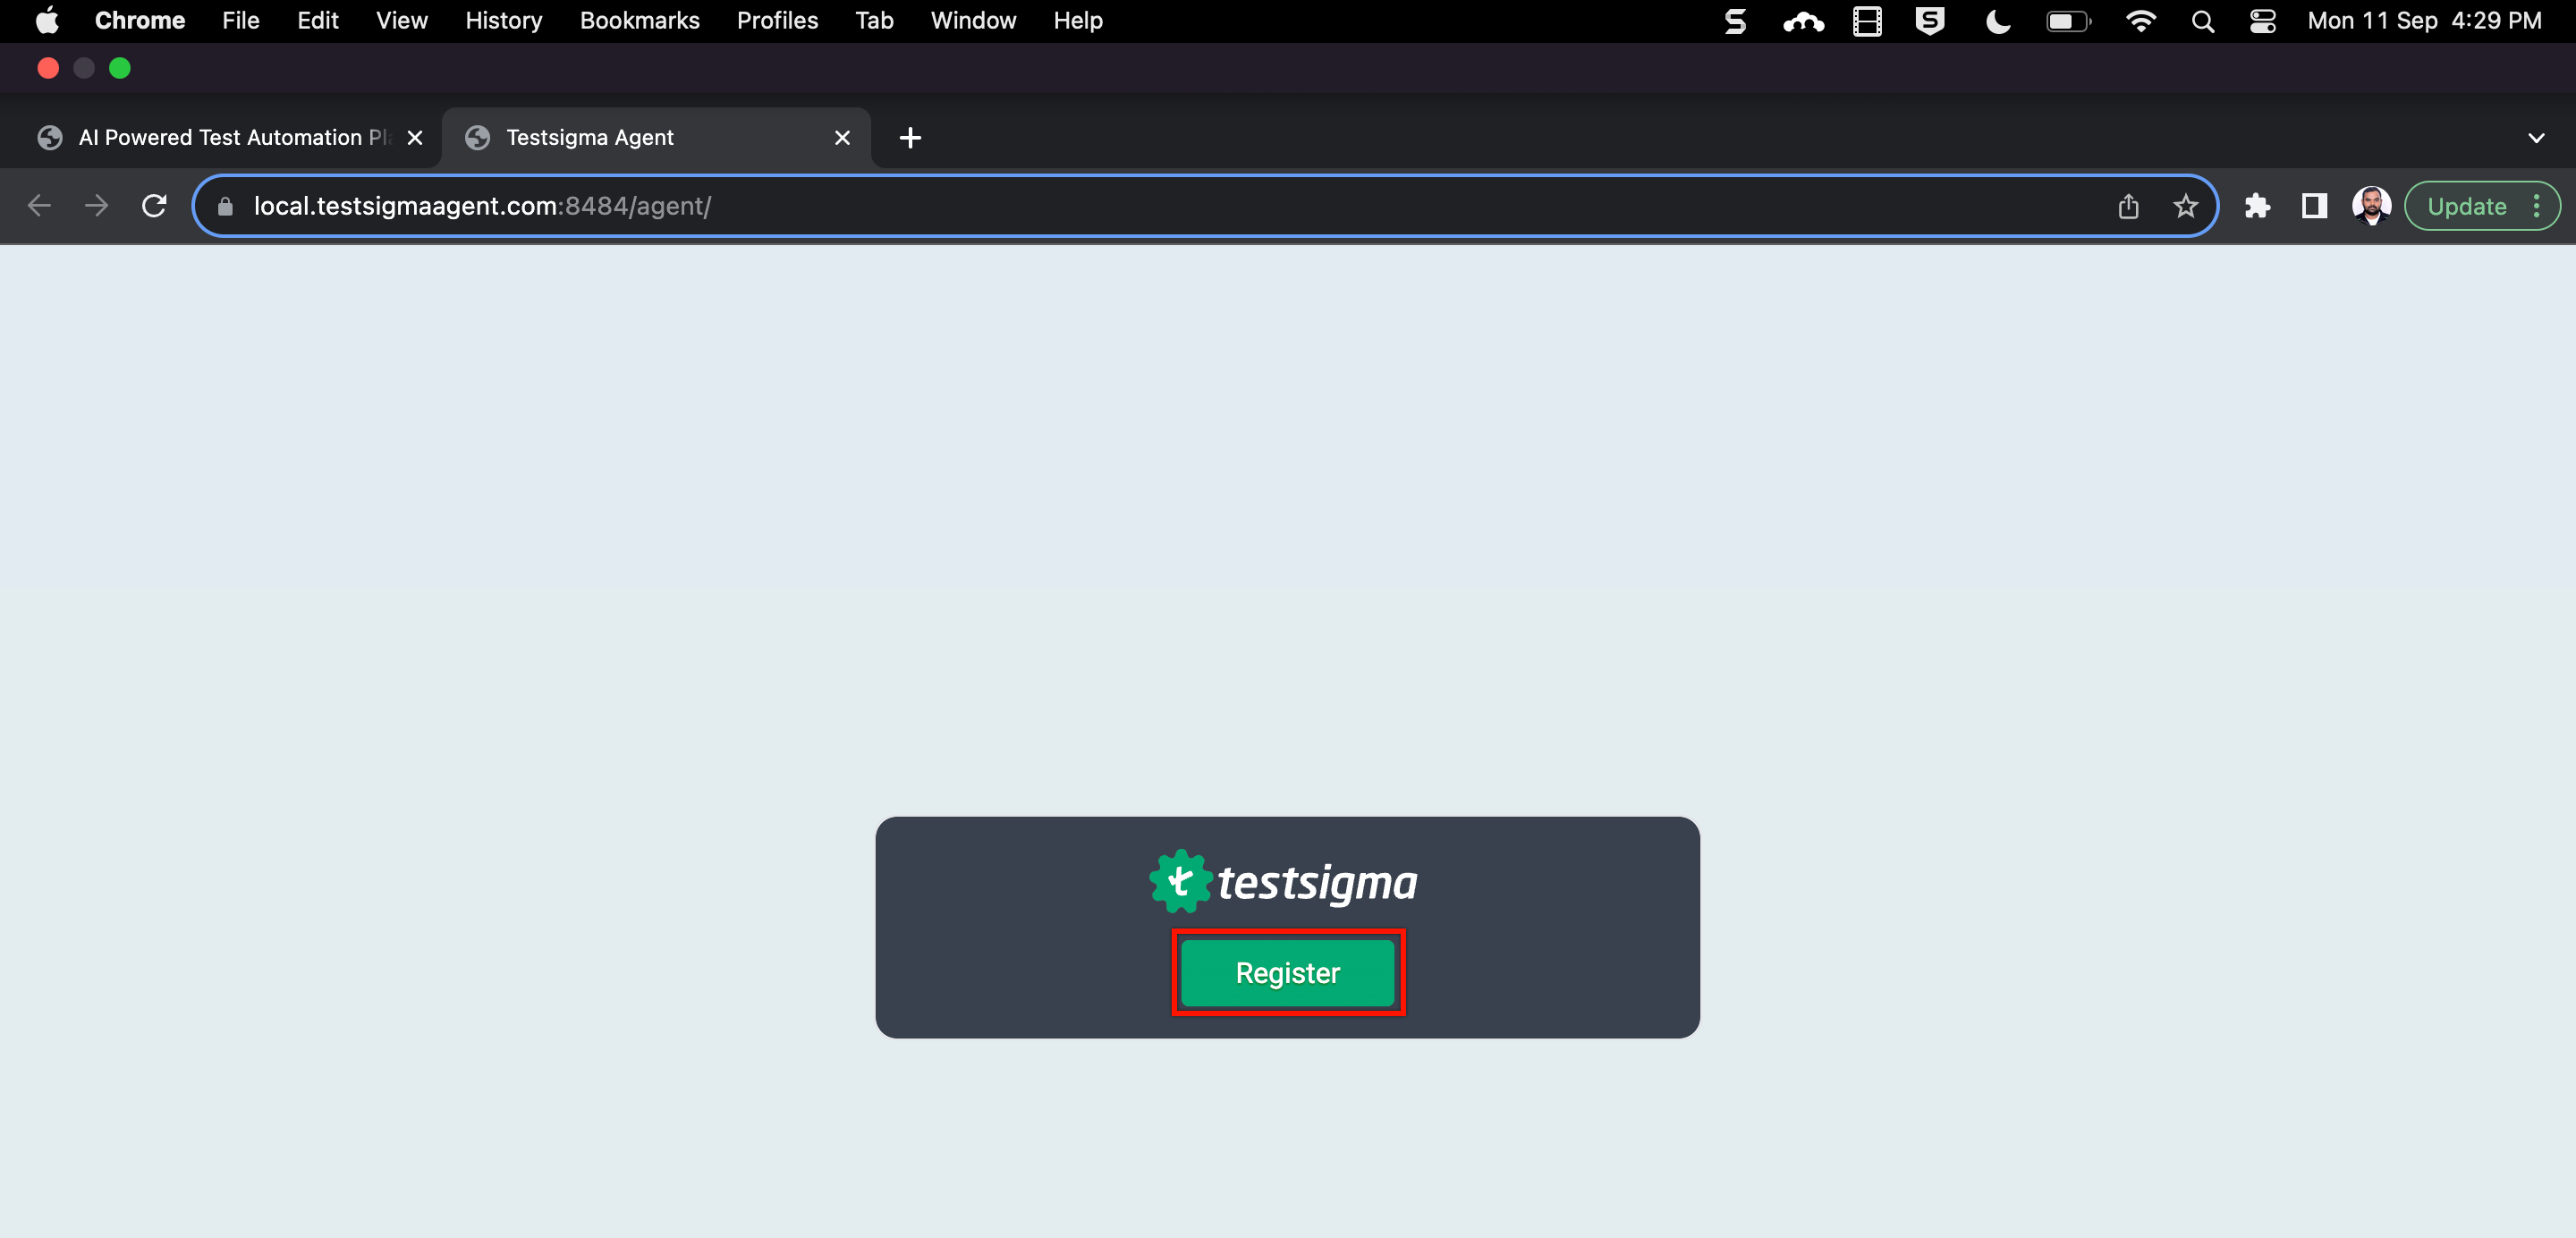
Once your Testsigma agent is up and running, you will be directed to the Agent registration page.
-
Click on Register to start the Agent registration process.
-
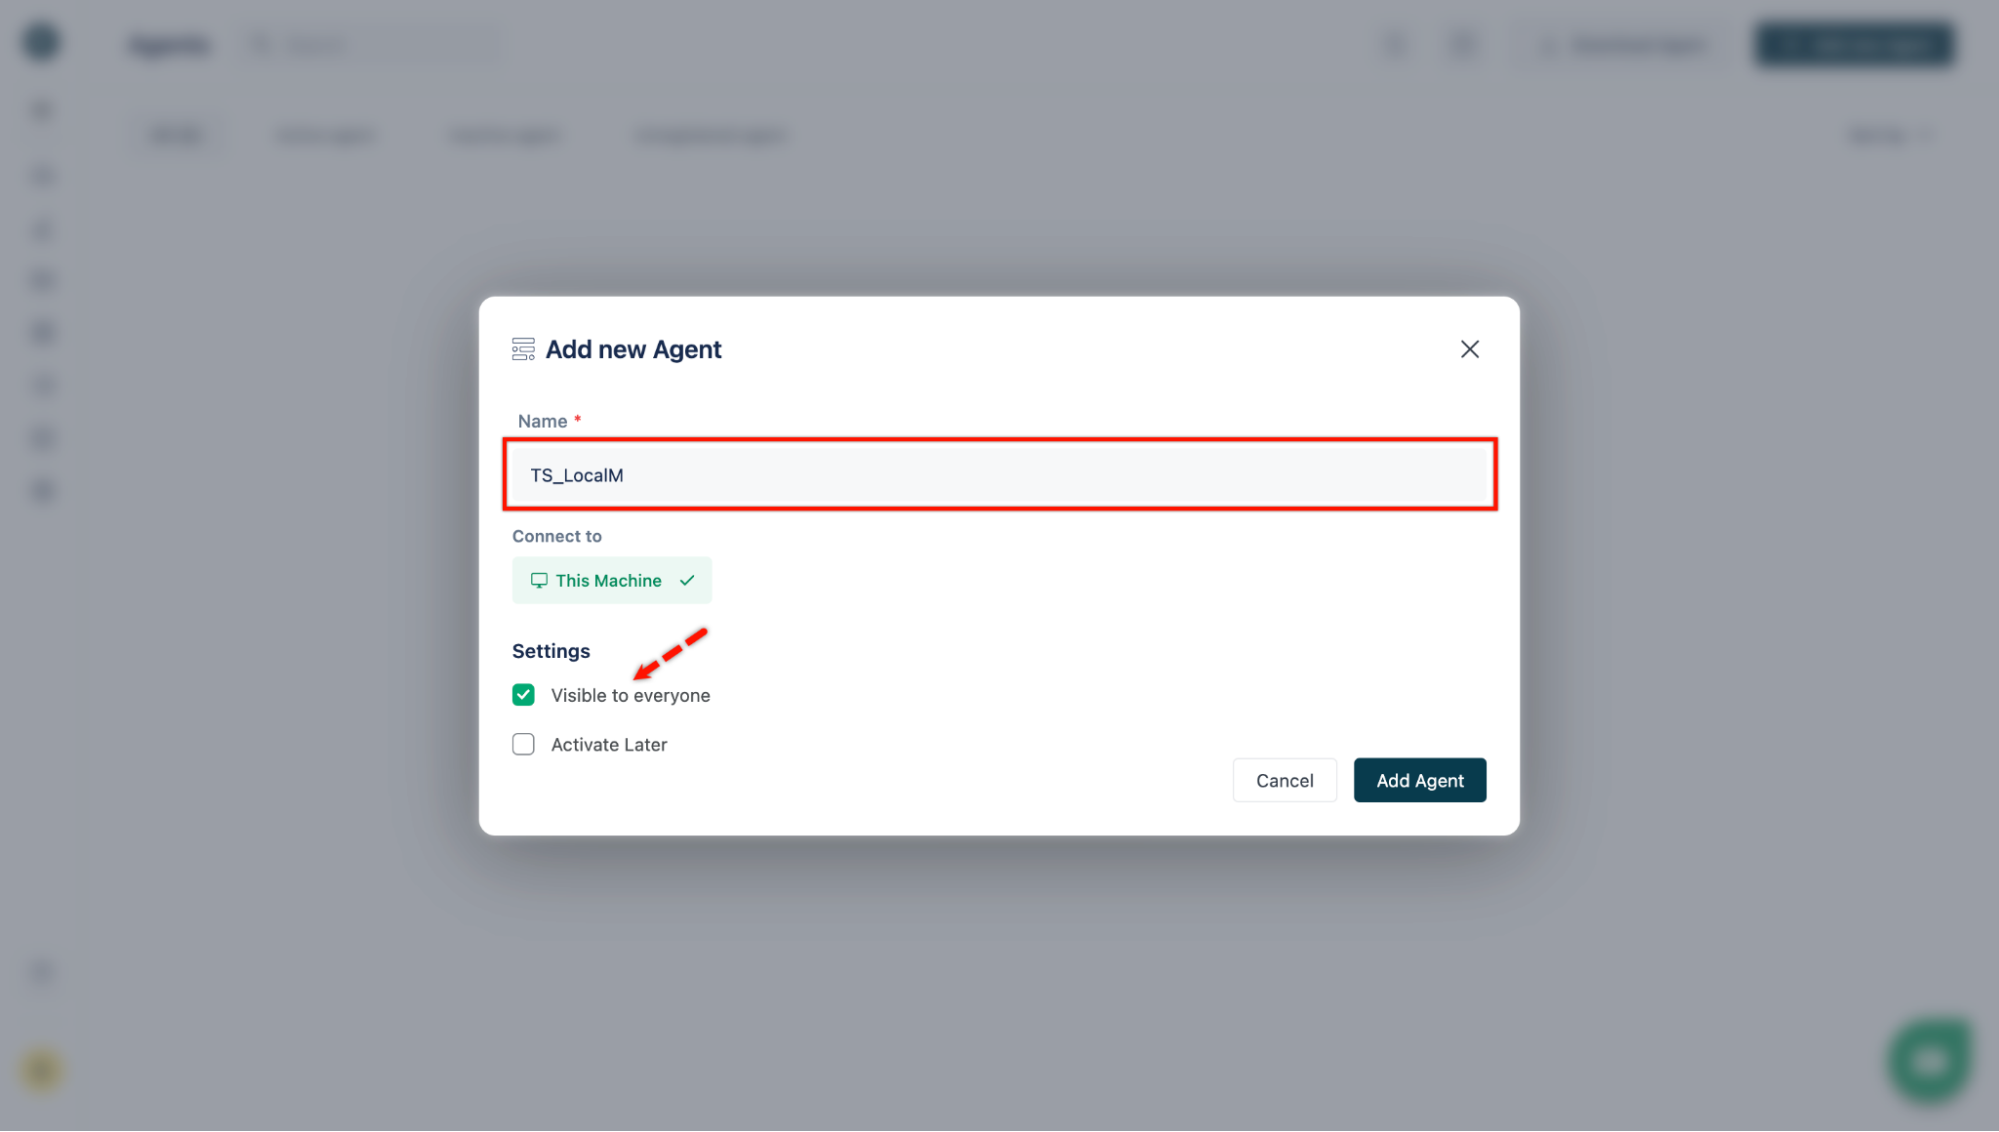
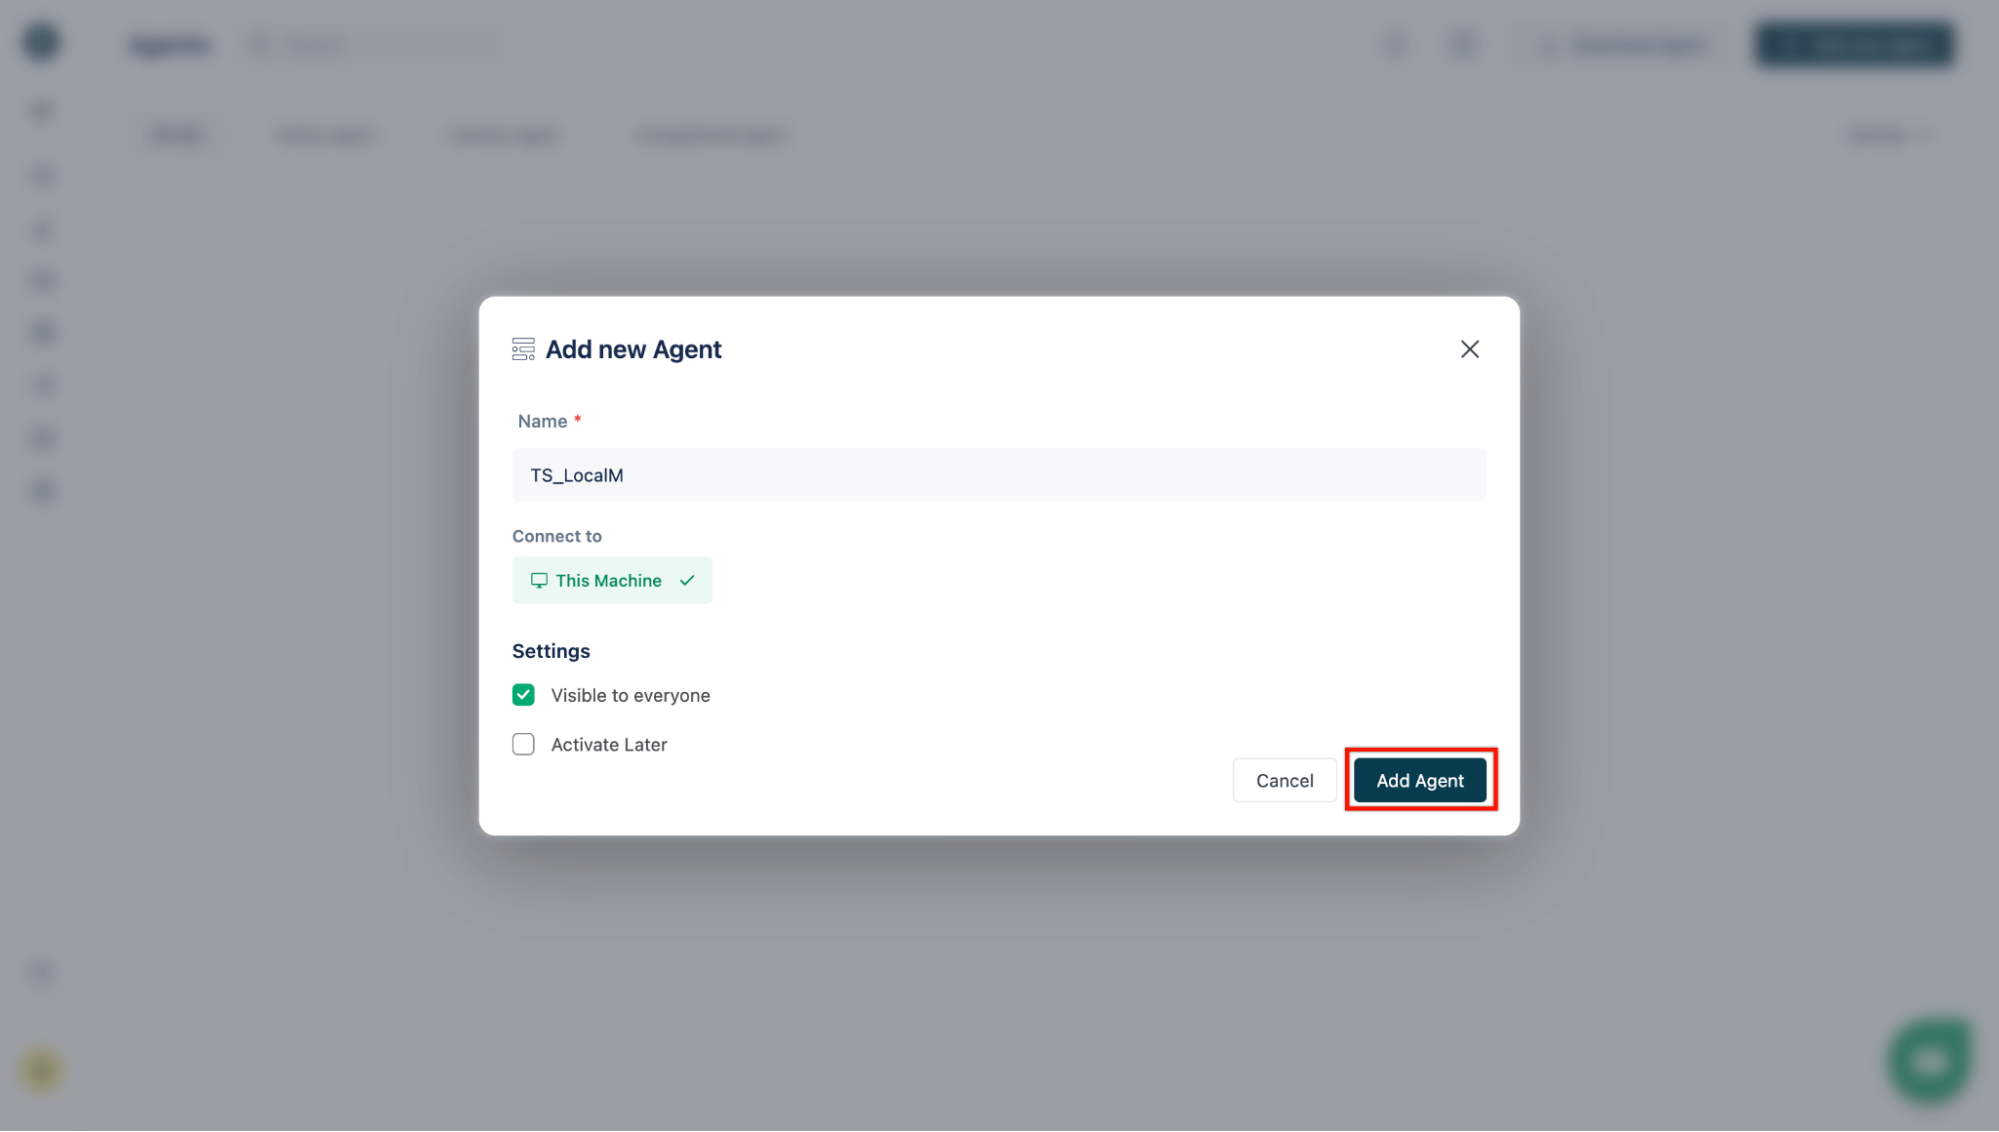
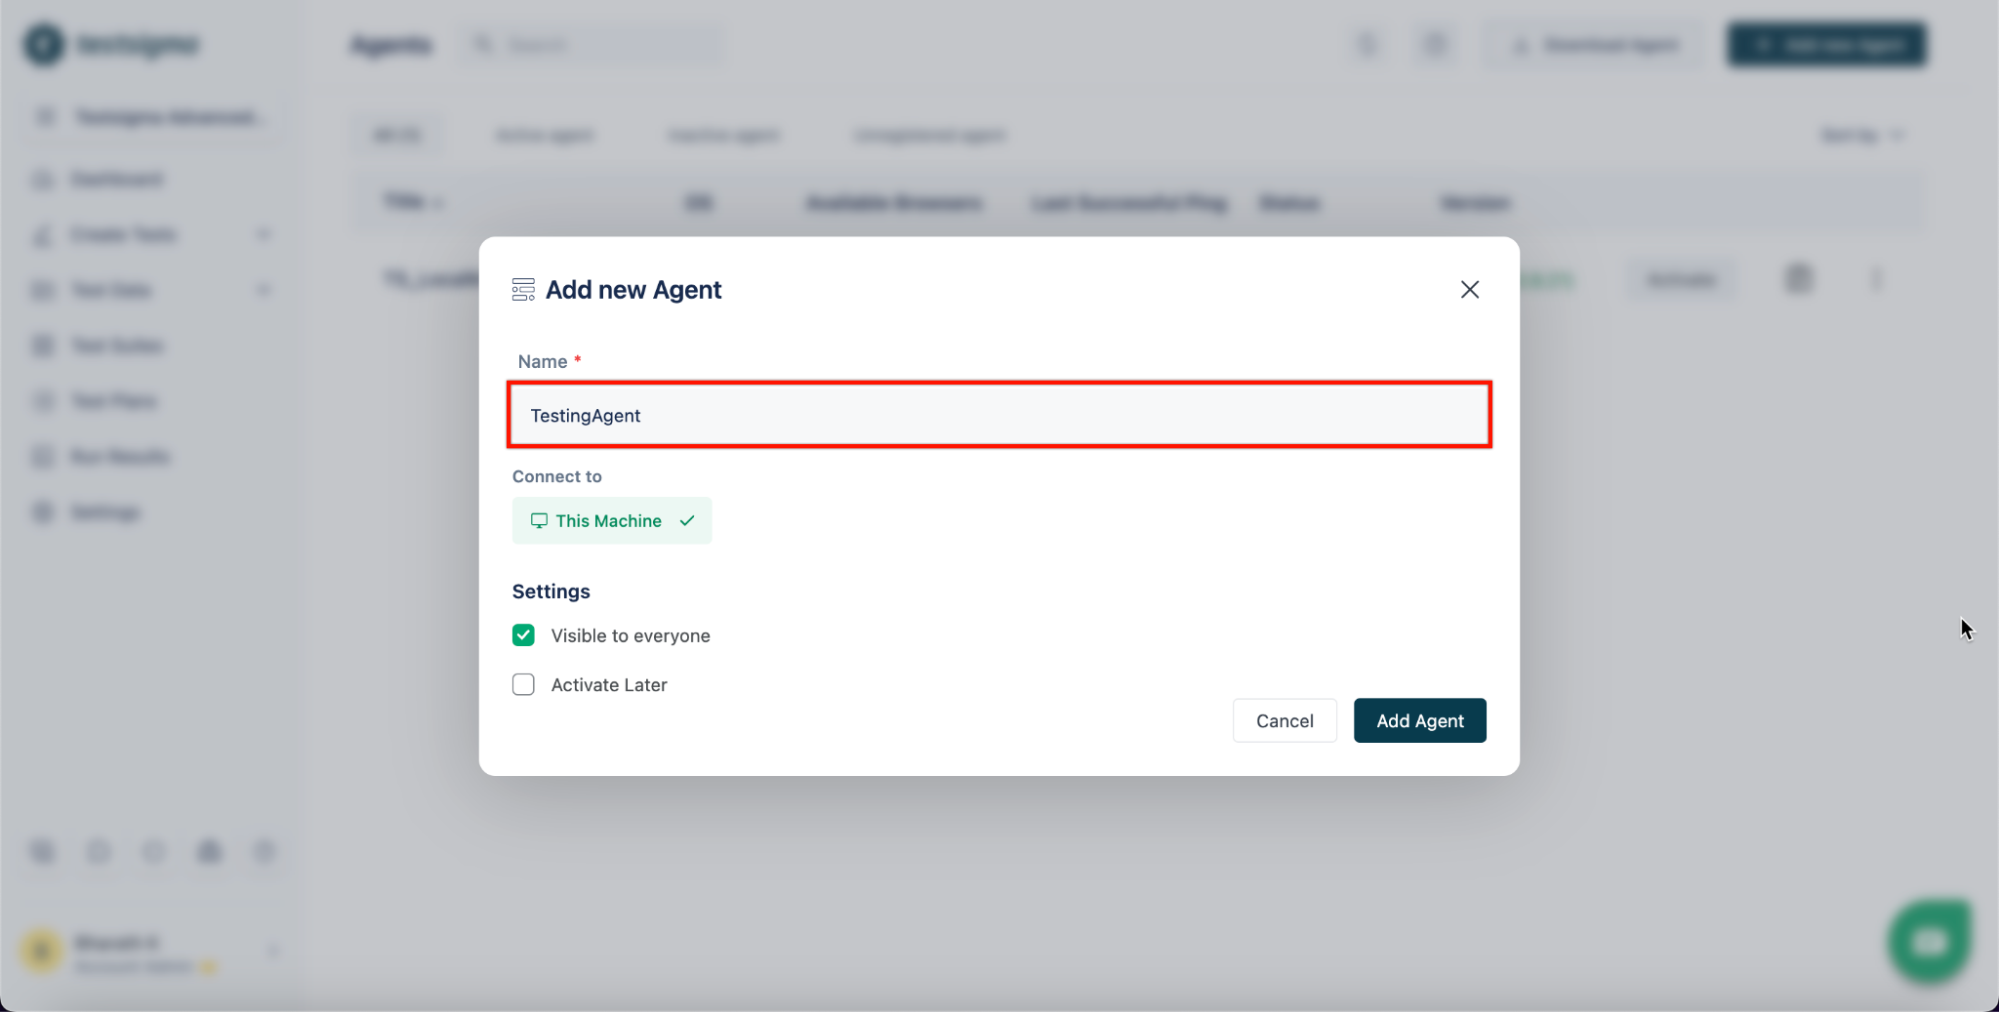
On the Add new Agent overlay,
- Enter a Name for your machine.
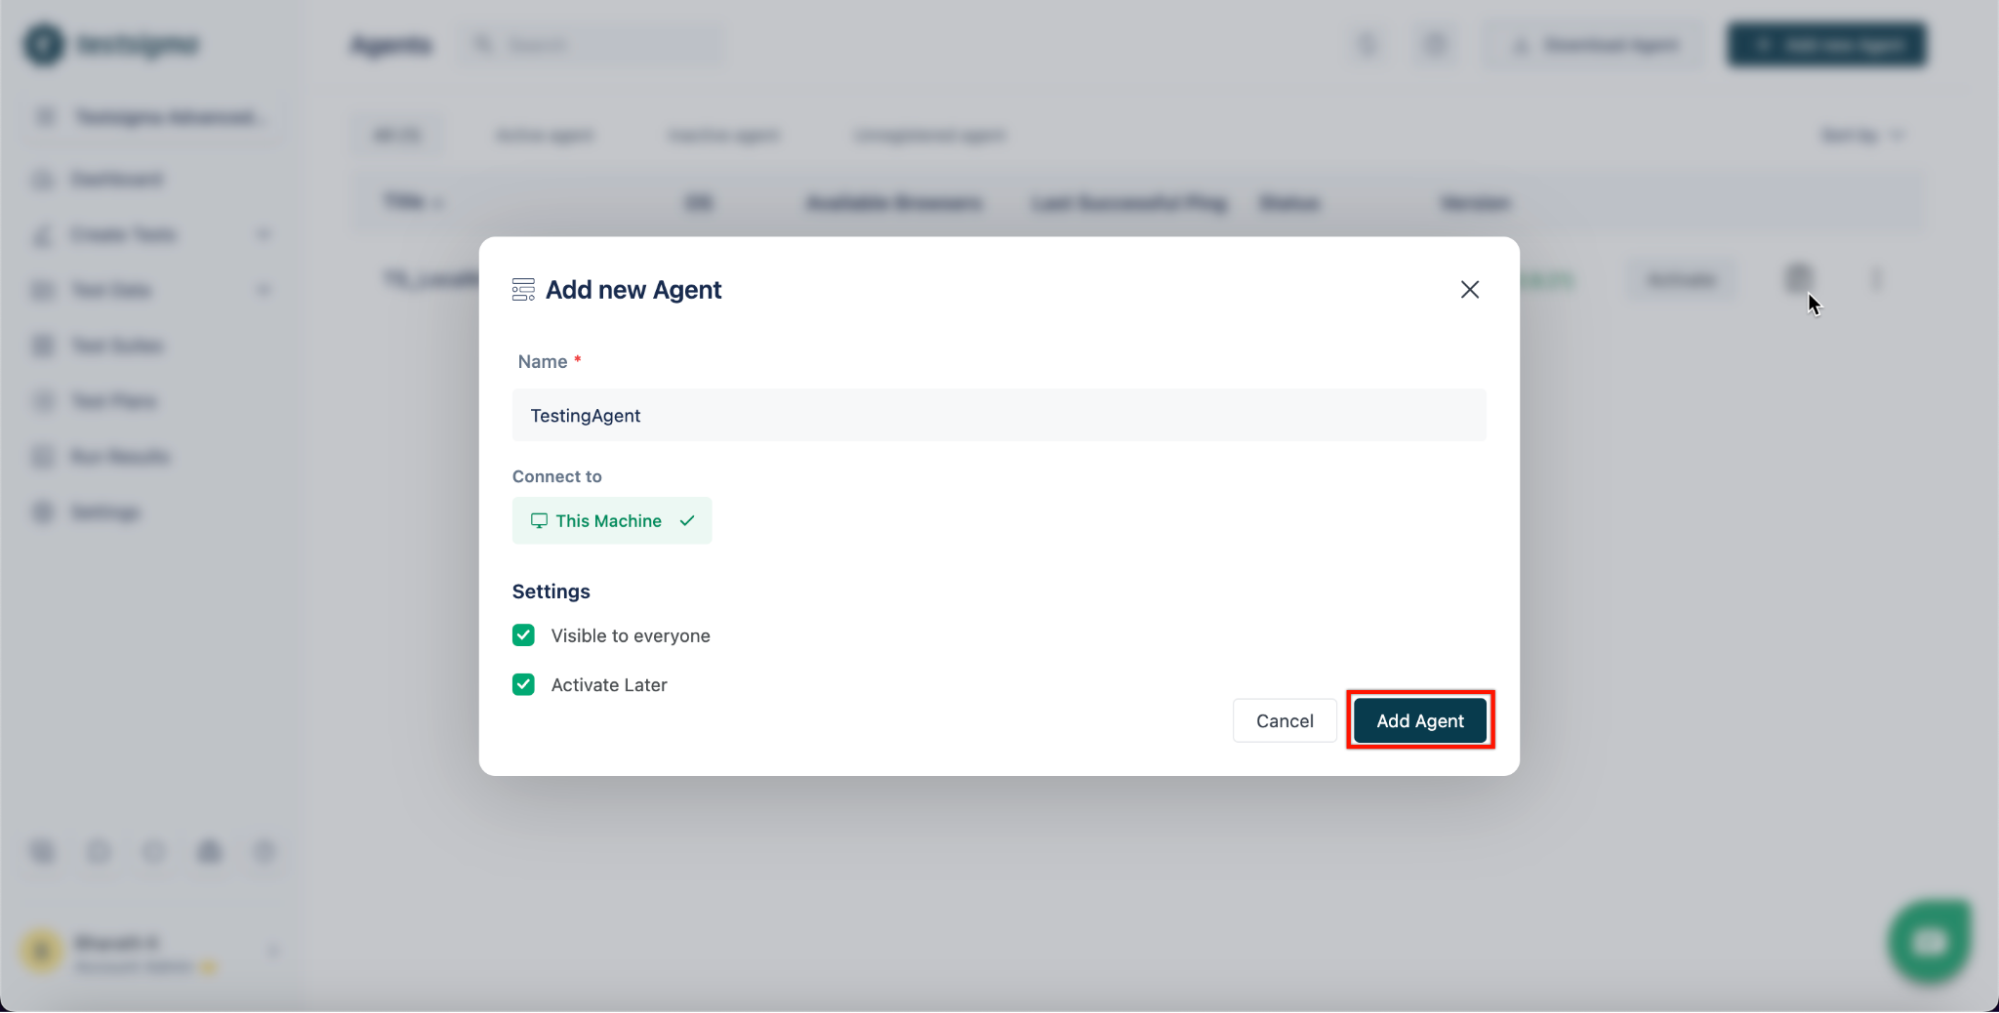
- If you want to make this agent private, uncheck the checkbox Visible to Everyone.
- Click on Add Agent.
-
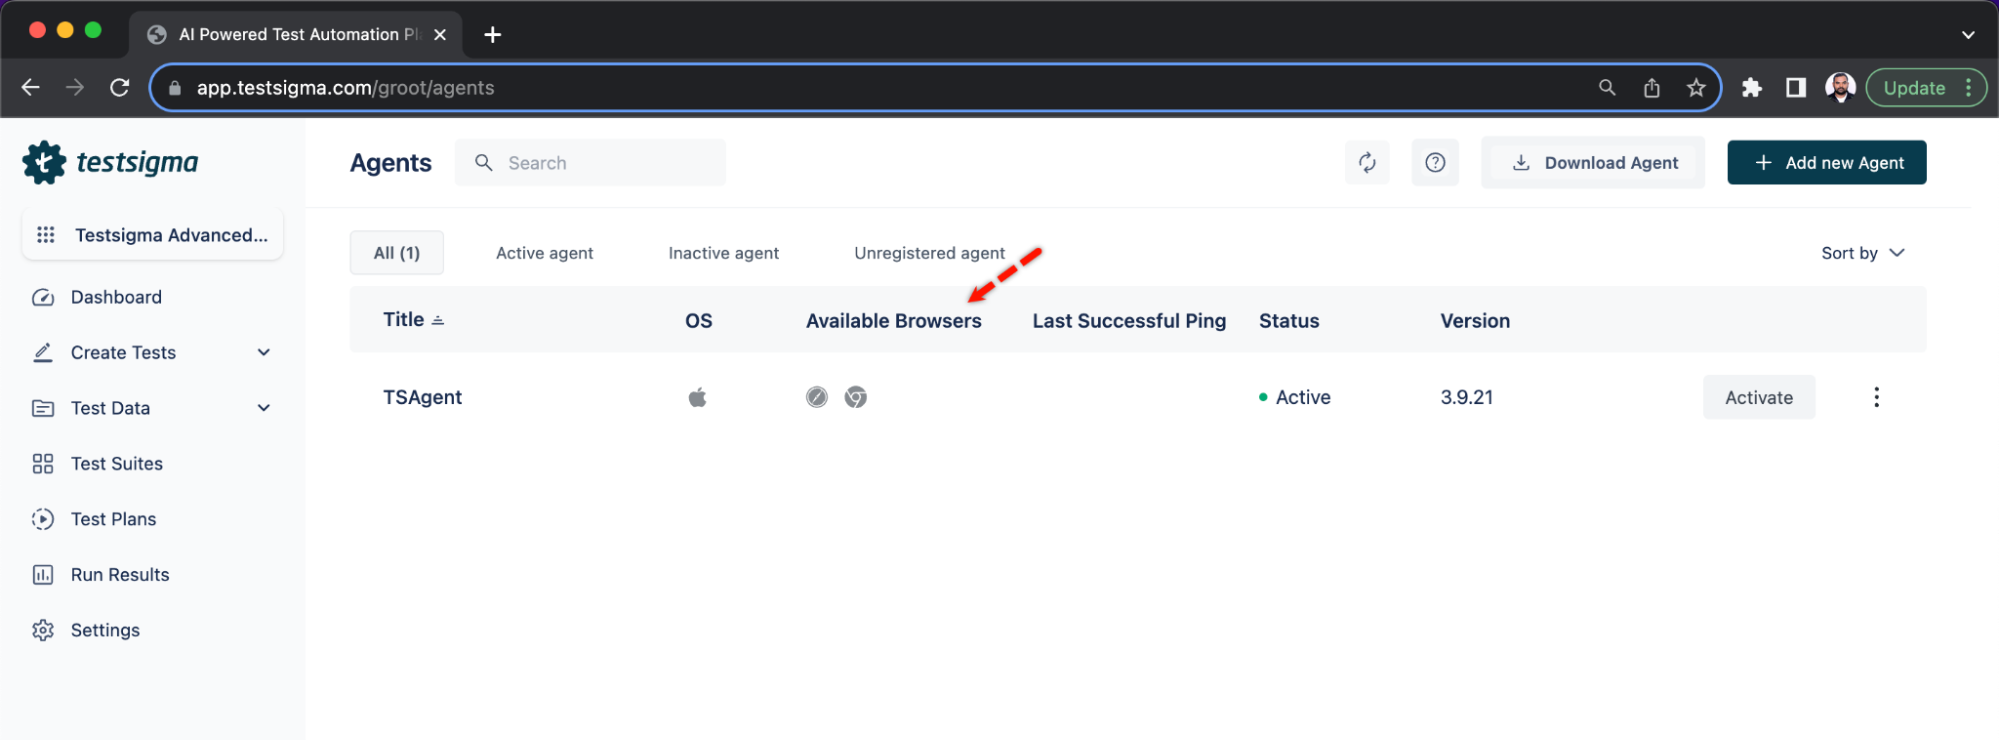
After adding, the agent that you registered will be displayed with all the available browsers in that Agent machine:
[[info | NOTE:]]
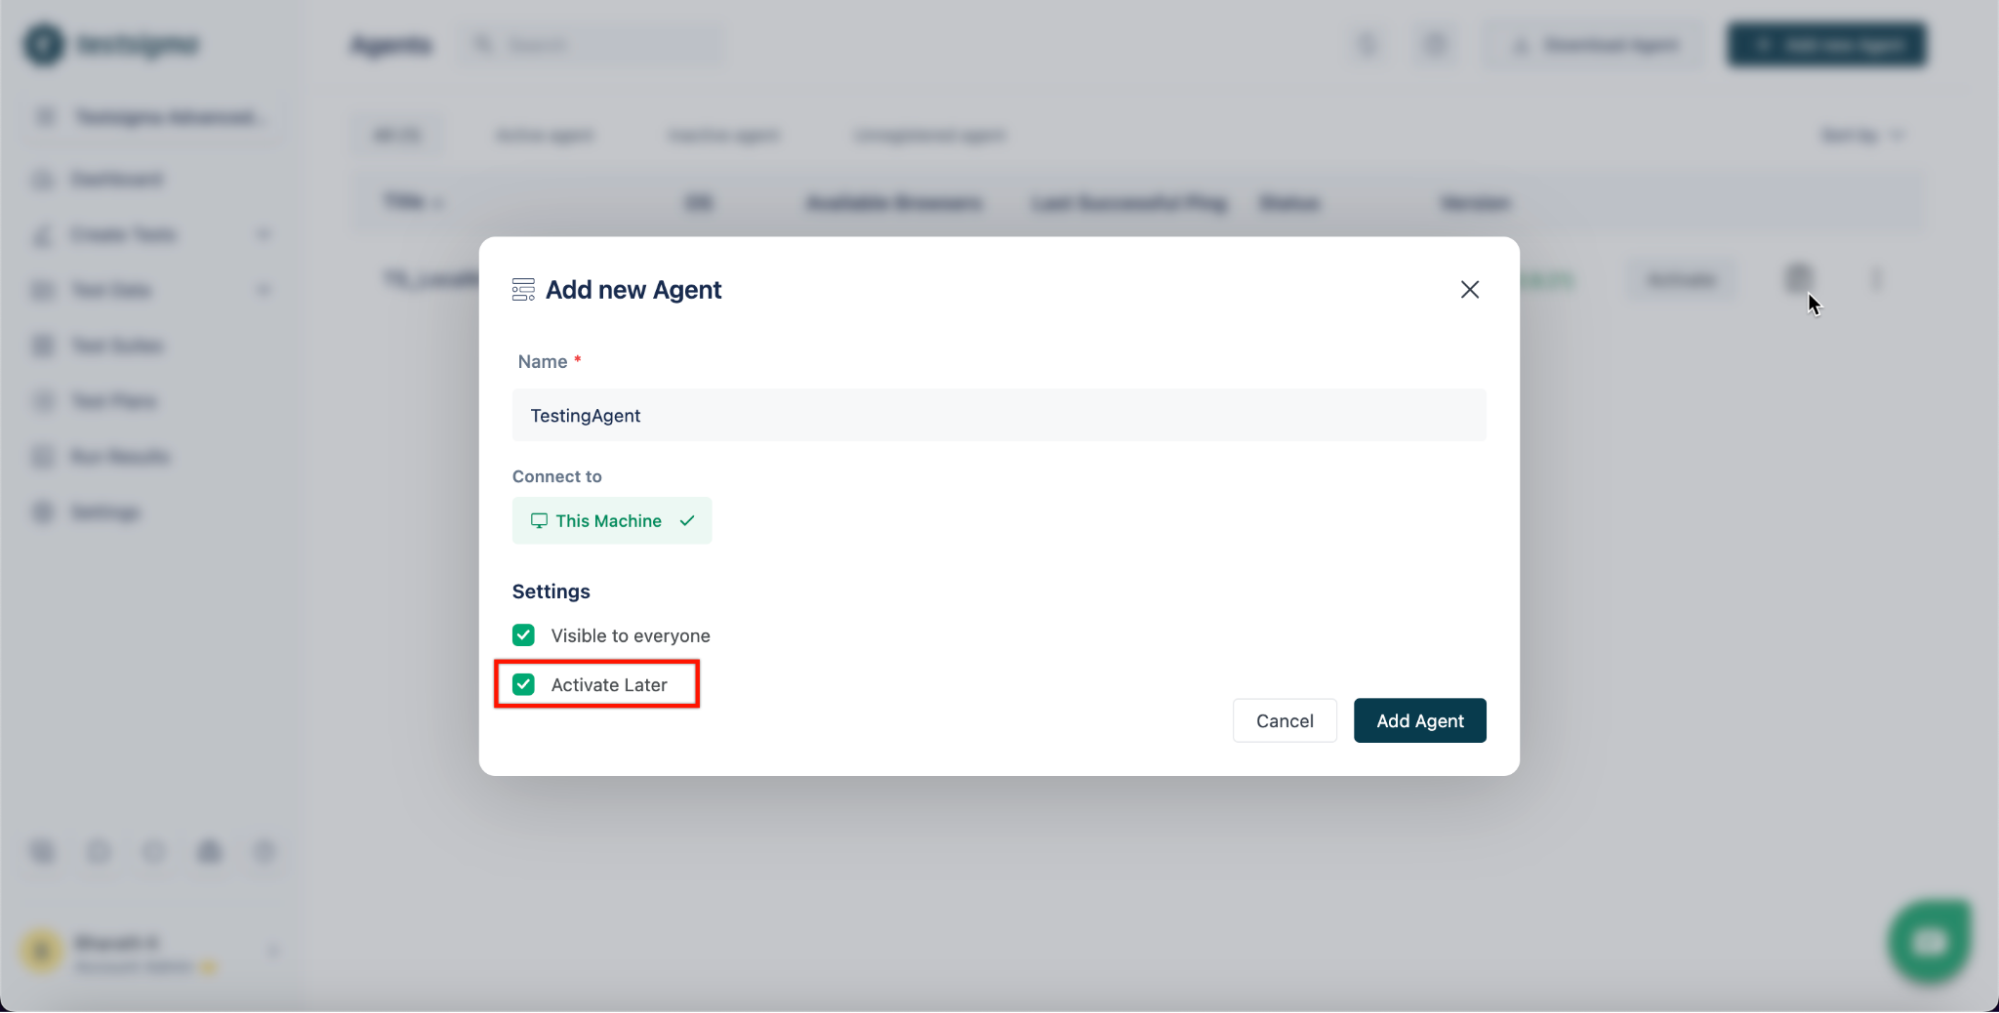
|1. There may be instances when you want to add the Testsigma agents to your Testsigma account but want to activate them later. Make sure to check the Activate Later checkbox, On the Add a new Agent popup.
|
It might take a couple of minutes for the operating system version and the browser names to appear. Refer to the troubleshooting guide if the details does not show up after 10 minutes.
There are two ways of starting the testsigma local agent using docker:
- Create an Agent in Testsigma application, obtain the Activation Key, and use it to register the agent while the Docker container is booting.
- Create and register a New Agent entirely while booting the Docker container.
-
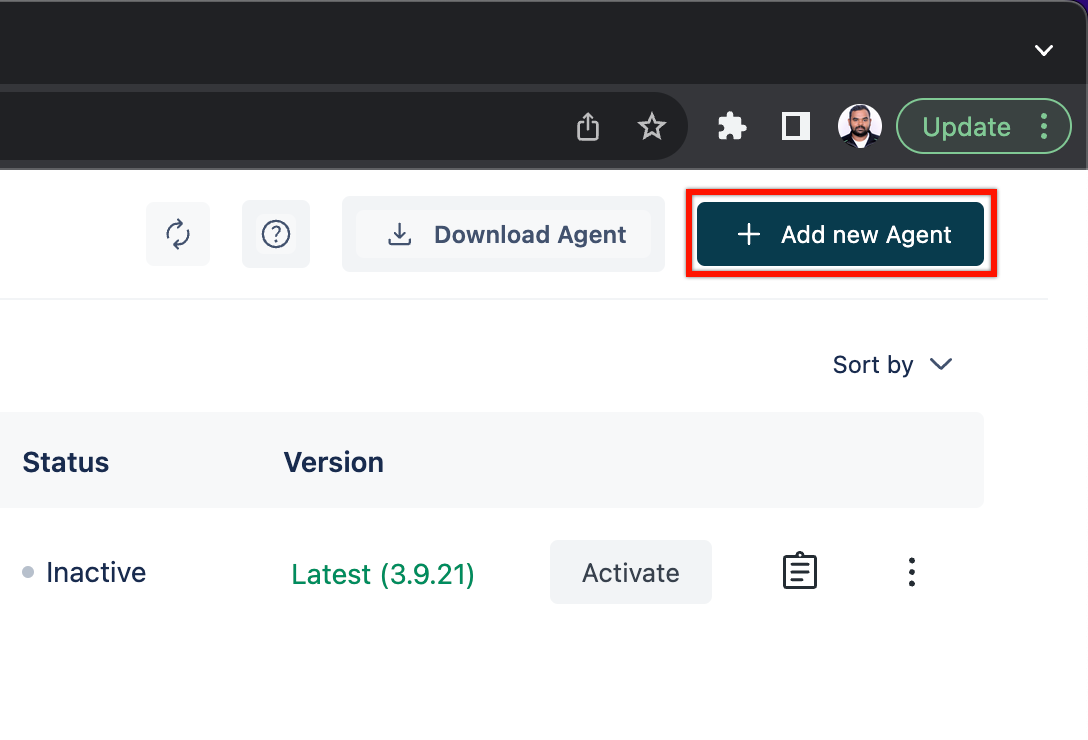
On the dashboard, click on Agents.
-
Click on Add new Agent.
-
On the Add a new Agent form,
- Add the Name for the agent.
- Make sure to check the Activate Later checkbox.
- Add the Name for the agent.
-
Click on Add Agent.
-
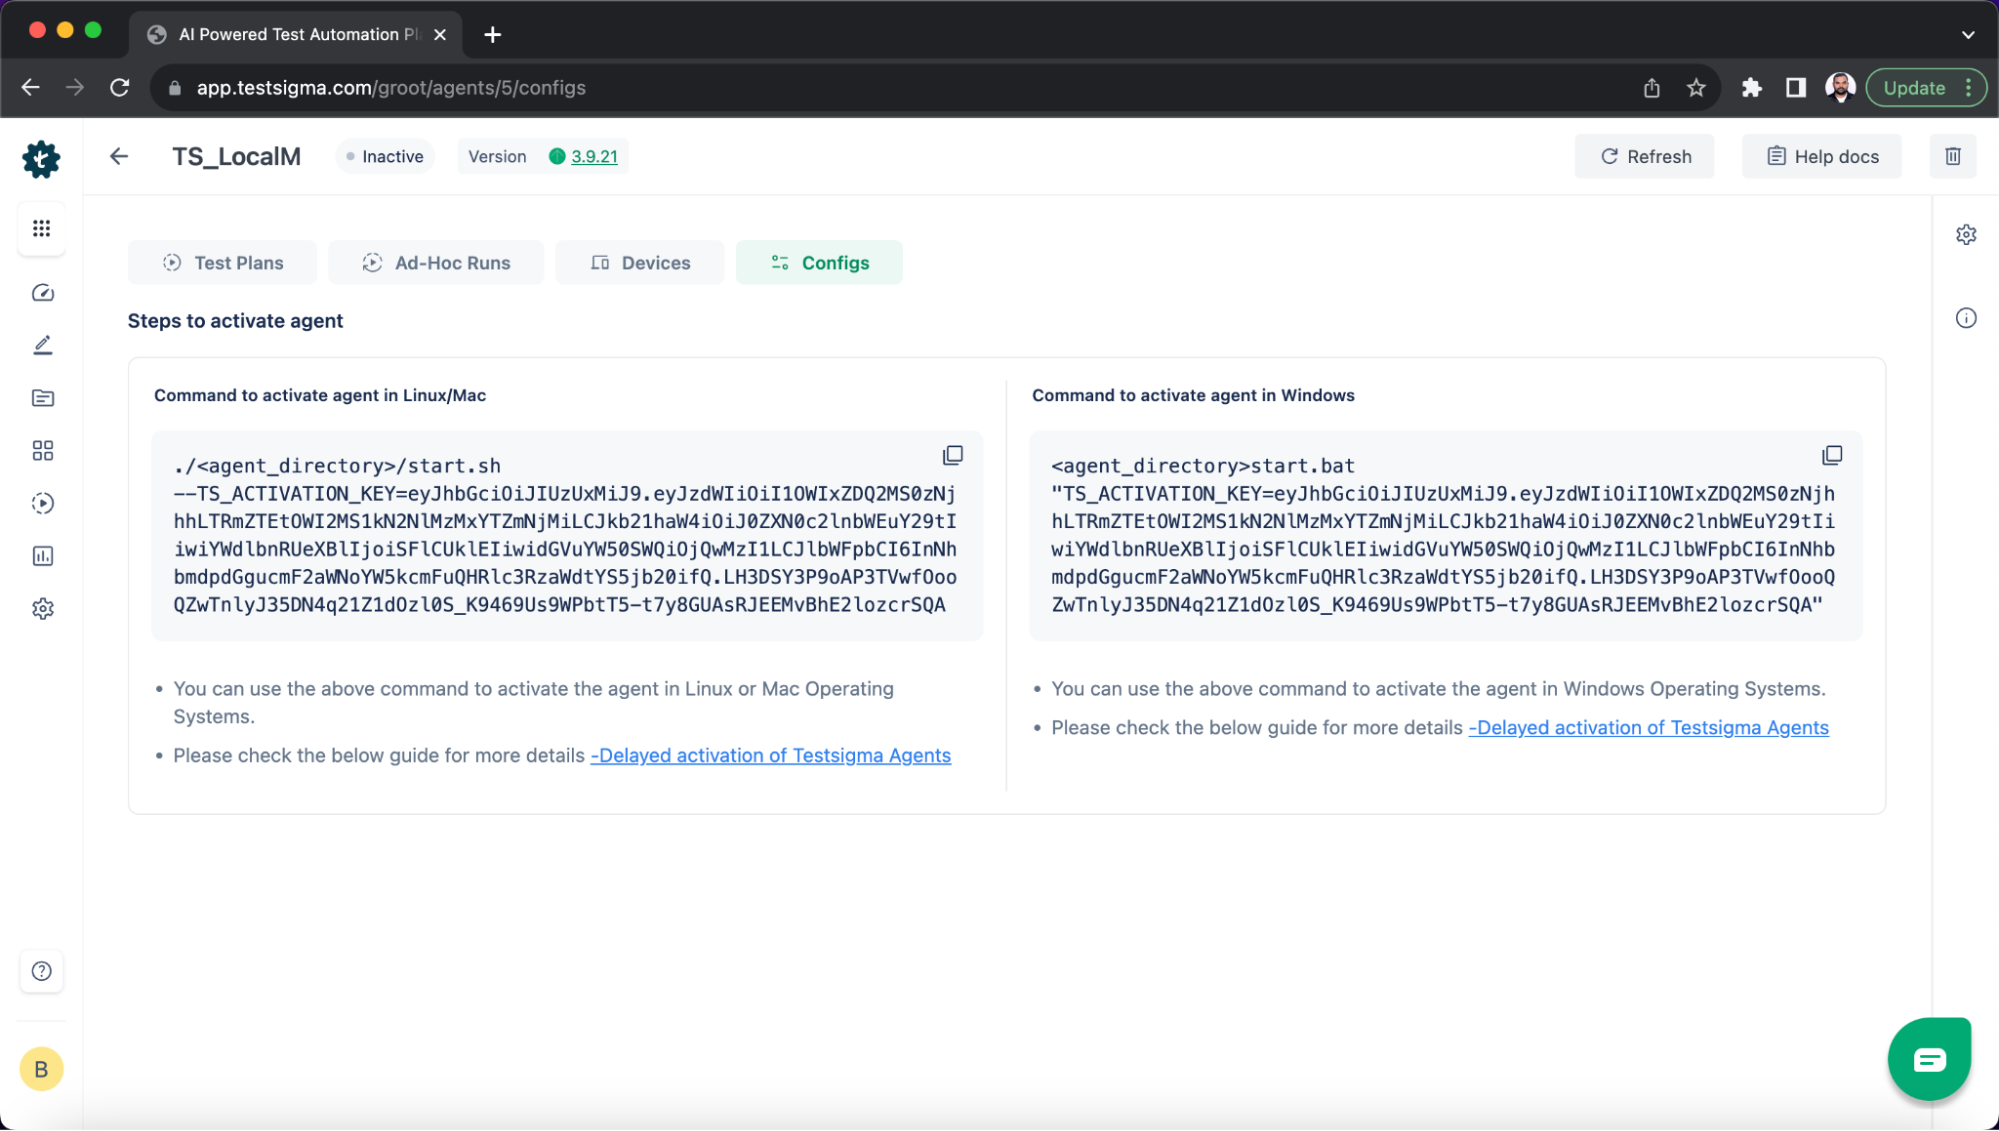
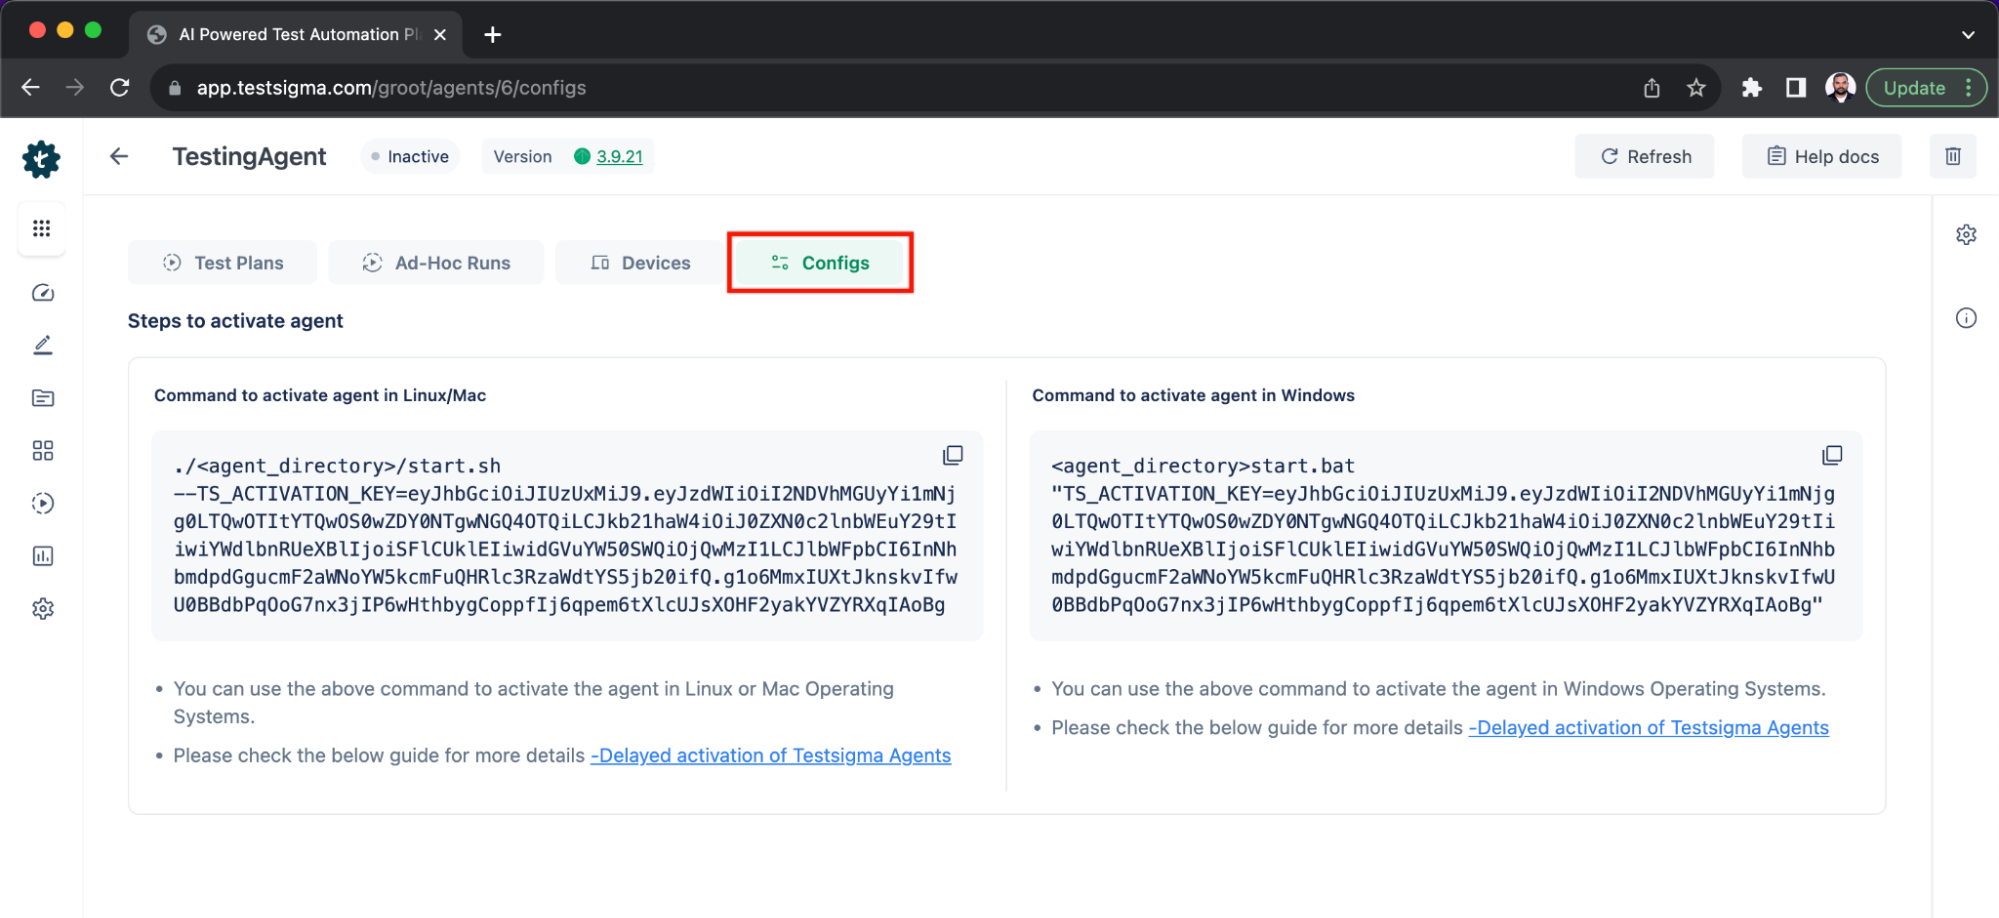
On successfully saving the agent, you will be taken to the agent configuration page that will contain the activation key.
-
Create a docker-compose.yml file with TS_ACTIVATION_KEY environment variables.
The following docker-compose snippet can be used to start a Testsigma Agent with headless Chrome, Firefox & Edge browsers:
version: "3.9"
services:
  testsigma-agent:
    image: testsigmainc/testsigma-agent:latest
    container_name: testsigma-agent
    depends_on:
      - chrome
      - firefox
      - edge
    volumes:
      - ./data/agent_data:/var/ts/agent
    environment:
      TS_ACTIVATION_KEY: "REPLACE_WITH_YOUR_ACTIVATION_KEY"
      CHROME: "http://chrome:4444"
      FIREFOX: "http://firefox:4444"
      EDGE: "http://edge:4444"

  chrome:
    image: selenium/standalone-chrome:latest
    shm_size: 1gb
    ports:
      - "4444:4444"

  firefox:
    image: selenium/standalone-firefox:latest
    shm_size: 1gb
    ports:
      - "4445:4444"

  edge:
    image: selenium/standalone-edge:latest
    shm_size: 1gb
    ports:
      - "4446:4444"
This docker-compose snippet spins up four containers:
- Testsigma Agent
- Standalone Selenium with pre-installed Chrome
- Standalone Selenium with pre-installed Firefox
- Standalone Selenium with pre-installed Edge
Testsigma Agent will detect browser versions through the Environment Variables CHROME, FIREFOX, and EDGE. Note that these Environment Variables are all optional.
If you plan to run your test solely on the Chrome browser, there's no need to specify the FIREFOX and EDGE environment variables. Here's an example docker-compose file:
version: "3.9"
services:
  testsigma-agent:
    image: testsigmainc/testsigma-agent:latest
    container_name: testsigma-agent
    depends_on:
      - chrome
    volumes:
      - ./data/agent_data:/var/ts/agent
    environment:
      TS_ACTIVATION_KEY: "REPLACE_WITH_YOUR_ACTIVATION_KEY"
      CHROME: "http://chrome:4444"

  chrome:
    image: selenium/standalone-chrome:latest
    shm_size: 1gb
    ports:
      - "4444:4444"
If your system lacks sufficient resources, you can distribute browser containers across multiple systems and specify a remote debugging URL. Here's an example docker-compose file:
version: "3.9"
services:
  testsigma-agent:
    image: testsigmainc/testsigma-agent:latest
    container_name: testsigma-agent
    volumes:
      - ./data/agent_data:/var/ts/agent
    environment:
      TS_ACTIVATION_KEY: "REPLACE_WITH_YOUR_ACTIVATION_KEY"
      CHROME: "<REMOTE_CHROME_URL>"
      FIREFOX: "<REMOTE_FIREFOX_URL>"
      EDGE: "<REMOTE_EDGE_URL>"
Testsigma Agent container allows controlling minimum and maximum heap memory settings using MIN and MAX environment variables. The default values for MIN and MAX will be 1GB and 8GB, respectively. Here's an example docker-compose file:
version: "3.9"
services:
  testsigma-agent:
    image: testsigmainc/testsigma-agent:latest
    container_name: testsigma-agent
    volumes:
      - ./data/agent_data:/var/ts/agent
    environment:
      TS_ACTIVATION_KEY: "REPLACE_WITH_YOUR_ACTIVATION_KEY"
      MIN: "-Xms1g"
      MAX: "-Xmx8g"
      CHROME: "<CHROME_URL>"
      FIREFOX: "<FIREFOX_URL>"
      EDGE: "<EDGE_URL>"
For ARM-based Systems (Mac M1 processors):
Google does not build Chrome for Linux ARM platforms. Instead, docker-seleniarm uses the open-source Chromium browser built for ARM. Here's an example docker-compose file:
version: "3.9"
services:
  testsigma-agent:
    image: testsigmainc/testsigma-agent:latest
    container_name: testsigma-agent
    depends_on:
      - chrome
      - firefox
    volumes:
      - ./data/agent_data:/var/ts/agent
    environment:
      TS_ACTIVATION_KEY: "REPLACE_WITH_YOUR_ACTIVATION_KEY"
      CHROME: "http://chrome:4444"
      FIREFOX: "http://firefox:4444"
      EDGE: "<REMOTE_EDGE_URL>"
  chrome:
    image: seleniarm/standalone-chromium:latest
    shm_size: 1gb
    ports:
      - "4444:4444"
  firefox:
    image: seleniarm/standalone-firefox:latest
    shm_size: 1gb
    ports:
      - "4445:4444"
-
Save the docker-compose.yml file in an appropriate directory.
-
Open a command-line interface and navigate to the directory. Execute the command docker-compose up, which will download the necessary images and start the Testsigma Agent.
To create and register the Agent Automatically in one step, you must specify the environment variables below instead of TS_ACTIVATION_KEY.
TS_AUTO_REGISTRATION_KEY - Testsigma API key
TS_AUTO_REGISTRATION_TITLE - Title of the Agent
TS_AUTO_REGISTRATION_HTTP_PORT - HTTP Port for internal communication between Agent and Testsigma
TS_AUTO_REGISTRATION_HTTPS_PORT - HTTPS Port for internal communication between Agent and Testsigma
Here's an example docker-compose file:
version: "3.9"
services:
  testsigma-agent:
    image: testsigmainc/testsigma-agent:latest
    container_name: testsigma-agent
    depends_on:
      - chrome
      - firefox
      - edge
    volumes:
      - ./data/agent_data:/var/ts/agent
    environment:
      TS_AUTO_REGISTRATION_KEY: "REPLACE_WITH_API_KEY"
      TS_AUTO_REGISTRATION_TITLE: "REPLACE_WITH_TITLE"
      TS_AUTO_REGISTRATION_HTTP_PORT: "REPLACE_WITH_ANY_AVAILABLE_PORT_NUMBER"
      TS_AUTO_REGISTRATION_HTTPS_PORT: "REPLACE_WITH_ANY_AVAILABLE_PORT_NUMBER"
      CHROME: "http://chrome:4444"
      FIREFOX: "http://firefox:4444"
      EDGE: "http://edge:4444"

  chrome:
    image: selenium/standalone-chrome:latest
    shm_size: 1gb
    ports:
      - "4444:4444"

  firefox:
    image: selenium/standalone-firefox:latest
    shm_size: 1gb
    ports:
      - "4445:4444"

  edge:
    image: selenium/standalone-edge:latest
    shm_size: 1gb
    ports:
      - "4446:4444"
Please refer to the Activation Key sections for alternative methods of configuring the docker-compose file and starting the Agent using the docker-compose file.